Hi there!
Today i have a card featuring some Stampcow stamps and Craftpon buttons. Stampcow stamps are wood mounted and roughly 1.5 by 1.5. I have been having fun inking up these stamps!
I started with some orange cardstock made a cardbase and die cut a long label shape. I stamped the grass image from Stampcow with watermark ink on my cardbase and used the die cut to hide some of the grass, my thinking is it now dosen;t really look like grass, but a cool border.
I stamped the butterfly from Stampcow with a dark orange ink on the die cut and used a glitter marker to color in the wings, its a little hard to see in the pictures, but there is some sparkle!
At the bottom of the die cut i used coconut wooden heart buttons from Craftpon. They have a great selection of crafty supplies including buttons, charms, washi tape, beads and embellishments.
I tied some twine in a bow to the button and adhered it to the die cut. I added the die cut to the cardbase with pop up dots.
I didn't add a sentiment to the front, there isn;t really a good spot for one. I figured i would stamp a sentiment to the inside depending on the occasion that comes up!
Thanks so much for stopping by! I'll be back in a tomorrow with some more Craftpon goodies to share!!
Dana
Supplies
Stamps: Stampcow: Butterfly B00071, Grass B00052
Buttons Craftpon: Coconut Wooden Heart 10000194-010
Cardstock: Papertrey Ink - Orange Zest
Ink: Papertrey Ink - Canyon Clay. Versamark - Watermark
Twine: May Arts
Achievements
▼
June 29, 2013
June 28, 2013
Hampton Art - Camera Hi
Hi!
I had a card on Hampton Art blog yesterday, i thought it was going up today! Oh well! LOL
Do you like cameras? Hexagons? Well if you do click here to see them both together on one card!! Here's a little peek!!
Thanks for stopping by!!
Dana
I had a card on Hampton Art blog yesterday, i thought it was going up today! Oh well! LOL
Do you like cameras? Hexagons? Well if you do click here to see them both together on one card!! Here's a little peek!!
Thanks for stopping by!!
Dana
June 27, 2013
Happy Wedding Day
Hiya!
Today i have a card Cheery Lynn Design's challenge this week. The theme is Wonderful Weddings. And the weekend before last i attended a cousins wedding, so when i made their card i tied it into Cheery Lynn's challenge.
I used the Button #2 set twice in my card can you tell where???
Well the obviously is the flower centers, i die cut white duck cloth with the button dies. The other place i used the button dies is in the background. I die cut several buttons and lined them up across my cardbase and then i used some ink spray's, after it dried i lined them up again below the first row and sprayed again.
The i used two ink spray's so the background came out a nice peachy color. So i used some matching pattern paper and cardstock to stamp and cut out some flowers. I also used some Tim Holtz Rock Candy on one of the flowers.
I layered the flowers and used metallic thread to attache each flower layer and button. Then i adhered the flower to my cardbase and last stamped my sentiment.
Thanks so much for stopping by!!!
Dana
Supplies:
Die: Cheery Lynn Designs: Button #2
Stamps: Papertrey Ink: Happy Day
Ink Sprays: Heidi Swaap: Mustard & Peach
Ink: Papertrey Ink: Dark Chocolate
June 26, 2013
You're The Best
Hello!
How is everyone doing? Today i have a card that features some cute stamps from Stampcow. They have a great selection of stamps in their etsy shop.
The stamps are wood mounted and are roughly 1.5 by 1.5 inches. And they stamp great!! I'll be featuring several cards through out the week using their stamps and craft supplies, so make sure you stop by over the next few days!!
For my card i was inspired by CAS-ual Friday's challenge this week - Over the Edge.
I started with stamping the grass. I stamped one grass image on a piece of cardstock, then immediately stamped it again on my cardbase. I continued across my cardstock and cardbase. Then i cut out my cardstock piece and adhered it to my cardbase with pop up dots.
Next i stamped Stampcow's butterfly image in black ink. I used distress markers to color the wings and then cut it out. Then i stamped the butterfly once more on my cardbase and used pop up dots to adhere my colored butterfly.
Thanks so much for stopping by and make sure you check out Stampcow's shop!!
Dana
Supplies
Stamps: Stampcow: Butterfly B00071 and Grass B00052. Give a Girl a...: You are the Best
Ink: Papertrey Ink: New Leaf, Smokey Shadow
Tim Holtz: Distress Markers: Spun Sugar, Tumbled Glass, Bundled Sage
June 25, 2013
Papertrey Ink Blog Hop - Touch of Gold
Hello!
Today i have the 1st Christmas card of the year! Yes it is that time (at least for me) to get my supply of Christmas cards ready for a craft fair in December. So i'll probably be sharing random holiday cards from now until the end of the year!
I did this these cards for Papertrey Ink Blog Hop - the theme Touch of Gold.
I have pulled my Christmas pattern paper out so i can start using it!! And as i was looking through it i found this nice blue/blue green cardstock that came with a set of snowflake pattern paper. I cut the whole sheet up to make two 4.25 x 5.5 and one 3.5 x 5 card. I figured since i have all the stamps and embossing powder out already i might as well use each card!
I choose a sentiment stamp to stamp with versamark and embossing with gold embossing powder. Then i used my Scor Pal to add two lines below and above the sentiment.
Then i stamped small snowflakes above and below the lines, using a scrap paper to mask at the lines. Before i stamped each snowflake i first stamped them off on scrap paper, so my snowflakes were not super dark.
In this pic you can all three cards!
Thanks so much for stopping by!
Dana
Supplies
Stamps: Papertrey Ink: Stylish Sentiments -Holiday, Snowflake Medley
Ink: Papertrey Ink: Ocean Tides
Embossing powder: Stampendous
June 24, 2013
Hampton Art - I Love You
Hello!
I hope you are having a wonderful day! Today i have a card on the Hampton Art blog featuring some Bella Blvd stamps, paper and embellishments! Click here to see the card and all the details.
Thanks for stopping by!
Dana
I hope you are having a wonderful day! Today i have a card on the Hampton Art blog featuring some Bella Blvd stamps, paper and embellishments! Click here to see the card and all the details.
Thanks for stopping by!
Dana
June 23, 2013
All You Need
Hello!
Today i have a card for Simon Says Challenge Blog, the theme is fruit. Yesterday i attended a wedding shower for a cousin and needed a card so i came up with this.
Once i new how big my strawberries were i used my Silhouette to make a heart card. To make the card stand up i chopped off the point in the software.
Next i stamped the sentiment on kraft cardstock. I used my paper trimmer and trimmed it on 3 sides, then free handed the other side to make it into a 'plant pick' Last i adhered it and the strawberries to the heart card.
A little unusual wedding shower card, but i like it!
Have a great day!!!
Dana
Supplies
Stamps: PTI: Strawberry Patch. Mama Elephant: Smitten
June 20, 2013
I'm a Fan of You
Hey there!
I hope everyone is doing good! Today i have a card for this weeks Cheery Lynn Designs Challenge. The challenge this week is to use Kraft cardstock and i used a Kraft cardbase for my card. I decided that i was going to use the square button in the Button #2 set as i haven't used it yet.
I thought that the buttons would make great bricks, for a card at least! :) I adhered a piece of textured red cardstock to a sheet of double sided adhesive sheet. Then i die cut several square buttons.
I added a little bit of ink to the edges of each button and peeled the backing off my 'brick' stickers and adhered them to my Kraft cardbase. Next i added a strip of brown cardstock across the card to make a shelf.
Then i stamped the fan image and with some water and ink painted the fan's blades. I cut the fan out and adhered it to the shelf! Last i stamped the sentiment I'm a Fan of You.
Thanks so much for stopping by!
Dana
Supplies:
Die: Cheery Lynn Designs: Buttons #2
Cardstock: Kraft: The Paper Studio
Stamp: Studio G by Hampton Art
June 19, 2013
Nothing but Blue Skies
Hello!
Today i have a card for this weeks CAS-ual Friday's challenge. The theme this week is Mapquest, it took me awhile to come with a card as i don;t have very many travel themed stamps, but luckily i did remembered i had a plane from a Lawn Fawn set!
I started the card by stamping the plane on pattern paper, cut it out and ink the edges. I also used a printed die cut from the same paper collection. It has the sentiment Nothing but Blue Skies. I added a tiny dots of red glitter on the red spots already on the pattern.
I adhered the plane with pop up dots and before adhering the die i added free hand lines around my Kraft card base.
Quick and easy, nothing earth shattering about this card! lol but that's ok, i still like it!!
Dana
Supplies
Stamps: Lawn Fawn: Bon Voyage
Pattern paper and printed die cut: Basic Grey What's Up Collection
Ink: PTI: Ocean Tides
Glitter Glue: Tim Holtz: Red Xmas
June 17, 2013
Hampton Art - Miss You
Hi there!
Today i have a card on Hampton Art Blog, it features a background stamp and stamped flowers!! Here's a little sneak peek, click here to see the whole card and details!
Have a great day!!
Dana
Today i have a card on Hampton Art Blog, it features a background stamp and stamped flowers!! Here's a little sneak peek, click here to see the whole card and details!
Have a great day!!
Dana
June 15, 2013
Let's Celebrate
Hello!
Today i have a cute little card for you! Nothing special, i was just feeling like coloring and doing a card that didn't take a lot of thought!
I used some kraft pattern paper and stamped the owl image. I used some Tim Holtz distress markers to color the image. Then i stamped the sentiment Let's Celebrate. in the little sign one of the owls is holding.
I added the pattern paper to a small cardbase, it only measures 3 x 4. And that's it! A simple cute card!
Thanks for stopping by!!!
Dana
Supplies
Stamps: The Crafts Meow: Whoo's Birthday
Markers: Tim Holtz Distress markers
Pattern Paper: American Crafts: Amy Tangerine Yes Please
June 12, 2013
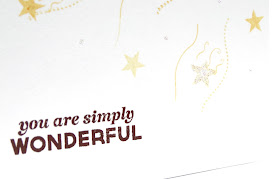
You Are Simply Wonderful
Hello there!
Today i have a card i made for this weeks challenge over at Cherry Lynn Designs. The challenge is Creative Corners. AND its another really CAS card, seams to be my mood lately! lol!
I have been thinking about this card for a few days, when i came up with my idea and i really like how it turned out!
I die cut the big star button from Buttons #2 set. I covered it with yellow glitter glue, set it aside to dry. Then i went searching through all my stamp sets for stars, lines, dash lines etc. I used like 5 different sets! LOL the sets are listed at the bottom!
I used two different yellow inks to stamp my solid and outline stars. I also stamped a solid wave line and a dash wave line. Then from a tea pot stamp set i used the little warm wisps that come from warm coffee or tea and stamp them behind a few stars, so the stars look like they are whooshing by!
I added my sentiment at the bottom left in brown ink. And last i tied a twine bow on my glitter star and adhered it to the top right corner.
Last i added glitter glue to a few stars and then added tiny little glitter glue spots.
Thanks for stopping by!!
Dana
Supplies
Stamps: Papertrey Ink: Flutter by Friend, 2012 Birthday Tags. Mama Elephant: Smitten. Stampin Up: Friends Fur Ever, Tea
Die: Cherry Lynn Designs: Buttons #2
Ink: Papertrey Ink: Harvest Gold, Lemon Tart
Glitter Glue: Stickles - Stardust, Yellow
June 11, 2013
Just a Note to Say
Hello there!
Today i have probably the most CAS card i have ever done!! The challenge this week at CAS-ual Friday's is Banners & Flags! And when i sat down at my craft table i was looking at the sets on my desk and that's when inspiration hit as i was looking at a stamp set by Give A Girl A....
I stamped the banner in black ink and cut it out. Next i stamped the sentiment 'just a note to say' inside the banner.
Then i adhered the alphabet chipboard stickers to spell hi to my cardbase. Then last i added the banner across the stickers.
Easy peasy!!
Thanks for stopping by!!
Dana
Supplies
Stamps: Give a girl a... You are the best
Stickers: American Craft
Cardstock: The Paper Studio
June 7, 2013
You're My Fave!
Hi there!
Today i have a quick and easy card! Its a perfect little card to send to anyone, just because! And it had to be quick, because i yesterday i had to get back to studying! This post is going live while i'll be on campus taking a test! Eek!! :)
I made this card for Cherry Lynn Designs Challenge #83 - Red, White & Blue. They have challenges every week and this week kicks off there Summer Blast Giveaway!! Click here to see the challenge and get all the details (you have to participate in each challenge this month, and the 1st challenge ends Sunday!)
I started by die cutting a star button from white cardstock, then i covered the front of the star with glitter glue, and set it aside to dry.
Then i used some red cardstock and blue pattern paper and die cut several round buttons. I made my cardbase and adhered the buttons with pop up dots.
I stamped my sentiment in black ink and last tied a tiny bow on the star and adhered it at the end of the sentiment.
Thanks so much for stopping by!
Dana
Supplies
Cheery Lynn Designs: Buttons 2
Stamp: Hampton Art - Bella Blvd: Kiss Me
Glitter Glue: Tim Holtz
Twine: May Arts
June 4, 2013
Baby Congratulations
Hi There!
Today i'm sharing a baby congratulations card that i made for a friend that just had a sweet little baby a few weeks ago. Yesterday i posted the matching album, you can check it out here. I found the inspiration for the card and album from this card, done by the talented Taheerah.
I am submitting the card to this weeks CAS-ual Friday's Challenge: Congratulations.
I used the same cardstock is used with the album for my cardbase. I stamped and cut out the little bear, alpha frame, heart and frame.
I added a tiny twine bow to the heart and assembled the bear, heart and frame on the scalloped shelf. Last i stamped congratulations under the shelf!
Dana
Supplies
Stamps: Mama Elephant: Nursery Deco
Ink: Papertrey Ink: Dark Chocolate
Cardstock: Coredinations, Kraft: The Paper Studio
June 3, 2013
Moxie Fab World - The Gift Challenge
Hi!
So i had no plans to get this project done in time to submit it to Moxie Fab World - Gift Challenge that ends today, but Sunday morning i decided to get it done and submitted! I am a little late in sending this baby gift, but in my defense Olivia did came a little early! LOL Now that it is done, i hope to get it in the mail this week! :)
*** Warning **** Lots of Photos!!! LOL
I already had the little box and album cut and assembled but i was a little stumped as to what to do next, but last week i saw a baby card by Taheerah (check it out here) and when i sat down to make a card and finish the album i remembered Taheerah's card and cranked this out yesterday!
I'm not going to go out into detail, but i did the box cover first and i die cut her name and then added the tiny bear and heart, like some people do in baby's room with those giant letters!
Before i started on the pages, i die cut a bunch of flowers, tags, and bows and layered up a few. This way i had embellishments at the ready as i did up each page.
I decided to keep this pretty clean with not a lot of embellishments on each page and no mat for pics. Manly b/c i only have the pattern paper that i used for the box and album cover. It also helps when you don;t have a lot of time! LOL
When i send this i will include the double sided photo adhesives so Olivia's mom can add pictures and journaling to the album as she likes!
Tomorrow i will have the matching card! Thanks for stopping by!!
Dana
Supplies
Stamps: Mama Elephant - Nursery Deco
Cut File:Lori Whitlock 5x5 Mini Album
So i had no plans to get this project done in time to submit it to Moxie Fab World - Gift Challenge that ends today, but Sunday morning i decided to get it done and submitted! I am a little late in sending this baby gift, but in my defense Olivia did came a little early! LOL Now that it is done, i hope to get it in the mail this week! :)
*** Warning **** Lots of Photos!!! LOL
I already had the little box and album cut and assembled but i was a little stumped as to what to do next, but last week i saw a baby card by Taheerah (check it out here) and when i sat down to make a card and finish the album i remembered Taheerah's card and cranked this out yesterday!
I'm not going to go out into detail, but i did the box cover first and i die cut her name and then added the tiny bear and heart, like some people do in baby's room with those giant letters!
Before i started on the pages, i die cut a bunch of flowers, tags, and bows and layered up a few. This way i had embellishments at the ready as i did up each page.
Pocket with Journal Card |
I decided to keep this pretty clean with not a lot of embellishments on each page and no mat for pics. Manly b/c i only have the pattern paper that i used for the box and album cover. It also helps when you don;t have a lot of time! LOL
When i send this i will include the double sided photo adhesives so Olivia's mom can add pictures and journaling to the album as she likes!
Tomorrow i will have the matching card! Thanks for stopping by!!
Dana
Supplies
Stamps: Mama Elephant - Nursery Deco
Cut File:Lori Whitlock 5x5 Mini Album