Hello!
It's the second week of Art Impressions Challenge, the challenge is Winter Wonderland! Finally winter has come to my area, we actually have snow on the ground!!
My card started with the Christmas Cheer set, two of the images and one of the sentiments can be used all winter long!! I went with the two cute bears on a sled and stamped them on some white card stock and some pattern paper. Then i used my Spectrum Noir markers to color them, everything except there scarfs and hats, which i fussy cut from the pattern paper. I also fussy cut out the image and then added the hats and scarfs.
Next i used some pattern paper, all from the same collection and added it to a white card base. Then i cut a snowflake pattern with a stitched circle. I stamped the sentiment at the bottom of the circle and then added the circle to my card base.
Last i added the image to the circle with foam tape, oh and rounded the corners of the card to match the circle.
Thanks for stopping by! I hope you will play along with us over at the Art Impressions blog!!
Dana
January 14, 2016
January 13, 2016
Another Year....
Hello!
It's the new year, do you do New Year Resolutions?? I used to, but it never lasts!!! One thing we all would like to do more is exercise!! I so love this image from the Don't Sweat It, it has a perfect sentiment for the new year!!
First i picked out some pattern paper from a My Minds Eye 6 x 6 pad, Chalk Studio Basics. I picked out a few patterns for her outfit, stamping her multiple times. Then it was just a matter of fussy cutting out all the pieces. Before adding the outfit i first used my Spectrum Noir markers to color her skin and hair.
When she was colored and assembled i cut her out with a circle die. From some other patterns i cut two other circles.
For the background i picked out a grey pattern paper and adhered it to a white card base. Then i added my image and the pink circle. Last i stamped the sentiment to the top of the remaining circle and adhered it to my card, trimming off the overhang.
Thanks so much for stopping by!!
Dana
December 31, 2015
For You Mom
Hello!!
Happy New Year's Eve!! Today i have another spring like card to share with you! I'll get back to some winter cards, don't worry, but i was in a warm, spring like mood when i made this card!!!
First i used Crafter's Companion Diesire Essential Square die to cut a piece of white card stock. Next i stamped the image from Mulberry Wood Love You stamp set on the square.
To color the image i used my Spectrum noir markers, but instead of the usual blending i instead used a stippling technique. Usually you use a black marker, but for this image i used different greys and pinks (BP1, BP3, BP4, BP7, CG1, CG2, CR3, FS6, GB8, GB9, GB10, IG1, IG2, IG4, IG6, PL1, PL2
I stamped the For You Mom sentiment above the image. Next i used some clear Sparkle pen to add a little bit of sparkle to the flowers. I decided to make a square card and made a card base from white card stock.
Next i found some green stripe pattern paper and adhered it to my square card base. Then i added the stamped square to the card with foam tape.
Thanks so much for stopping by!!!
Dana
December 30, 2015
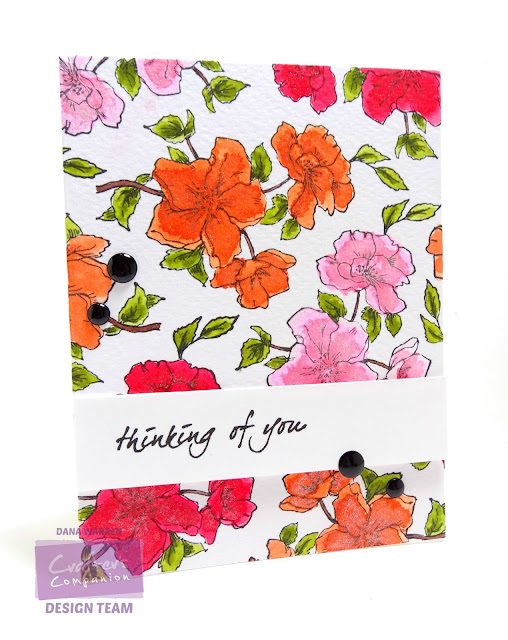
Thinking of You
Hello!!
I can't believe that it's almost 2016!!! With some good news i received yesterday, it feels like my Christmas vacation between semesters has just started!! Luckily the new semester dosen;t start until the 11th so i still have some time to savor my free time (ok not really free time, i still have to work and do my internship, but no school work to worry about for a little bit longer!!)
Today i'm sharing a card that features Crafter's Companions new Sparkle Pens! I've been playing with them and figuring how the best way to use them and boy they are fun to use!! You can use them to color directly on your paper or you can use water to dilute the ink a little.
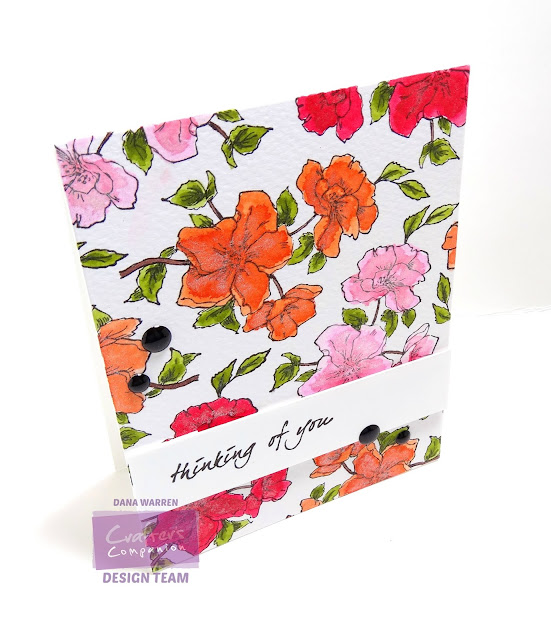
I started by stamping the gorgeous flower from the Stamp It Australia Floral Fancies stamp set, all over a piece of CC's water color paper. Then i used a clear block and scribbled the Harvest Moon Sparkle Pen. With a water brush i picked up the ink from the block and started color the flowers.
Before the flowers were dry i applied the Sparkle Pen directly to the flower. This allowed the ink to fan out, reacting to the water in a nice watercolor look. I did this with the rest of the flowers using Red Berry and Cosmos. For the leaves i used Olive Jade.
For a sentiment i cut a strip of white card stock and stamped the Thinking of You sentiment from the Stamp It Australia Dreamy Daisies stamp set. When my flower panel was dry i added it to a white card base and then adhered the sentiment trip over it with foam tape. Last i added a few black enamel dots to my card.
Thanks so much for stopping by!
Dana
December 29, 2015
Friends
Hello!!
How is everyone? I got some great news last night regarding the next semester and my stress level has gone out the door!! I now can relax and get somethings caught up!! I'm way behind in my commenting so i've started over!! And can you believe it's almost 2016??? It will be Christmas again before i know it!! LOL
The card features some Spectrum Noir markers and the new Sparkle Pens, both made by Crafter's Companion. I started by stamping Sheena Douglass's Monarch Butterfly stamp three times on a panel of white card stock.
Next i used my Spectrum Noir Markers to color the butterflies (CG4, DR5, DR6, JG1,PL3, PL4). Then i used my Clear Sparkle Pen to add just a touch of sparkle to the butterflies wings. If you like more sparkle, just use a heavier hand when applying.
For a sentiment i used one from the Kimono Lotus Flower stamp set. Next i trimmed down my panel about 1/4 of an inch and adhered it to a black card base. Last i added a few black sequins.
Thanks so much for stopping by!!
Dana
December 27, 2015
Happy Birthday
Hello!!
Today i'm sharing a birthday card! Unfortunately Christmas is over and its time to think of birthday's, valentines and spring!!! Ok, there might still be a few winter cards thrown in because winter is not over!!!
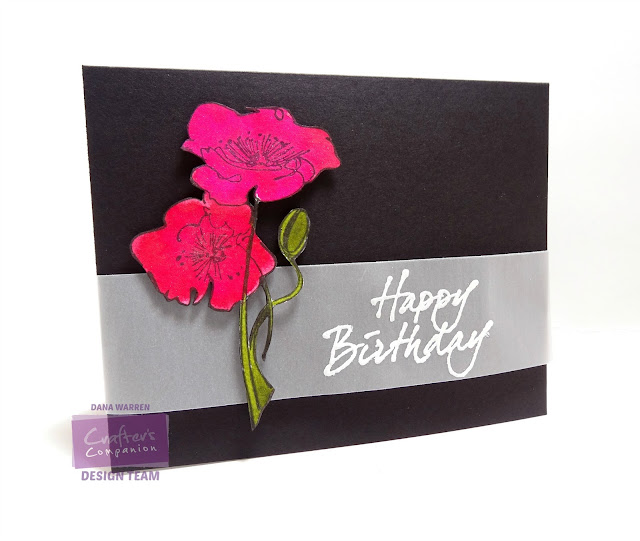
I started by stamping one of the flowers from Crafter's Companion Stamp It Australia's Dreamy Daisies on watercolor paper. Then i used the new Spectrum Noir Sparkle Pens to color the flowers. I used a water pen along with the pen, but i used too much water so these flowers don't have much of a watercolor look.
Next i cut a strip of vellum and stamped Happy Birthday in versamark ink and white embossed. I wrapped the vellum around a black card base, adhered it on the underside.
Once the flowers were dry i fussy cut them out and adhered them to my card with foam tape. You can see the the sparkle from the pens in the below picture.
Thanks so much for stopping by!!
Dana
December 25, 2015
Merry Christmas
Happy Holidays!!
I hope everyone is having a wonderful day!!! I'm sharing my last Christmas card of the year!!
I started with Pretty Poinsettia die from Crafter's Companion Signature Collection - Festive Wonder. I cut several petals and a couple leaves from CC's water color paper. Then i played with CC's new Sparkle Pens and colored the petals and leaves, add a little water or use a water brush to lighten the color!
When the petals were dry, i placed the die back over each petal and inked a little black Distress ink over the little curly q's in the dies. To assemble my flower i just used a piece of scrap paper to adhere my flower layers to. Last i just added the leaves behind the flower.
Next i added some pretty green pattern paper from the 6 x 6 Festive Wonder pad. Then from black and glitter gold card stock i cut the Merry Christmas die from the same collection. I adhered the gold over the back, just slightly off set.
I adhered the Merry Christmas on my card base and last added the poinsettia. In the photo above you can see the sparkle from the new Sparkle Pens!!
Happy Holidays!!
Dana
Subscribe to:
Posts (Atom)


