Hello!
Its time for a new challenge over at Addicted to Stamps & More!! This week the challenge is Holiday!! I went with Easter!! I used bright spring like colors because i am so ready for spring!!
I started with a light blue card base then added a white notched banner with the flat side at the bottom of the card base (oh, i almost forgot, before adding it to the card base i tied a twine bow around it!). Next i die cut several Easter eggs from pattern paper. I also cut some white felt flowers and green felt leaves.
Next i arranged the eggs and flowers at the bottom of the card, when i was happy with the arrangement i adhered some eggs directly to the card and a couple with foam dots. I adhered the flowers and leaves on and around the eggs then added a little pink glitter glue to each flower center.
Last i inked up the You're Egg-stra Special' sentiment and stamped it above the banner. I just love this sentiment, a perfect little message to send to a special someone for Easter!!
I hope you will play along with us at Addicted to Stamps and More!!! Thanks for stopping by!!!
Dana
Supplies
Stamps: Kellie Stamps - Easter (retired)
Pattern Paper: Simple Stories - Vintage Bliss
Dies: My Favorite Things - Blue Prints #13, A Muse Studio - Color Me Happy, Tiny Flowers
Glitter Glue: Stickles - Fruit Punch
Twine: Hemptique
Showing posts with label A Muse Studio. Show all posts
February 24, 2015
April 20, 2014
Happy Easter
Hi!
I originally was going to post this yesterday, but then duh! it hit me, wait one more day and post the Easter card ON Easter!! LOL! I made this card for Taheerah's Cure for the Monday Blues Challenge #13.
From the inspiration photo i took away the bunnies and the pink and yellow colors that dominate. I actually had a different plan, but when i sat down and started it morphed into something else.
I did a lot of masking and stamping to make my bunny background. I wanted it to be a really full background, so i had 3 bunny masks and 1 ear mask going at once. When the background was don;t i wasn;t sure what i wanted to do with it, color it, color one or two, add a paper peiced bunny.... the ideas were swirly, but i didn;t want to mess it up!!
As i was thinking about it, i took a pieces of water color paper and stamped, then embossed the Happy Easter in white. Then i used pink and yellow watercolors to color the strip. I thought it was hard to read the sentiment so i added some shadow to the Happy. I added a couple pink sequins and a yellow sequin.
When that was done, i thought that the background really needed something so i decided to just color the bunny noses and leave it as that. Kind of less is more!! (and i really didn;t want to try something and have it not work out and all that work down the tube!) Last I added the watercolor panel to my card base with foam dots.
Thanks for stopping by! And i hope you have a wonderful Sunday!!
Dana
Supplies
Stamps: A Muse Studio - Color Me Happy
Die: Avery Elle - Custom Panels
Watercolors
Embossing Powder: Hero Arts
I originally was going to post this yesterday, but then duh! it hit me, wait one more day and post the Easter card ON Easter!! LOL! I made this card for Taheerah's Cure for the Monday Blues Challenge #13.
From the inspiration photo i took away the bunnies and the pink and yellow colors that dominate. I actually had a different plan, but when i sat down and started it morphed into something else.
I did a lot of masking and stamping to make my bunny background. I wanted it to be a really full background, so i had 3 bunny masks and 1 ear mask going at once. When the background was don;t i wasn;t sure what i wanted to do with it, color it, color one or two, add a paper peiced bunny.... the ideas were swirly, but i didn;t want to mess it up!!
As i was thinking about it, i took a pieces of water color paper and stamped, then embossed the Happy Easter in white. Then i used pink and yellow watercolors to color the strip. I thought it was hard to read the sentiment so i added some shadow to the Happy. I added a couple pink sequins and a yellow sequin.
When that was done, i thought that the background really needed something so i decided to just color the bunny noses and leave it as that. Kind of less is more!! (and i really didn;t want to try something and have it not work out and all that work down the tube!) Last I added the watercolor panel to my card base with foam dots.
Thanks for stopping by! And i hope you have a wonderful Sunday!!
Dana
Supplies
Stamps: A Muse Studio - Color Me Happy
Die: Avery Elle - Custom Panels
Watercolors
Embossing Powder: Hero Arts
April 3, 2014
Happy Easter!
Hello!
Today i have a cute little Easter card to share with you! It has nice bright, spring colors, colors that i am hoping to see now that spring is surely around the corner!!
I started with a cream card base and added thin wood tape along the bottom (i flipped the card on its side). Next i die cut some cute little Easter eggs from spring like pattern papers, then stamped the matching stamp with black ink.
Next i die cut a few tiny flowers from white felt and added a little bit of glitter glue to the flower centers. I adhered the eggs to the card with foam dots and then added the flowers to the card! Last i stamped the Happy Easter sentiment.
Kind of simple and sweet! Thanks for stopping by!!
Dana
Supplies
Stamps & Dies: A Muse Studio - Color Me Happy
Dies: A Muse Studio - Small Flowers
Ink: PTI - True Black
Wood Tape: ARC Crafts
Pattern paper: LawnFawn
Today i have a cute little Easter card to share with you! It has nice bright, spring colors, colors that i am hoping to see now that spring is surely around the corner!!
I started with a cream card base and added thin wood tape along the bottom (i flipped the card on its side). Next i die cut some cute little Easter eggs from spring like pattern papers, then stamped the matching stamp with black ink.
Next i die cut a few tiny flowers from white felt and added a little bit of glitter glue to the flower centers. I adhered the eggs to the card with foam dots and then added the flowers to the card! Last i stamped the Happy Easter sentiment.
Kind of simple and sweet! Thanks for stopping by!!
Dana
Supplies
Stamps & Dies: A Muse Studio - Color Me Happy
Dies: A Muse Studio - Small Flowers
Ink: PTI - True Black
Wood Tape: ARC Crafts
Pattern paper: LawnFawn
March 29, 2014
The Alley Way Stamps - Sneak Peek #2
Hey there!!
Its day 2 of The Alley Way Stamps Sneak Peeks!! The set being featured today is called BEE Sweet! And i have a sweet card for you!
Its a little Easter card, perfect for a little girl! And i actually made a little scene! I'm usually bad at making scene cards, not sure why but they never seam to work for me, but this one fell into place nicely.
I started by stamping and masking the bee, one bunny ear and antennae. I also stamped another ear and the tiny flowers off to the side. I colored the bee with distress markers, then cut the bee out. I also cut out the bunny ear and the flowers. I added both to the bee with foam dots.
This is when i remembered these extra felt clouds that i had, i found them added them to my card base. I also used a wave like die to cut some green pattern paper. I adhered these waves to my card base to make green hills. I also die cut some tiny flowers and added them to the bottom right.
Last i stamped the sentiment from the BEE Sweet set! And wa-la a cute little bee bunny scene!! :)
Make sure you stop by The Alley Way Stamp's blog for more sneak peeks from the design team and a chance to win the new BEE Sweet stamp set!!
Have a great day!!
Dana
Supplies
Stamps: The Alley Way Stamps - BEE Sweet (available March 31st @ 10pm TAWS time)
Distress Markers: Squeezed Lemonade, Mustard Seed, Worn Lipstick, Ripe Persimmon, Spiced Marmalade
Pattern paper: Lawn Fawn - Bright Side
Die: A Muse Studio - Small Flowers, PTI - Clouds, Into The Meadow
Its day 2 of The Alley Way Stamps Sneak Peeks!! The set being featured today is called BEE Sweet! And i have a sweet card for you!
Its a little Easter card, perfect for a little girl! And i actually made a little scene! I'm usually bad at making scene cards, not sure why but they never seam to work for me, but this one fell into place nicely.
I started by stamping and masking the bee, one bunny ear and antennae. I also stamped another ear and the tiny flowers off to the side. I colored the bee with distress markers, then cut the bee out. I also cut out the bunny ear and the flowers. I added both to the bee with foam dots.
This is when i remembered these extra felt clouds that i had, i found them added them to my card base. I also used a wave like die to cut some green pattern paper. I adhered these waves to my card base to make green hills. I also die cut some tiny flowers and added them to the bottom right.
Last i stamped the sentiment from the BEE Sweet set! And wa-la a cute little bee bunny scene!! :)
Make sure you stop by The Alley Way Stamp's blog for more sneak peeks from the design team and a chance to win the new BEE Sweet stamp set!!
Have a great day!!
Dana
Supplies
Stamps: The Alley Way Stamps - BEE Sweet (available March 31st @ 10pm TAWS time)
Distress Markers: Squeezed Lemonade, Mustard Seed, Worn Lipstick, Ripe Persimmon, Spiced Marmalade
Pattern paper: Lawn Fawn - Bright Side
Die: A Muse Studio - Small Flowers, PTI - Clouds, Into The Meadow
March 28, 2014
Pink Hello
Hi there!!
Today's card features a new find cool find and using up some scraps (ok, really really really new scraps and since i can't stop using this die there are more scraps to be had!!) My find is wood tape! I found it at Joann's it was kind of expensive, but it was on sale and well its awesome. Its real wood, very very thin wood with an adhesive back. Its really similar to washi tape!
I used some pink card stock and added the wood tape vertically across my card base. Then i added the tiny die cut flowers in a long grouping with foam dots. The flowers were left over from Monday's card.
Next i die cut the hello sentiment 3 times from some scrap paper. I ran all 3 hello's through my sticker maker. I adhered them on top of each other, then on to my card base. Last i added a few glitter dots.
Thanks so much for stopping by!!! Oh and i just realized, this card has no stamping!! GASP!!! lol!
Dana
Supplies
Card stock: A Muse Studio - Blush (i think)
Die: A Muse Studio - Hello, Small Flowers
Wood Tape: ARC Crafts
Glitter Dots: Close to My Heart
Today's card features a new find cool find and using up some scraps (ok, really really really new scraps and since i can't stop using this die there are more scraps to be had!!) My find is wood tape! I found it at Joann's it was kind of expensive, but it was on sale and well its awesome. Its real wood, very very thin wood with an adhesive back. Its really similar to washi tape!
I used some pink card stock and added the wood tape vertically across my card base. Then i added the tiny die cut flowers in a long grouping with foam dots. The flowers were left over from Monday's card.
Next i die cut the hello sentiment 3 times from some scrap paper. I ran all 3 hello's through my sticker maker. I adhered them on top of each other, then on to my card base. Last i added a few glitter dots.
Thanks so much for stopping by!!! Oh and i just realized, this card has no stamping!! GASP!!! lol!
Dana
Supplies
Card stock: A Muse Studio - Blush (i think)
Die: A Muse Studio - Hello, Small Flowers
Wood Tape: ARC Crafts
Glitter Dots: Close to My Heart
March 27, 2014
Super Star
Hey there!!
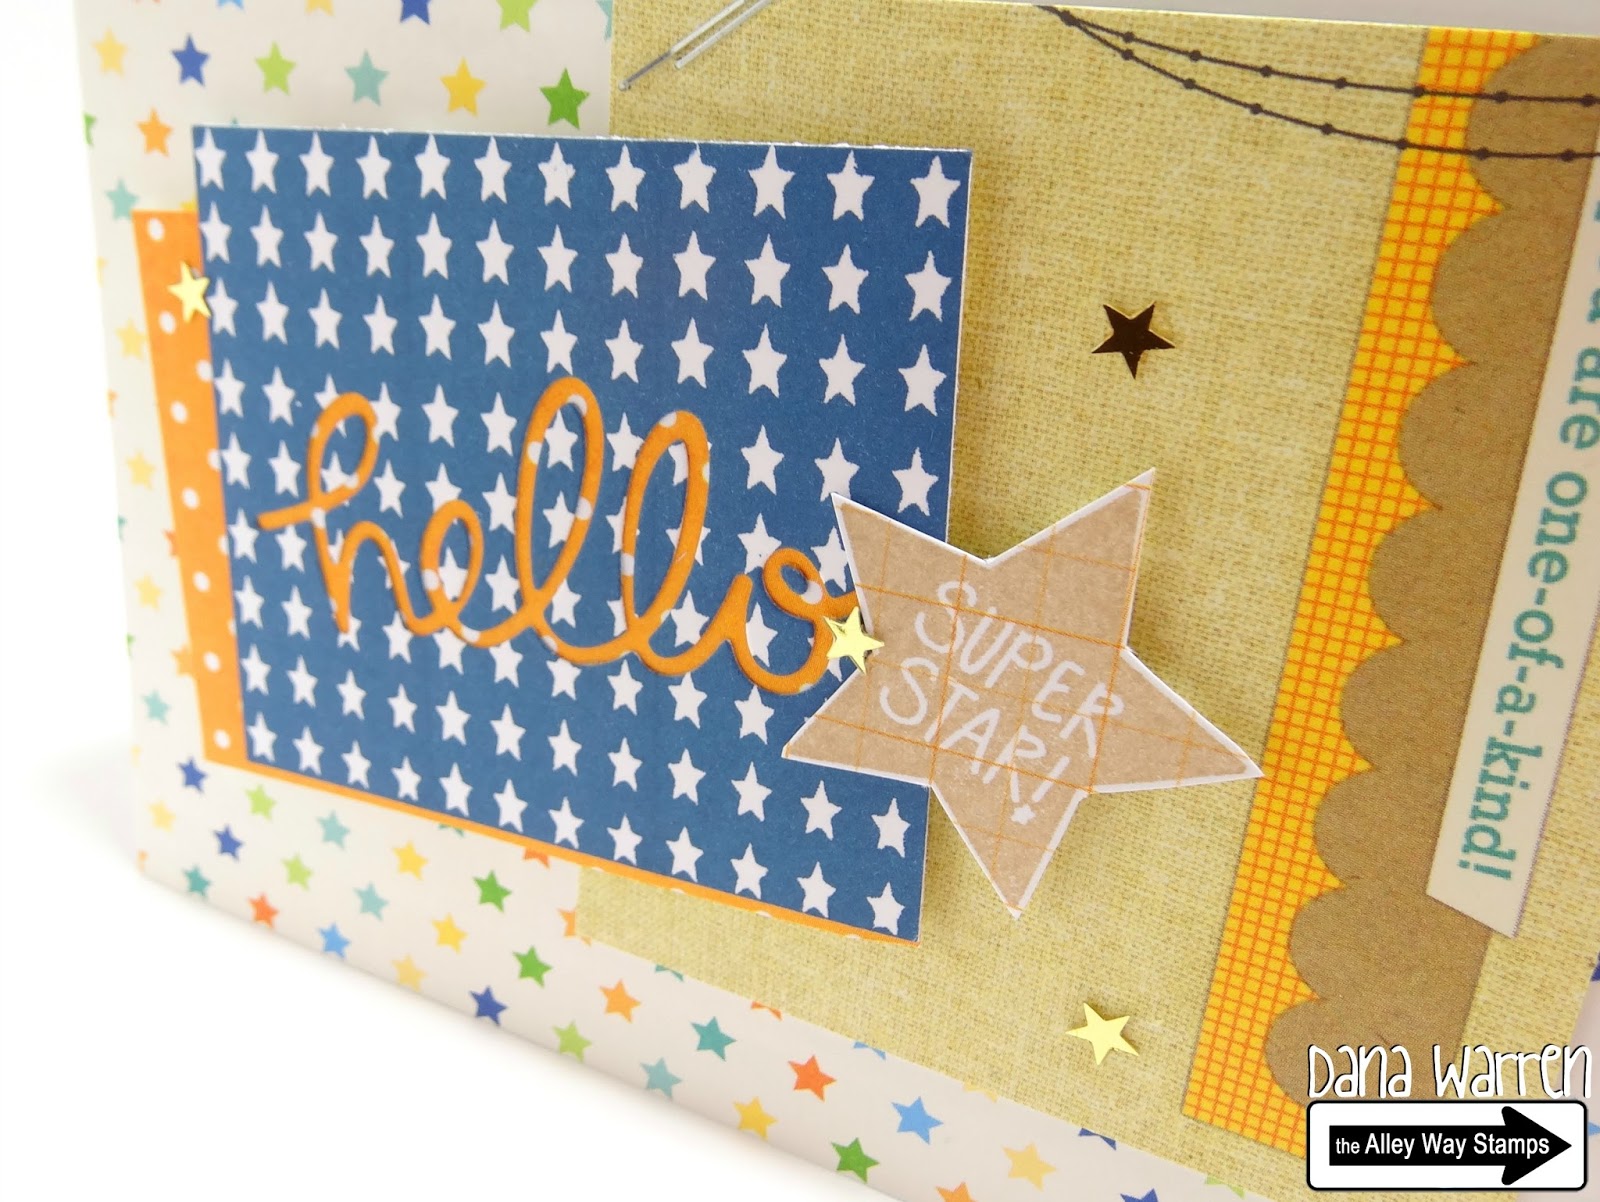
How is everyone?! Good i hope! Today i'm sharing a card that i just love!!! I had no plan when i started but i came out great!!!
I started with a stamp from The Alley Way Stamps: Got It Covered set!!! I stamped the star background with blue pigment ink, 3 times in a row, making sure each one was touching. Then i trimmed all three really close (the stamp has rounded edges), then added a little ink where needed.
Next i i die cut Hello from my blue star background. I set aside the cut hello to just work with the negative. I backed the negative with orange poke-a-dot pattern paper. I was going to trim off the orange paper, but liked how it looked peaking out on two of the sides.
Then i stamped the super star stamp and cut it out. I added a multicolored star pattern paper to my card base, along with a pattern journal card that i attached to the star panel with staples. I added the hello negative and the cut out super star with foam dots and last added 3 tiny gold hearts.
Hope you have a great day!!!
Dana
Supplies
Stamps: The Alley Way Stamps - Got it Covered
Pattern paper and journaling card: Elle's Studio - Cameron
Ink: Memento Luxe - Nautical Blue. Papertrey Ink - Classic Kraft
Die: A Muse Studio - Hello
How is everyone?! Good i hope! Today i'm sharing a card that i just love!!! I had no plan when i started but i came out great!!!
I started with a stamp from The Alley Way Stamps: Got It Covered set!!! I stamped the star background with blue pigment ink, 3 times in a row, making sure each one was touching. Then i trimmed all three really close (the stamp has rounded edges), then added a little ink where needed.
Next i i die cut Hello from my blue star background. I set aside the cut hello to just work with the negative. I backed the negative with orange poke-a-dot pattern paper. I was going to trim off the orange paper, but liked how it looked peaking out on two of the sides.
Then i stamped the super star stamp and cut it out. I added a multicolored star pattern paper to my card base, along with a pattern journal card that i attached to the star panel with staples. I added the hello negative and the cut out super star with foam dots and last added 3 tiny gold hearts.
Hope you have a great day!!!
Dana
Supplies
Stamps: The Alley Way Stamps - Got it Covered
Pattern paper and journaling card: Elle's Studio - Cameron
Ink: Memento Luxe - Nautical Blue. Papertrey Ink - Classic Kraft
Die: A Muse Studio - Hello
March 24, 2014
Garden Flowers
Hello!!
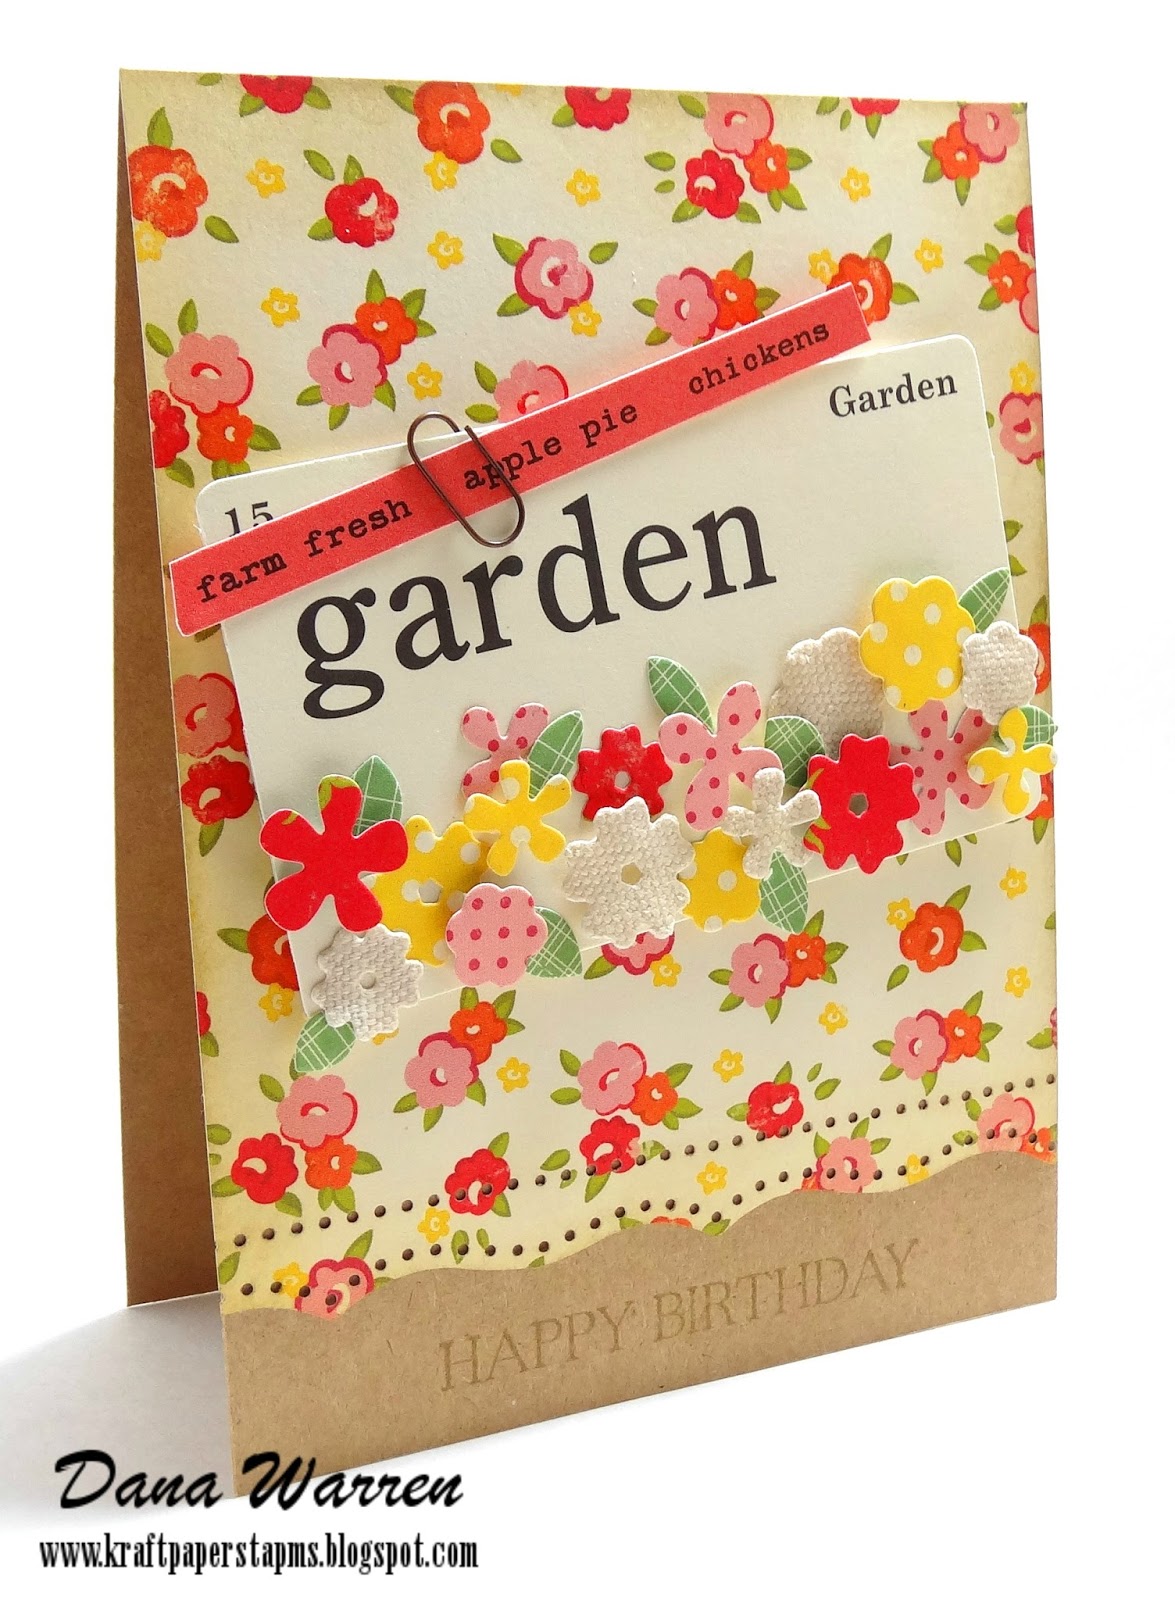
Today i'm sharing a card i made for the Curtian Call Inspiration Challenge - Farm Fresh challenge. I pulled out my October Afternoon: Farm Girl collection for inspiration, mainly because it is a farm inspired pack and i really have no other farm like stamps as i don't really care for that kind of style. This collection has some really nice farm images and such, but not surprisingly i'm was drawn to the pretty flower pattern that is included in the collection.
I'm also using some new product i purchased a little bit ago. Now if you follow my blog long enough you might realize that i made a new years resolution not to buy any more crafty supplies..... well that lasted about 3 months!!! However, i just stopped by Michael's and Joann's and didn;t really feel any need to add to my crafty supplies, i am realizing that i would rather purchase supplies from various companies online, supplies that you just can't get at the big 3 (don't forget Hobby Lobby!!) And really i just don't need the $1 pearls in the discount section, no matter how many colors they come in!! lol
Ok so on to my card, oh and the new purchase i made are these tiny flower die cuts from A Muse Studio! I LOVE them! You will be seeing them a lot! I love they size: Tiny, but oh so perfect for cards!!
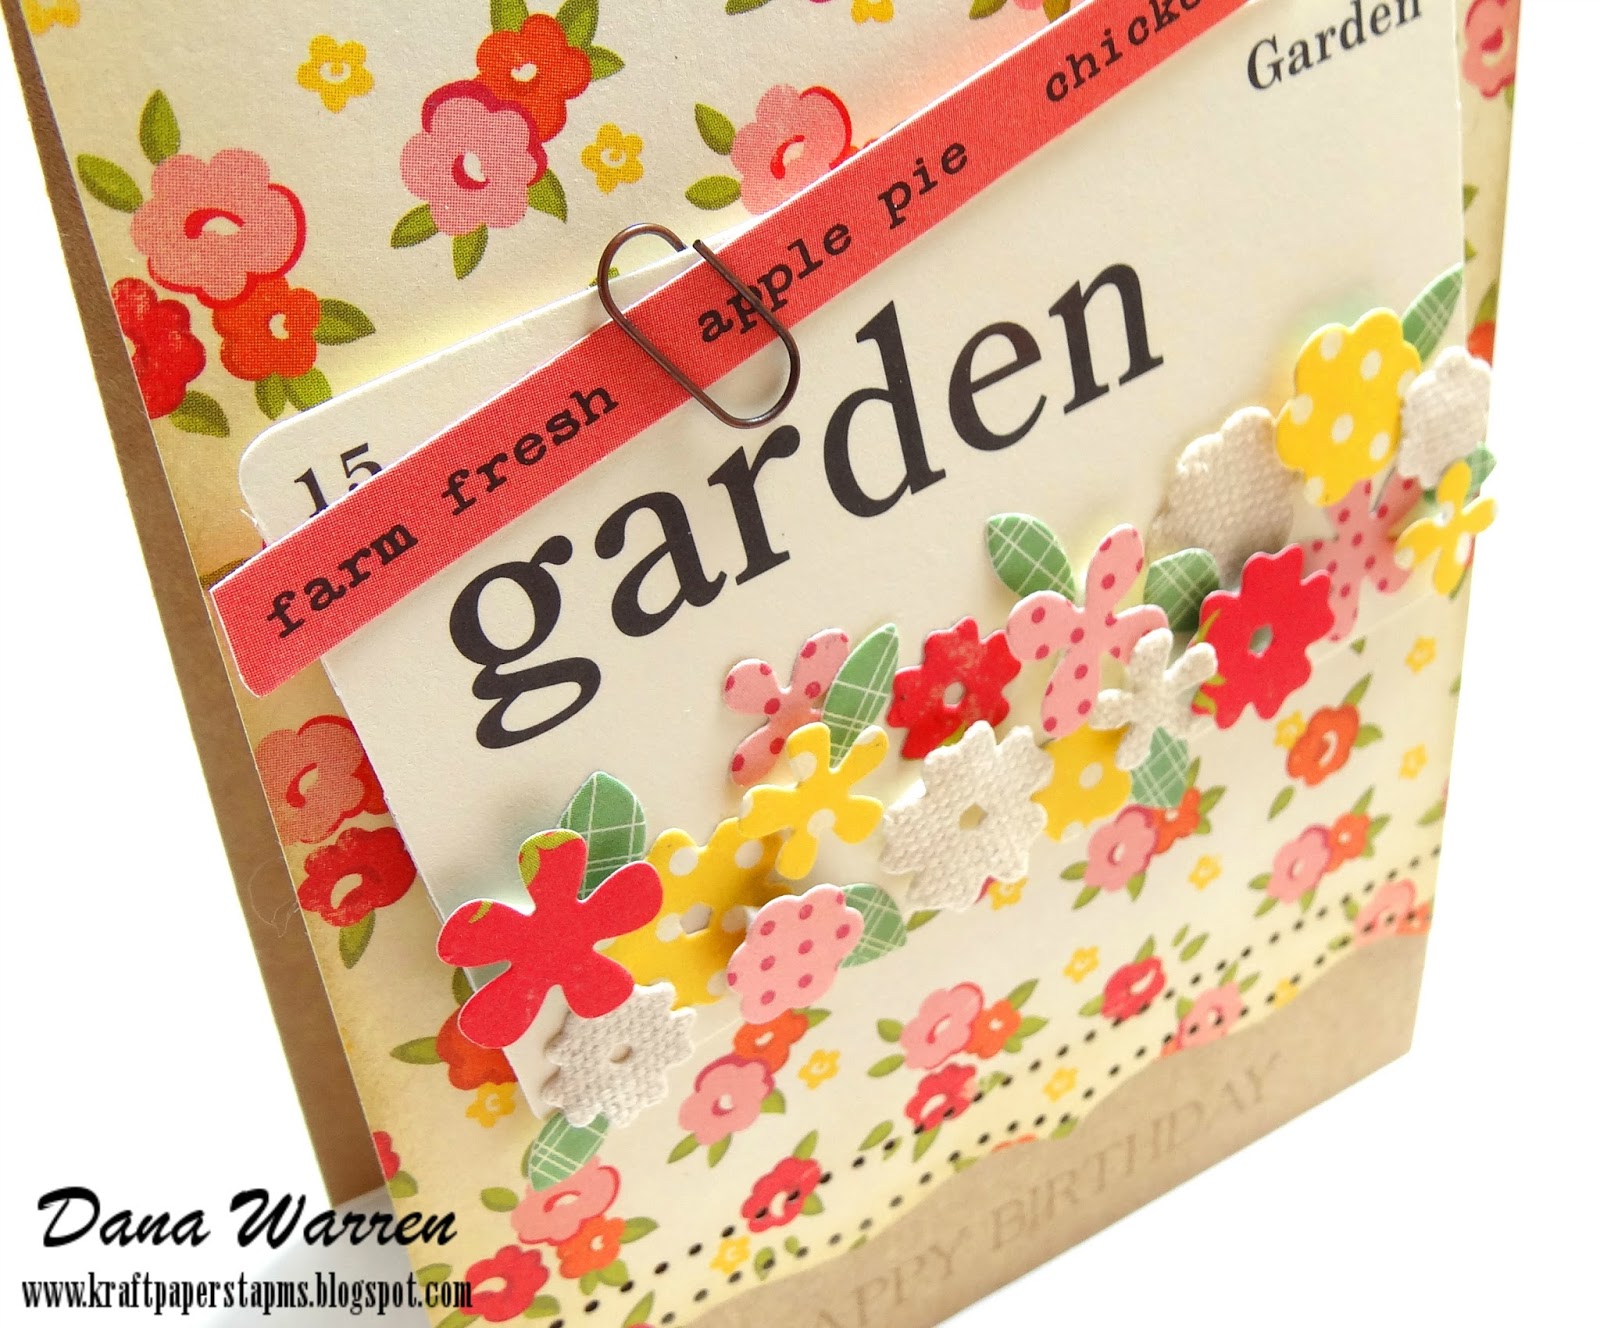
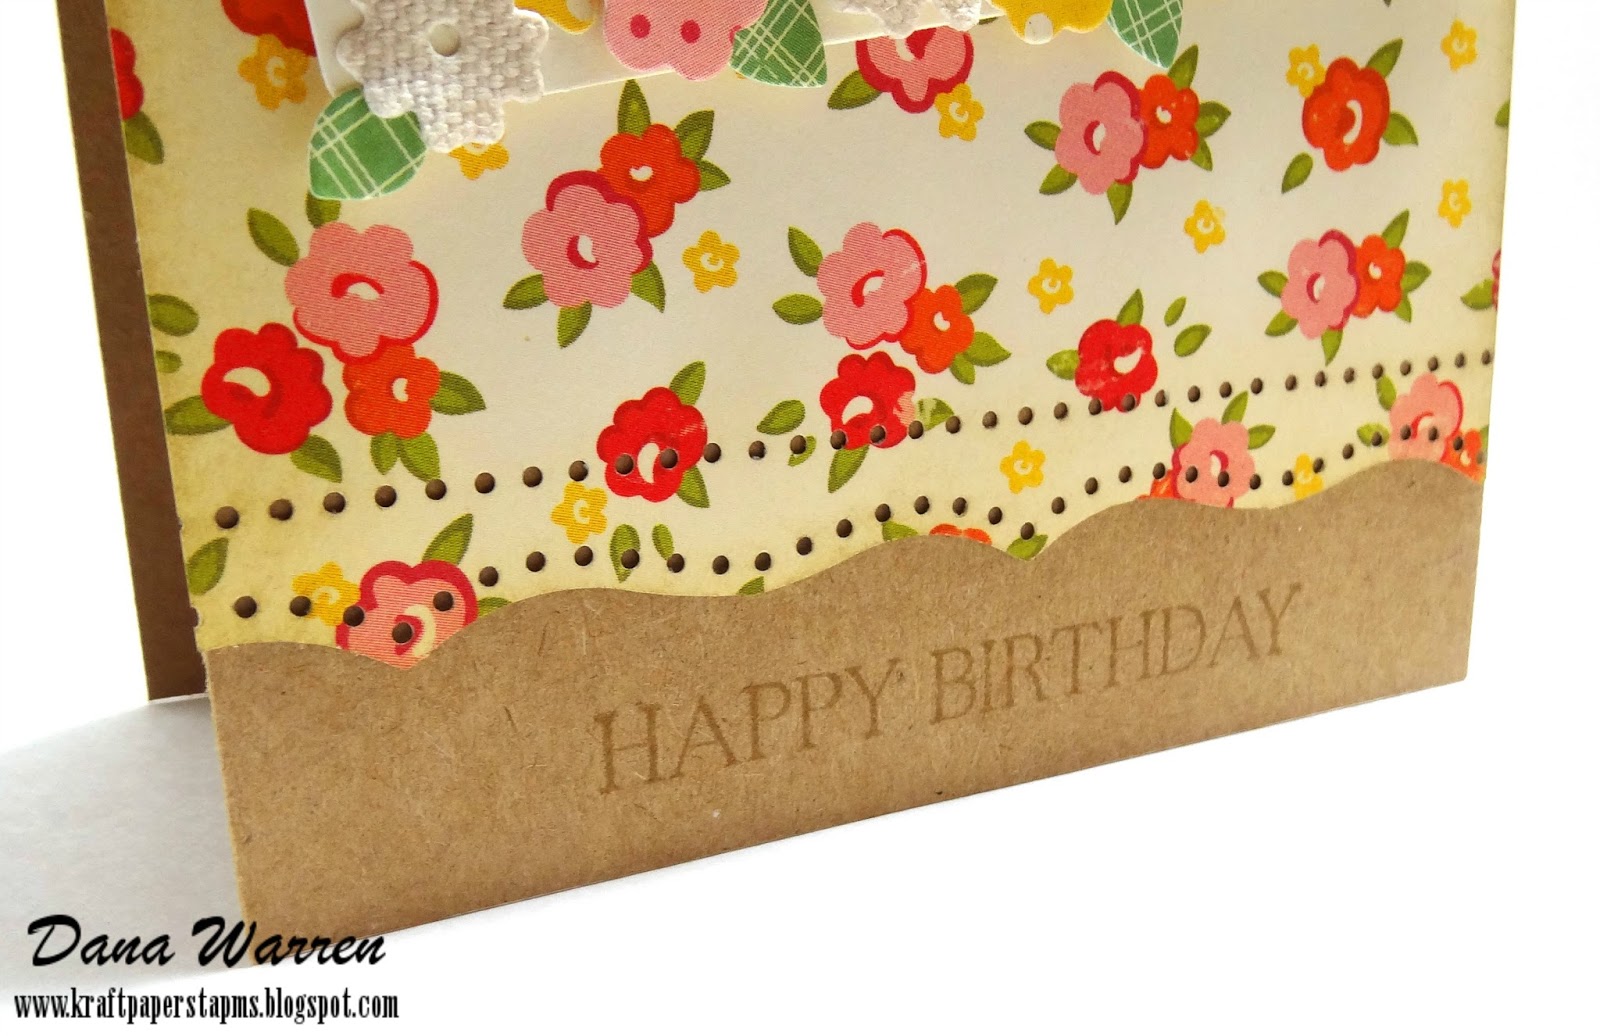
To start i trimmed the flower pattern paper to match my Kraft card base, then punched a border along the bottom. I also added a touch of distress ink along the edge. Next i used a journal card from the Farm Girl collection that said Garden on it, kind of like a flash card looking card. I added a pink word element to the journal card with a tiny paper clip.
Next i die cut several tiny flowers from different pattern papers in the collection. I also die cut some flowers from tea stained canvas that i have laying around. I adhered the flowers to the journal card, some with foam dots. Then i added the journal card to my card base with foam dots and last stamped the Happy Birthday sentiment at the bottom.
Thanks so much for stopping by!
Dana
Supplies
Stamps: A Muse Studio - Make A Wish
Die: A Muse Studio - Small Flowers
Pattern Paper, Journal Card and Embellishments: October Afternoon - Farm Girl
Paperclip: Tim Holtz
Ink: Distress Ink - Frayed Burlap
Today i'm sharing a card i made for the Curtian Call Inspiration Challenge - Farm Fresh challenge. I pulled out my October Afternoon: Farm Girl collection for inspiration, mainly because it is a farm inspired pack and i really have no other farm like stamps as i don't really care for that kind of style. This collection has some really nice farm images and such, but not surprisingly i'm was drawn to the pretty flower pattern that is included in the collection.
I'm also using some new product i purchased a little bit ago. Now if you follow my blog long enough you might realize that i made a new years resolution not to buy any more crafty supplies..... well that lasted about 3 months!!! However, i just stopped by Michael's and Joann's and didn;t really feel any need to add to my crafty supplies, i am realizing that i would rather purchase supplies from various companies online, supplies that you just can't get at the big 3 (don't forget Hobby Lobby!!) And really i just don't need the $1 pearls in the discount section, no matter how many colors they come in!! lol
Ok so on to my card, oh and the new purchase i made are these tiny flower die cuts from A Muse Studio! I LOVE them! You will be seeing them a lot! I love they size: Tiny, but oh so perfect for cards!!
To start i trimmed the flower pattern paper to match my Kraft card base, then punched a border along the bottom. I also added a touch of distress ink along the edge. Next i used a journal card from the Farm Girl collection that said Garden on it, kind of like a flash card looking card. I added a pink word element to the journal card with a tiny paper clip.
Next i die cut several tiny flowers from different pattern papers in the collection. I also die cut some flowers from tea stained canvas that i have laying around. I adhered the flowers to the journal card, some with foam dots. Then i added the journal card to my card base with foam dots and last stamped the Happy Birthday sentiment at the bottom.
Thanks so much for stopping by!
Dana
Supplies
Stamps: A Muse Studio - Make A Wish
Die: A Muse Studio - Small Flowers
Pattern Paper, Journal Card and Embellishments: October Afternoon - Farm Girl
Paperclip: Tim Holtz
Ink: Distress Ink - Frayed Burlap
March 15, 2014
Hello Spring!
Hi there!!
Today i have 3 quick spring or Easter tags for you! I did these for the Cure For They Monday Blues Challenge #8. Taheerah has been picking some gorgeous inspiration photos and i finally got around to playing again. Here is this weeks photo:
I went with the pink, yellow, grey and white colors in the photo and made some quick spring tags. I first stamped the bunny, chick, and lamb from pink, yellow and grey card stock. I also stamped them again on some scrap paper. I cut them all out, then cut out the their belly and ear centers from the white card stock.
To make these even easier, use a opaque white pen and color in the bellies and ears. Thought about that AFTER cutting out all the little pieces, of course!! LOL
I die cut some tags from white card stock and adhered each die cut image with foam tape. Next i stamped the sentiment Hello Spring on each tag. Last i added a little pink twine to the top of each stamp!!
Easy peasy!! Cute little spring stamps AND easy to make multiples of!!
Have a great day!!
Dana
Supplies
Stamps: A Muse Studio - Color Me Happy
Die: A Muse Studio - Color Me Happy, PTI - Tag Sale
Card stock: Coredinations
Today i have 3 quick spring or Easter tags for you! I did these for the Cure For They Monday Blues Challenge #8. Taheerah has been picking some gorgeous inspiration photos and i finally got around to playing again. Here is this weeks photo:
I went with the pink, yellow, grey and white colors in the photo and made some quick spring tags. I first stamped the bunny, chick, and lamb from pink, yellow and grey card stock. I also stamped them again on some scrap paper. I cut them all out, then cut out the their belly and ear centers from the white card stock.
To make these even easier, use a opaque white pen and color in the bellies and ears. Thought about that AFTER cutting out all the little pieces, of course!! LOL
I die cut some tags from white card stock and adhered each die cut image with foam tape. Next i stamped the sentiment Hello Spring on each tag. Last i added a little pink twine to the top of each stamp!!
Easy peasy!! Cute little spring stamps AND easy to make multiples of!!
Have a great day!!
Dana
Supplies
Stamps: A Muse Studio - Color Me Happy
Die: A Muse Studio - Color Me Happy, PTI - Tag Sale
Card stock: Coredinations
March 11, 2014
Mint & Melon
Hey there!!
Today i have a card that i made for Seize the Sketch, i also used the colors Mint & Melon and am entering it in Paper Crafts & Scrapbooking March Gallery Challenge.
Here is the sketch i followed:
I used The Alley Way's Spotted stamp set to stamp the background. I followed the sketch by stamping melon on the right and mint on the left. I also stamped a panel in grey using a stamp from the set.
I used a die cut circle, stamped my sentiment and then adhered it to my card base. I layered the grey spotted panel over the circle with foam dots. Next i added a strip of white cardstock over the grey panel and notched the end.
Last i die cut some tiny flower. To make sure my flowers matched my colors i used a couple scraps and inked them up with the same ink i used on the background. Then i cut them out and adhered them together in a cluster on my card.
Thanks so much for stopping by!
Dana
Supplies
Stamps: The Alley Way Stamps - Jibber Jabber, Spotted
Ink: Hero Arts - Soft Granite, Mint Julep, Fresh peach
Die: A Muse Studio - Small Flowers
Today i have a card that i made for Seize the Sketch, i also used the colors Mint & Melon and am entering it in Paper Crafts & Scrapbooking March Gallery Challenge.
Here is the sketch i followed:
I used The Alley Way's Spotted stamp set to stamp the background. I followed the sketch by stamping melon on the right and mint on the left. I also stamped a panel in grey using a stamp from the set.
I used a die cut circle, stamped my sentiment and then adhered it to my card base. I layered the grey spotted panel over the circle with foam dots. Next i added a strip of white cardstock over the grey panel and notched the end.
Last i die cut some tiny flower. To make sure my flowers matched my colors i used a couple scraps and inked them up with the same ink i used on the background. Then i cut them out and adhered them together in a cluster on my card.
Thanks so much for stopping by!
Dana
Supplies
Stamps: The Alley Way Stamps - Jibber Jabber, Spotted
Ink: Hero Arts - Soft Granite, Mint Julep, Fresh peach
Die: A Muse Studio - Small Flowers
March 2, 2014
I'm Here For You
Hello!!
Today i have a quick and simple card to share with you!! Just one of those ideas that popped in my head! It's also nice to make a card just to make a card!! No DT work, challenge or contest to think about!!
First i cut a panel to fit my card base. Then i stamped the push pin. I inked the pin with pink pigment and grey dye ink. Then i used a ruler and pierced some holes and stitched some black twine.
I stamped the sentiment I'm Here For You with black pigment ink. And last i adhered the panel to the card base!! See, short, easy and sweet!! :D
Have a great day!!
Dana
Supplies
Stamps: A Muse Studio - Fight Like A Girl
Ink: A Muse Studio - Watermelon. Memento Luxe - Tuxedo Black. Hero Arts - Grey
Twine: May Arts
Cardstock: PTI - Rustic White
Today i have a quick and simple card to share with you!! Just one of those ideas that popped in my head! It's also nice to make a card just to make a card!! No DT work, challenge or contest to think about!!
First i cut a panel to fit my card base. Then i stamped the push pin. I inked the pin with pink pigment and grey dye ink. Then i used a ruler and pierced some holes and stitched some black twine.
I stamped the sentiment I'm Here For You with black pigment ink. And last i adhered the panel to the card base!! See, short, easy and sweet!! :D
Have a great day!!
Dana
Supplies
Stamps: A Muse Studio - Fight Like A Girl
Ink: A Muse Studio - Watermelon. Memento Luxe - Tuxedo Black. Hero Arts - Grey
Twine: May Arts
Cardstock: PTI - Rustic White
Subscribe to:
Posts (Atom)