Hello!!
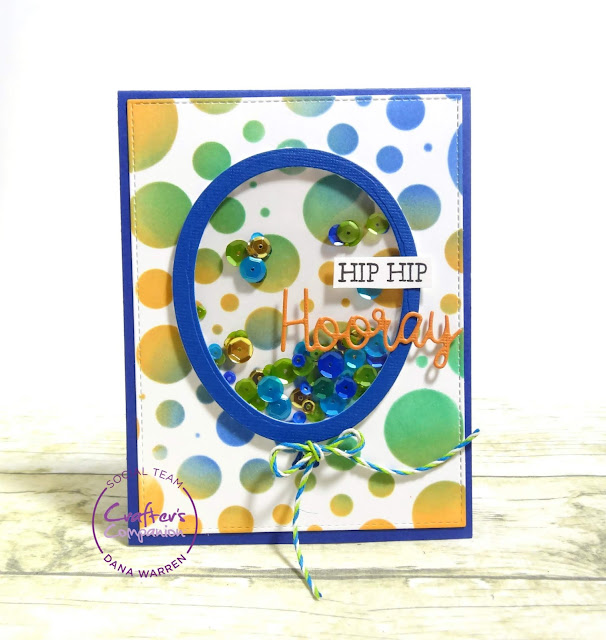
I hope everyone is having a great day!! Today I'm sharing an easy shaker card with you! And I made it masculine, which is really easy to do with a basic birthday stamp and die set!
I started with Crafter's Companion Hip Hip Hooray Shaker Card Stamp and Die Set! I made the shaker using the balloon die and cutting some CC Bright Textured Cardstock. I also cut the hooray from the pad using the orange.
Next, I used a circle stencil and Spectrum Noir Inkpads to ink the circles in. I used Midnight, Holly Leaf and Orange. Then I used a stitched rectangle die to cut a panel. I added the panel to a blue card base.
To create the shaker I adhered clear acetate to the back of the balloon, then added foam tape. I added some matching sequins and then adhered the balloon to the panel over the sequins with the foam tape.
I stamped and cut out the Hip Hip and adhered them and the Hooray to the balloon. I found some twine that happened to match and tied that around the bottom of the balloon.
Thanks so much for stopping by!!
Dana
Supplies
Stamps: Crafter's Companion : Hip Hip Hooray
Ink: Spectrum Noir Inkpads
Sequins: Neat & Tangled - Peacock Feather Mix
Circle Stencil
Showing posts with label Spectrum Noir Inkpads. Show all posts
Showing posts with label Spectrum Noir Inkpads. Show all posts
July 26, 2019
June 24, 2019
No Line Coloring with Crafter's Companion
Hello!!
I'm starting the week of with some No Line Coloring. I haven't done this in awhile but I saw someone doing it on Instagram and it inspired me to break out my gorgeous Crafter's Companion flower stamps!! My card today features the Beautiful Blooms set!
To make the image no line I used Spectrum Noir Inkpad Sandstorm, but I stamped it off first to make it a really light tan color. I stamped the image three times on a card stock panel.
Then I got to coloring! It does take longer because you have to be aware of the lines, doing a little at a time. I use the packaging as a guide to make sure I'm really coloring a petal the correct way. But, don't worry about being perfect! Only you know what the image should really look like and there were definitely places I color it a little different then the original stamp!!
To color the images I used my Spectrum Noir Tri-Blend Markers - Blends: Pale Pink, Light Yellow, Hydrangea, Dull Green.
When I was done coloring I stamped the Birthday Wishes with the SN Inkpad Noir Black. Last I added a few sequins for a little texture and sparkle!
Thanks so much for stopping by!!
Dana
Supplies
Stamps: Crafter's Companion - Beautiful Blooms
Spectrum Noir Tri Blend Markers
Sequins: Trinity Stamps
April 30, 2019
Coffee Loving CardMakers & Trinity Stamps Bubble Tea Blog Hop
Hello!!
Trinity Stamps and the Coffee Loving Cardmakers have gotten together for National Bubble Tea day!! I hadn't heard of bubble tea before, if I get the opportunity I'll try it! But, I have to be honest is sounds really weird!!! LOL!!
You should have come from the fabulous Helen Gullett! You can also start at the begining at the CLC Blog or Trinity Blog!! Make sure to leave a comment along the hop for your chance to win a gift card to Trinity Stamps!!
My first card features the Seasonal Sweetheart stamp set. First, I stamped the girl and a flower and colored them with my Spectrum Noir Tri-Blend Markers. Then I fussy cut them out.
Next, I made my shaker, using My Favorite Things LLD Coffee Cup die cut. I cut it into some watercolor card stock, then used some distress inks to add some color to the panel. Then I added a piece of acetate to the coffee cup window.
I added foam tape around the cup and then added some of Trinity Stamps sequins and confetti included a few Coffee Bean Hearts as the bubble's in my coffee cup! Then I added the panel over the sequins adhering it to a white card base.
Last I stamped the thankful for you sentiment and added the girl and flower with foam tape!
For my second card I started with Trinity's Coffee with Character stamping two of the cups on a watercolor panel. On a separate piece I stamped two different lids. To color everything I used some Spectrum Noir inkpads. Then I fussy cut the lids and adhered them to the background of cups.
Next, I stamped and colored the girl from Seasonal Sweetheart, then I fussy cut her and the flower out. I also stamped the sentiment You Art Sweet on white card stock.
I added a strip of black card stock strip across the card, then added the sentiment and girl. I also added a few Trinity's Rock Candy Confettii.
Thanks so much for stopping by!! Your next stop is the amazing Amy Tsuruta!!!
Dana
April 29, 2019
Graciellie Designs - Summer Sunflower
Hello!!
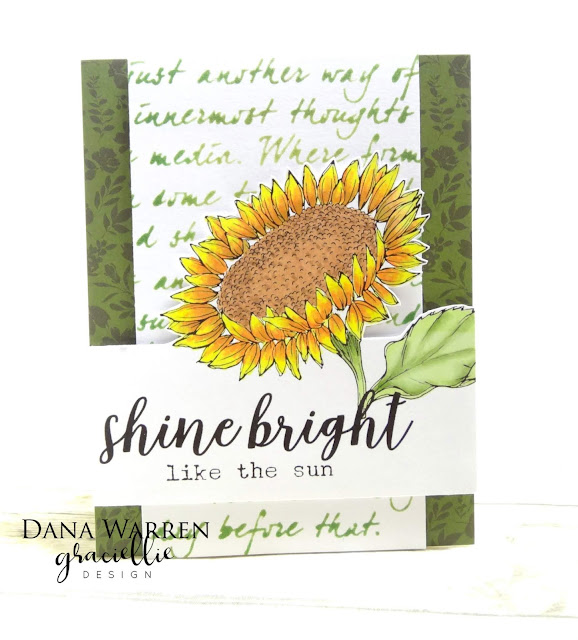
I'm sharing a card today that I made with Graciellie Designs Summer Sunflower digital stamps! This is a great set, it could go for summer and am looking forward to using it in the fall, too!!
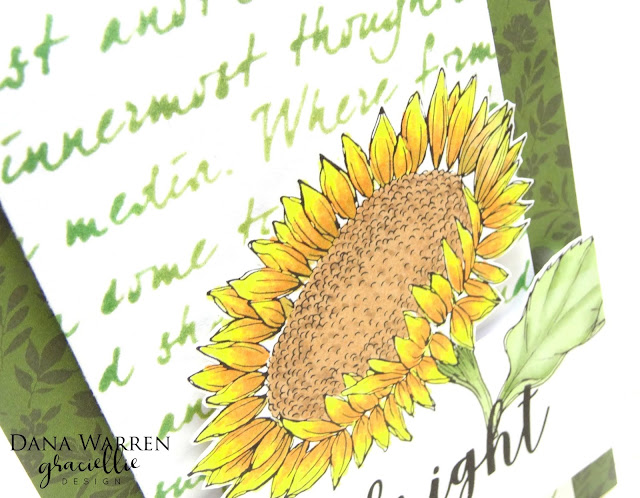
I used Word to make the sunflower fairly big and adding a sentiment on top of the image. After printing the image I used my Spectrum Noir Tri-Blend Markers to color it.
Next, I fussy cut around the top part of the flower and trimming along the bottom of the sentiment. I set it aside to work on the background. With a panel of white card stock I used The Crafter's Workshop Mini Art Is stencil and Spectrum Noir Ink pads to ink up the word stencil. The colors I used with the stencil are Holly Leaf, Grass Hopper and Pine Tree.
From my pattern paper stash I found the perfect dark green pattern from Carta Bella Welcome Home paper pad. I added this paper to a white card base and then adhered the stencil panel with foam tape.
Next, I added the sunflower with foam tape also. I thought about adding gems, but in the end I figured the background was busy enough!
Thanks so much for stopping by!!
Dana
February 13, 2019
Wishing You Love
Hello!!
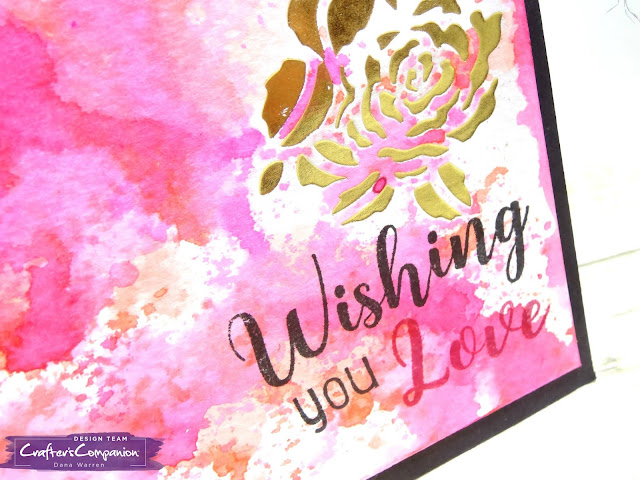
With tomorrow being Valentine's Day, I thought I'd share this fun love card!! Crafter's Companion's Foil Press is now available on their website and I grabbed one as soon as it appeared. I got a couple of the foil stamps and played around with them. This card features one of those experiments!
I started with some watercolor card stock, which is thicker then typical card stock, but the Foil Press had no problem foiling the rose metal stamp. I love how it turned out!!
Next, I did some watercolor smooshing with my Spectrum Noir Harmony Inkpads. I used Chinese Red, Fuchsia, Plum Jam. The watercoloring did not affect the foiling, though I didn't use a ton of water either!
After the watercoloring was dry I stamped Wishing You Love below the foiled rose. I added some black twine at the top of the panel and then added it to a black card base.
Thanks for stopping by!!
Dana
Supplies
Crafter's Companion: Gemini Foiling Press, Gold Foil, Rose Bloom Foil Stamp. Love, Laugh, Laughter Stamp Set.
Spectrum Noir Inkpads: Harmony - Chinese Red, Fuchsia, Plum Jam. Finesse - Noir Black
December 6, 2018
Art Impressions Challenge #246 - Anything Goes
Hello!!
It's the second week of Art Impressions Challenge #246 - Anything Goes! Make sure to play along for your chance to win some AI goodies!! There is also a new release of Work & Play and Funny Farm stamps!!
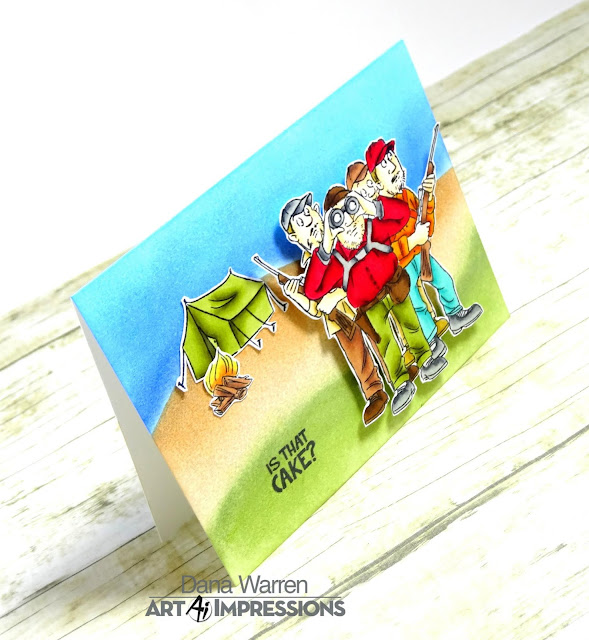
My card features the new Ole Buck stamp set! I started by stamping the group of guys, tent and fire. I used my Spectrum Noir markers to color them up. Then I fussy cut everything out.
Next, I used my Spectrum Noir inkpads to create some ground and sky. First, I sketched where I wanted the ground to be, in this case two. One for the guys and the other for the tent and fire. I used masking tape to mask off the different areas, then went to town with ink!
When my inking was done I added the tent and fire directly to the card. The guys were added with foam tape. Last I stamped the Is That Cake sentiment below the tent.
Thanks so much for stopping by!
Dana
Supplies
Stamps: Art Impressions - Ole Buck
Spectrum Noir Makers
Spectrum Noir Inkpads - Sand Storm, Seal Brown, Friar Brown, Midnight, Ocean Blue, Pine Tree, Grasshopper.
Simon Says Stamp Masking Paper
December 5, 2018
Sana Claus is Coming to Town
Hello!!
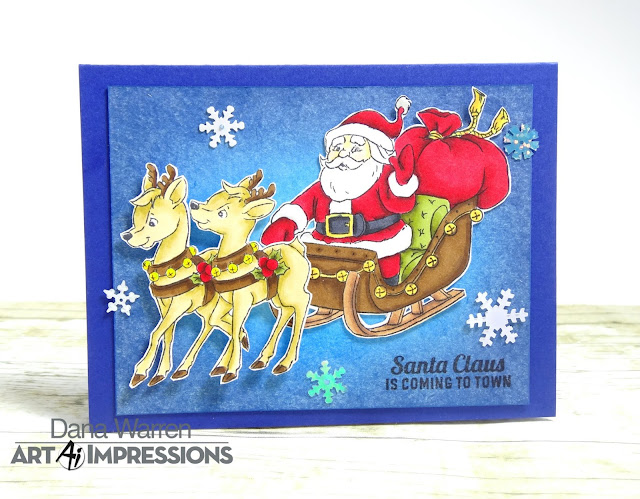
I'm on the Art impressions blog today!! I can't believe it's December already!! That means Christmas is right around the corner!! My card today features the new Sleigh Bells stamp set!!
I started with a small panel of cardstock and used my Spectrum Noir Inkpads to ink a blue sky, I was going for night and in hindsight could have added a little black! But I like it anyway!! Once I had it all inked I set it aside to try while I stamped and colored my images.
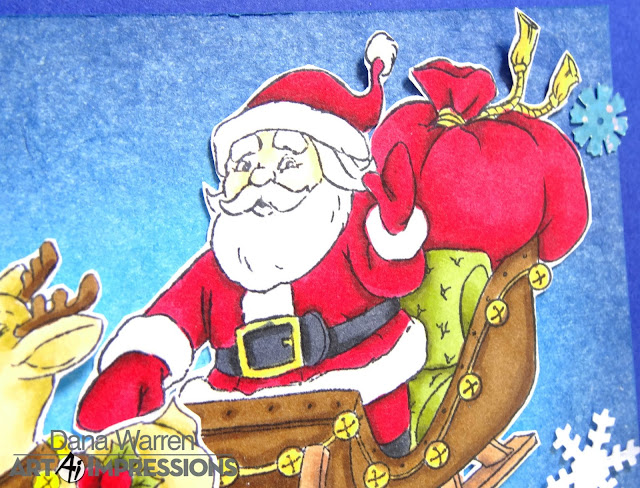
I stamped the santa and reindeer images on white cardstock and used my Spectrum Noir Markers to color them. I used: CG3, CG4, R4, DR5, DR6, DR7, EB1, EB2, EB5, EB6, GB4, GB5, GB8, IG6, IG10. Then I fussy cut out the images.
Next, I adhered the inked panel to a navy blue cardbase and then added the Santa directly to the panel. For the reindeer I added them with foam tape.
To add a little sparkle I adhered a few snowflakes from Trinity Stamps Blizzard Shaker Embellishment mix! Last, I stamped the Santa Clause is Coming to Town in the bottom right corner
Thanks for stopping by!!
Dana
Supplies
Stamps: Art Impressions - Sleigh Bells
Spectrum Noir Inkpads
Spectrum Noir Markers
Trinity Stamps - Blizzard Shaker Embellishment Mix
December 3, 2018
Coffee Loving Card Makers Blog Hop - Card #2
Hello!!
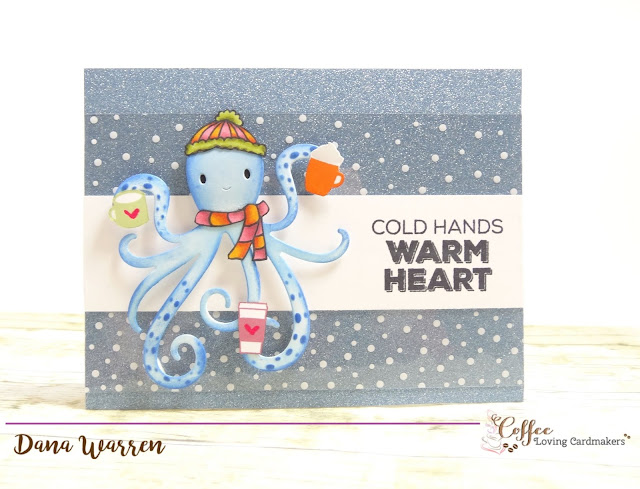
Today I'm back with my second card for the Coffee Loving Card Makers!! This summer I used some Birthday money and got this super cute octopus die, but I never got around to using it. So I got to think of a way to use it for the hop and I think it turned out so cute!!!
I started by die cutting the octopus by Spellbinders and then using my Spectrum Noir Harmony Inkpads Ocean Blue, Baby Blue and Midnight to ink up the octopus. I figured blue because whats more winter then blue!!
Then I pulled out Honey Bee Stamps Flakey Friends it has just the right sized coffee cups, scarf and hat for my octopus. I used colored ink to stamp the cups. For the scarf and hat I used my Spectrum Noir Markers to color them up. Then I just fussy cut everything out and adhered them to the octopus!
Next, I cut a strip of white card stock and stamped the Cold Hands Warm Hearts from Echo Park Paper Co - But First Coffee stamp set. I adhered the strip to a snow patterned acetate and then finally to some blue glitter cardstock. Everything went on a cardbase and the octopus was added with foam tape!
Thanks so much for stopping by!! Make sure to stop by and check out all the sponsors, then play along for your chance to win!
Dana
Supplies
Stamps: Honey Bee Stamps - Flakey Friends. Echo Park Paper Co - But First Coffee
Glitter Cardstock & Snow Acetate - Crafter's Companion
Die: Spellbinders - Happy Octopus
Ink: Spectrum Noir Harmony Inkpads - Ocean Blue, Baby Blue, Midnight. Papertrey Ink - Spring Moss, Autumn Rose, Orange Zest
Markers: Spectrum Noir - AP1, AP2, AP4, BO2, BO3, BO4, DG4, DR4, YG1, YG2
November 12, 2018
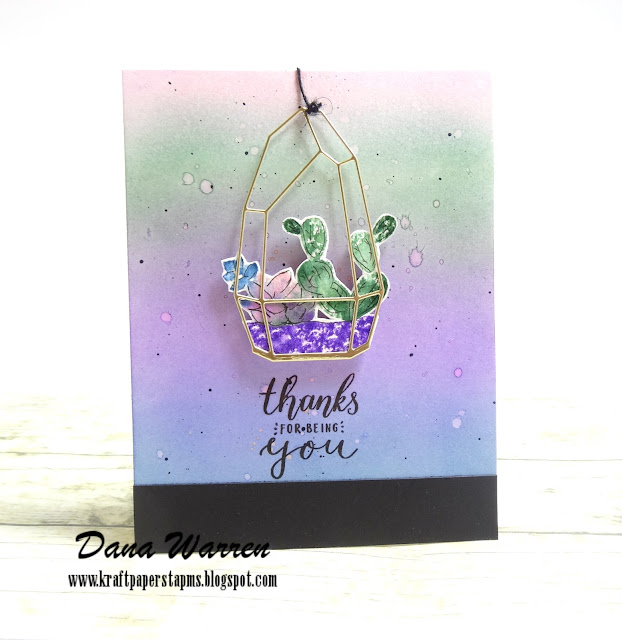
Thanks for Being You
Hello!!
I'm popping in with a card I made for PinkFresh Studio November Challenge! I missed the past couple months, I've been soooo busy! It hasn't gotten much better, but I needed to take a little break from my DT designing and playing with some unused goodies is a great way to refresh my mojo!!
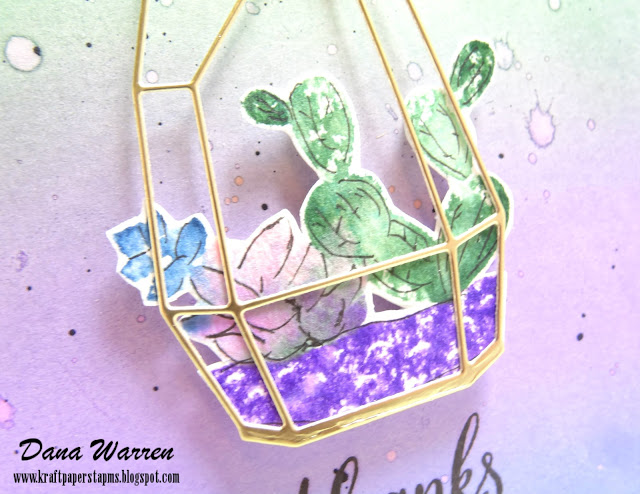
The above is the graphic with the colors and theme! I went through my inks and picked out colors that were close. I started with the Simply Succulents stamp set, using my MISTI to do some watercolor stamping with the inks. The inks I used are listed at the end of this post.
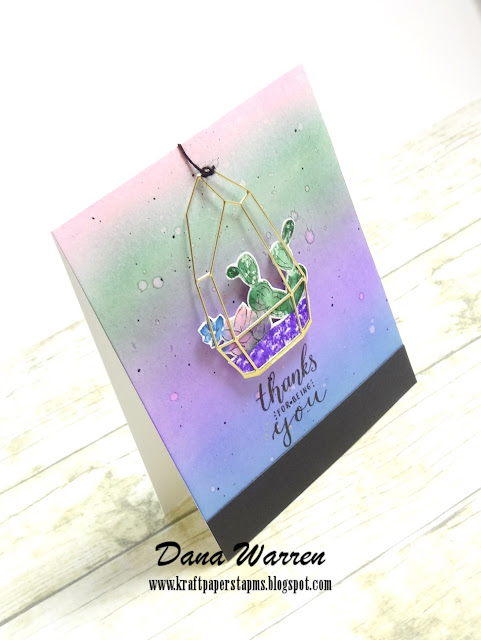
I wanted to add a few details, so I went in with a fine black pen and added some lines using the stamp as a guide. Then I fussy cut out the succulent planter. From a matte gold card stock I used one of PinkFresh's Terrarium dies. I just adhered it on top of my succulents.
Next, I used the same inks to blend an inked background. I used Bristol card stock for the first time and wow!! it blended wonderfully!!! I added a few splatters of water and then black paint.
When that was dry I added a strip of black card stock along the bottom and then stamped the Thanks For Being You sentiment above that.
I tied some black twine at the top of the terrarium and after adhering the succulents with foam tape added a bit of glue at the top of the card for the twine, cutting off the extra when it was dry.
Thanks so much for stopping by!!
Dana
Supplies
Stamps: PinkFresh Studio - Simply Succulents
Die: PinkFresh Studio - Terrarium
Ink: Spectrum Noir - Green Topaz, Smoked Emerald, Damson Wine. Papertrey Ink - Enchanted Evening. Memento - Angel Pink
August 11, 2018
Crafter's Companion on HSN - Wednesday August 15th
Hello!!
I'm stopping by with a card I made with some new products coming to HSN this coming Wednesday! Crafter's Companion has a TON of great new products available that day!
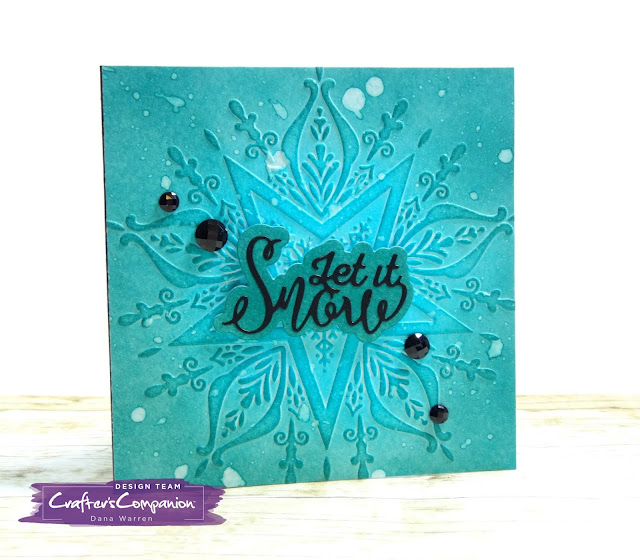
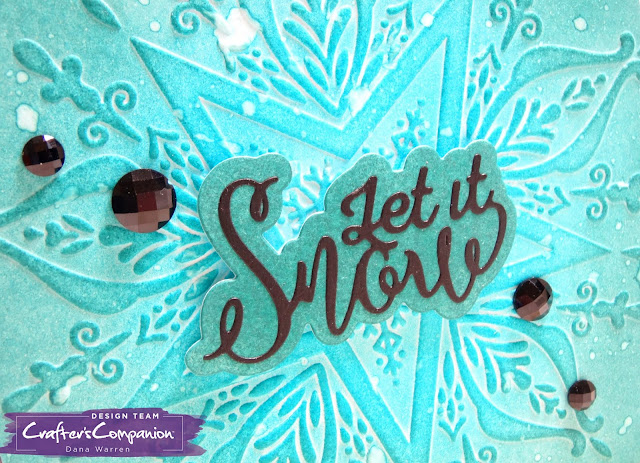
My card today features Christmas Sentimental 2, which are new word dies! I also used a snowflake embossing folder, a Sara Davies Signature Collection: Winter Wonderland - Snow Crystal. With CC's watercolor cardstock I ran the folder through my Gemini.
Then I used the new Spectrum Noir Inkpads to color the embossed panel, Lagoon, Parakeet, Oasis. I used the lightest color in the middle and darker at the end. Then I splattered some water over the panel. I let it sit for a while before blighting it away.
Next, I used the darkest color to ink up a scrap paper, then I used the Let It Snow outline die. From black cardstock, I cut the actual word die and added it to the outline.
I added the sentiment and black gems to the embossed panel, then I added the panel to a black card base.
Thanks for stopping by!!
Dana
Subscribe to:
Posts (Atom)
