Achievements

Showing posts with label Foil. Show all posts

November 3, 2020

Graciellie Designs - Live for Today

 Hello!

I'm popping in today to share a card I made with Graciellie Designs new digital stamp set, Live for Today! A beautiful winter bird with great sentiments!! 

I started by opening the bird in Word. I resized it and added the Live for Today sentiment. Then I printed it out and used my Copic markers to color it up. Instead of really blending the coloring, I did a more stippling like technique to dot the color and blend it. Then I fussy cut most of the image out, using my paper trimmer to cut the sentiment. 

For the background I decided to pick out a dark red card base and use my Wow Embossing Fab Foil. I started with Funky Fossil Designs Snow Flurry stencil and watermark ink. I only inked up the top half of the card base.

Then I added Wow Embossing Bonding Powder to the watermark ink and heated it. With Wow Fab Foil, I added the white foil, shiny side up onto the melted powder. 


Next, I heated up my regular cloths iron and placed my card base face down, opened the card and ironed the back of the front card base. Trim off any access foil as you don't what it to melt to your iron. I did this a few times, letting the card stock cool in between. The hardest part is the edges and the top, I think I get it all but there's usually a few spots I miss!! lol!!

After the card has cooled I pulled the foil and and wa-la I have my foiled white snowflakes! I always keep what I pulled up, down the road I'll use it on a card!!

Last I added the bird and sentiment to the card with foam tape! 

Thanks for stopping by!

Dana

September 23, 2020

Graciellie Designs - Simply Blessed

 Hello!!

I'm popping in today with a card featuring Graciellie Designs newest digital stamp set, Simply Blessed! This gorgeous set is perfect for fall or really even time if you are so inclined!! 


I started my card by first opening the image in a Word document and resizing. I added the sentiment and printed it out. Then I pulled out Copics and colored the image. 

With a rectangle die I cut the image out, with the jar in the bottom left corner. With sharp scissors I fussy cut around the image and sentiment on the right side. 

For the background I used Wow Embossing Bonding Powder with a Hero Arts stencil and versamark ink. I used my heating gun to melt the powder. Then I placed the Wow foil, colored side on top over the melted powder. 

To have the foil stick to the melted powder I used an iron on the wrong side of the paper. This was the first time I've done this and it worked pretty well. I did miss, I think with the iron, the top part of the card, but over all you get a nice distress look as its not 100% perfect. Great way to use foil with out the a heating plate system.

I added the colored image with foam tape. I keep the left over sheet from my project to use on a future project. 

Thanks so much for stopping by!!

Dana

October 3, 2019

National Coffee Day/Week Bonus Card

Hello!

Happy National Coffee Day/Week. The Coffee Loving Cardmakers are celebrating on the day, this past Sunday AND all week long!! Check out this post for blog hop and your chance to at some crafty goodies! Don't forget to stop by the blog each day this week for some great Coffee Inspiration!!

Today I have one card on the CLC blog and another here as a bonus! I played around with two fabulous Super Sponsors Newton's Nook and Thermoweb!!
Dana Warren - Kraft Paper Stamps - Newton's Nook, Thermoweb
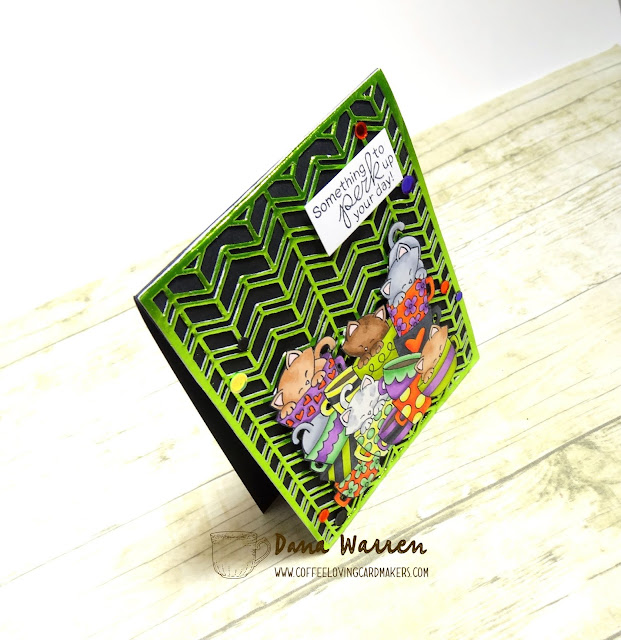
I started with Newton's Nook Caffeinated cats and stamped it on white card stock. Then I used my Spectrum Noir markers to color the bottom 3/4 of the image. I didn't color the top part because I will cut it off. I want to see more of the background, so just just a portion of the total image.  When I was done coloring I fussy cut the image out.

Dana Warren - Kraft Paper Stamps - Newton's Nook, Thermoweb

Next, I used Thermoweb's Deco Foil Foam Adhesive and Crafter's Companion Chevron die. Once the foam was cut I peeled one sides backing off and added the Lime foil on top. I ran it through my die cutting machine to make sure the foil was nicely adhered to the foam adhesive. I peeled off the foil and will use what is left on a future card.

Dana Warren - Kraft Paper Stamps - Newton's Nook, Thermoweb

I peeled the other sides backing off and adhered it to a black card base. Then I adhered the colored cats to the foiled adhesive.  I stamped the Something to Perk Up Your Day sentiment, trimmed it and added it to the card. As a final touch I added a few matching sequins.

Thanks so much for stopping by!!!

Dana


August 15, 2018

Crafter's Companion on HSN Today!!

Hello!!

Crafter's Companion is on HSN today!! Tons of great new products, including a new Signature Collection: Winter Wonderland!!!
Dana Warren - Kraft Paper Stamps - Crafter's Companion Winter Wonderland - Watercolor Smooshing

This collection has a ton new dies, embossing folders, pattern papers and stamps!! My card today features the Sparkling Snowflake. It's big!! I used Spectrum Noir Aqua Markers to do some watercolor smooshing!

Dana Warren - Kraft Paper Stamps - Crafter's Companion Winter Wonderland - Watercolor Smooshing

To a panel of watercolor cardstock, I added a wash of light blue. When that was dried I added snowflake foil transfers and foil to make a panel nice and sparkling!! I added the panel to a blue card base.
Dana Warren - Kraft Paper Stamps - Crafter's Companion Winter Wonderland - Watercolor Smooshing

Next, I cut a grey circle and added the Hello Winter foil transfer to the center. Then I added the snowflake and sentiment circle to the card.

Thanks for stopping by!!

Dana

Supplies
Crafter's Companion - Sara Davies Signature Collection: Winter Wonderland - Sparkling Snowflake Die, Foil Transfers and foil: Ice Blue, Sparkling Snowflake
Spectrum Noir Aqua Markers: Kingfisher, Teal, Navy, Black
Spectrum Noir Sparkle Pen: Moonstone