Hello!!
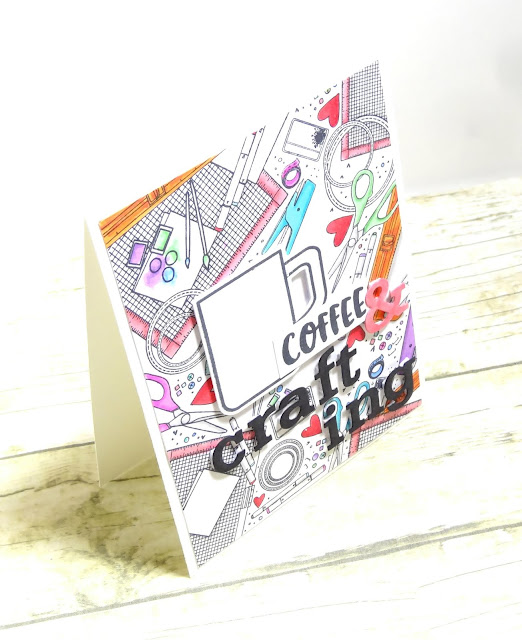
Yep, me again with my 3rd card for Coffee Loving Cardmakers Spring/Summer Blog Hop! My card today features a few different Sponsors! While driving home from my internship I had an idea on mixing non coffee stamps, with a coffee cup! While not strictly spring or summer, I craft more in the Spring & Summer as the craft room can get cold in the winter. This limits the time I can be in the room!
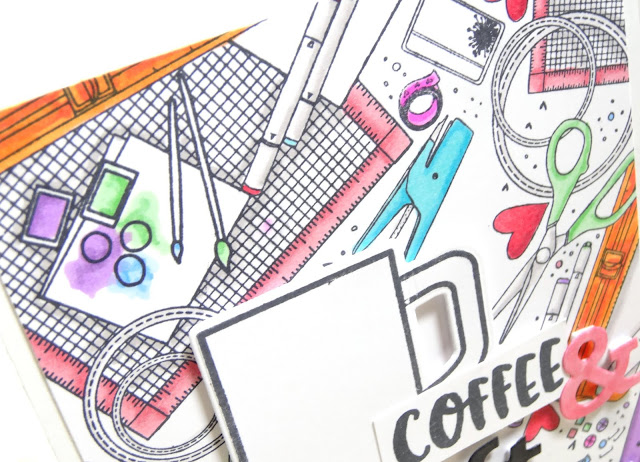
I started with Unity Stamp Company Crafty Supplies Border Backgrounds, stamping it on a white panel. Then I used my Spectrum Noir Tri-Blend Markers to color it up.
Next, I pulled out Honey Bee Stamps Tea Time stamps and dies and used one of the mugs. I masked off the the tea bag hanging over the cup. Because the background is so busy I wanted the cup the be simple.
I stamped the Coffee sentiment from Honey Bee Stamps Perfect Blend stamp set. Then I pulled out some alpha dies I have by Papertrey Ink Block Alpha. I colored them black except the & which I colored pink.
Last, I added the cup, sentiment and letters with foam tape. The panel was then added to a white cardbase.
Thanks so much for stopping by! Make sure you play along with your own Spring/Summer Coffee/tea themed project!! Who knows you could win this AMAZING prize pack from Unity Stamp Co!
Dana
Supplies
Stamps: Unity Stamp Co - Crafty Supplies. Honey Bee Stamps - Perfect Blend, Tea Time (and dies)
Dies: Papertrey Ink - Block Alpha
Spectrum Noir Tri-Blend Markers
Showing posts with label Unity Stamp Co.. Show all posts
Showing posts with label Unity Stamp Co.. Show all posts
May 8, 2019
August 23, 2018
Coffee Loving Cardmakers & Graciellie Designs
Hello!!
This is my second post today, you can check out my Art Impressions post here.
Coffee Loving Cardmakers & Graciellie Designs has gotten together for a collaboration!! Lots of great coffee inspiration!! Graciellie has an AWESOME new stamp set! If you like digi stamps check it out here or if you prefer a physical stamp check it out here on Unity Stamp Co website site!!
You can visit the CLC blog for the list of designers participating. Make sure to comment on all blogs for your chance to win a $10 gift card to Graciellie Design store!!
The new Stay Strong set is awesome!! Great coffee image, lots of sentiments and even a pretty flower!! In fact, I couldn't just make one card!! I made two!!
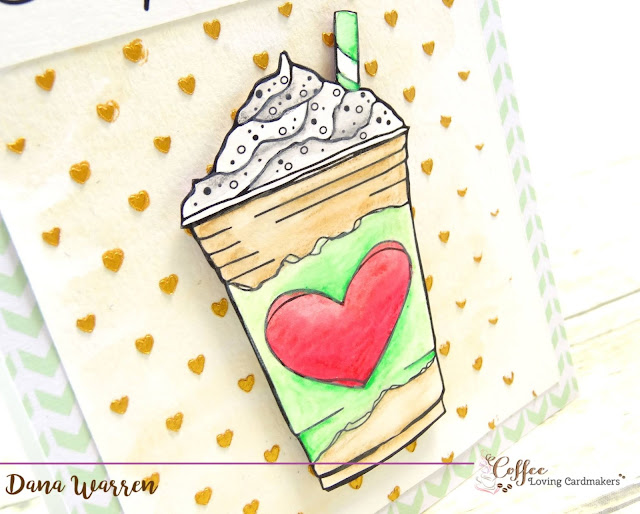
For both cards, I used the digi and adjust the sizes. The first card features the coffee up! So cute!! I printed it out on watercolor cardstock. Then I used my Spectrum Noir Aqua Pencils to color it. The colors I used were Bamboo, Gun Metal, Bright Green, Red Berry, Claret, Umber. When the watercoloring was done I fussy cut it out.
I took a panel of watercolor and used a sparkley gold watercolors. The little pot does not have a brand name and I've had it forever. Its called Golden Nugget and with a little water, you get a nice transparent sparkly coverage. When it was dry I used a Simon Says Stamp tiny heart stencil and some Faber Castell Texture Gold Paste over the gold watercolor.
When that was dry I cut it down a bit and added it to some mint pattern paper. I added the sentiment near the top and then added the coffee cup with foam tape.
For my second card, I used just the flower, adjusting the size so it was fairly large. I used the Spectrum Noir Aqua Pencils to color it too!! I used Pineapple, Iris, Aubergine, Bottle Green, Spruce. When it was dry I fussy cut it out.
Next, I used Hero Arts Ombre Mermaid ink pad and dragged it once across some watercolor cardstock. It didn't fill the panel, so I moved the paper and did another drag to fill the panel. From some aqua cardstock, I used a fancy edge die. I added this edge cut out to a navy blue card base.
Then I added the watercolor panel on top, it covered up some of the fancy edge, but enough still shows. Then I added the flower and scattered a few sequins around it.
Thanks for stopping by!! Make sure to leave a comment for your chance to win!! Check out the CLC blog for a list of all the designers!!
NEWS FLASH!! Great Coffee Bundle Sale at Graciellie Designs!!
Dana
Supplies
Stamps: Graciellie Designs - Stay Strong
Spectrum Noir Aqua Blend Pencils
Hero Arts Ombre Ink - Mermaid
Neat & Tangled Sequins - Winter Wonderland Mix
Little Things Lucy Cards Sequins - Mermaid
Faber Castel Texture Paste - Gold
Pattern Paper: We R Memory Keepers - Snapshots
Crafter's Companion Create A Card Die - Sophia
June 1, 2016
Be Cool
Hello!
I'm popping in with a card I made for Unity's Show and Tell Challenge. It's the Itty Bitty Challenge and I had one on my desk so I figured no time like the present to use it!!!
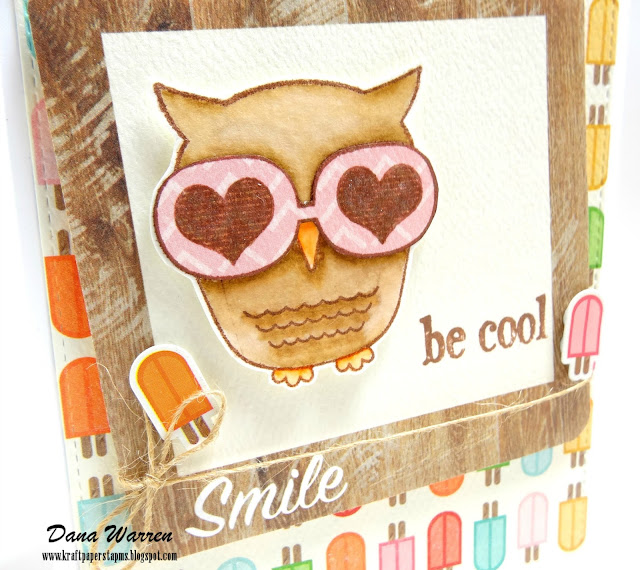
I stamped the cute owl from the Be Cool & Be Mine Itty Bitty set on some water color paper, then I used Distress Markers to color her. I also stamped her on some pattern paper and fussy cut out the glasses and then adhered them to my colored image. Next I fussy cut out the owl and then used a Clear Spectrum Noir Sparkle Pen to add a little sparkle to the heart's on her glasses.
Next I found some cute Popsicle pattern paper that I thought would be perfect with the Be Cool part of the sentiment. I cut it out with a stitched rectangle. From the same collection I found a journal card that had a wood frame and said smile. I trimmed off the pattern paper it had around the frame and then rounded the corners.
Then I masked off the Be Mine part of the stamp and just stamped the Be Cool on the framed journal square. I added the owl with foam tape and then wrapped some twine around it and tied it in a bow.
From the sticker sheet in the collection I found two little Popsicles and I added them to the journal frame with foam tape. I added the frame to the card with foam tape and last I added a little more Clear Sparkle Pen to the Popsicles on the pattern paper.
Thanks for stopping by!!
Dana
Supplies
Stamps: Unity Stamp Co: Itty Bitty - Be Cool & Be Mine
Collection Pack: Carta Bella - Soak Up the Sun
Distress Markers: Carved Pumpkin, Gathered Twigs
Twine: Maya Road
May 2, 2016
I'd Be Lion
Hello!!
I'm sharing a card I made this past weekend. I made it for fun and for Unity's Facebook Show & Tell Challenge. The challenge this week is to use an Itty Bitty stamp, so I looked through my Unity collection and pulled out I'd Be Lion Itty Bitty that saw ink for the first time!
First I cut some stripe pattern paper from Photo Play Paper, Paper Doll Collection to fit a card base. Then I used a heart die to cut a heart window from the stripe panel. I found a piece of water color that would fit behind the heart.
I stamped the lion and then used some Prima water colors to color the lion. Then I adhered the stripe panel with the heart window over the lion.
Next I stamped the sentiment below the heart. From the Paper Doll Collection sticker sheet I picked out a heart and sentiment sticker. Then I used baby powder to take care of the stickiness, that way I can play around the placement. I used twine to make a little bow, then added the heart and sentiment on top of the bow.
Dana
Supplies
Stamps: Unity Stamp Co - I'd Be Lion
Dies: Little B - Hearts
Pattern Paper/Stickers: Photo Play Paper - Paper Doll Collection
Watercolors: Prima Watercolor Confections - Decadent Pies
April 12, 2016
Ship Happens
Hello!
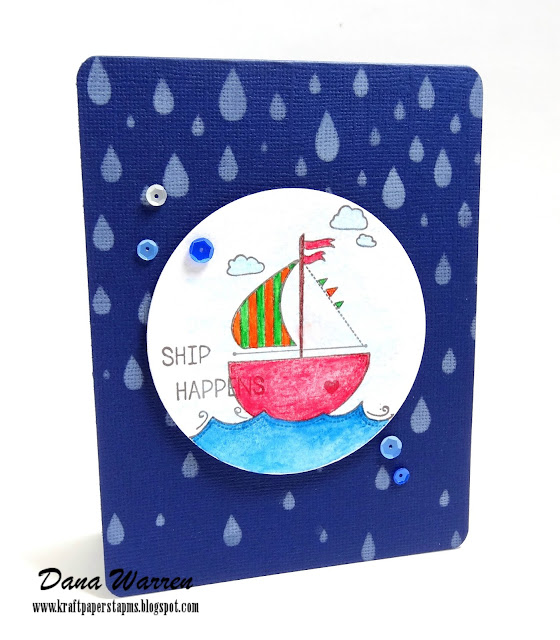
I'm sharing my second card today, i made it for Unity Show & Tell Photo Challenge. The photo inspiration has these colorful raindrops and which reminded me that i have a raindrop stencil that would go great with Unity's Ship Happens stamp set!
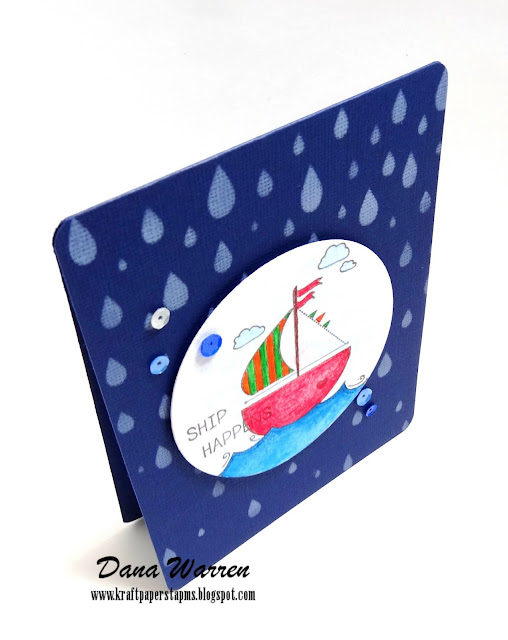
I started with a navy blue card base and then placed the rain drop stencil over it. I inked the stencil with an ink applicator and white pigment ink. Then i set the card base aside to dry.
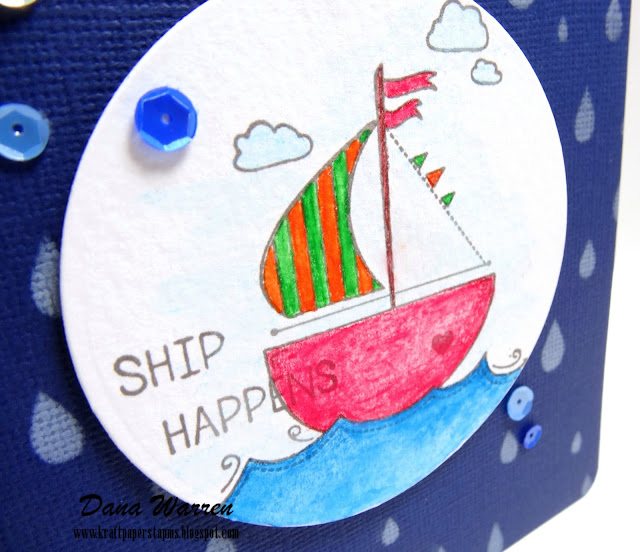
Next i cut a circle from water color paper and stamped the image on it. The sentiment is all on one line, which i didn't want. So i selectively ink each word to get then staggered.
I used my Crafter's Companion AquaBlend watercolor pencils to color the image, then added water to it to create the lovely textured watercolor.
I added the circle with foam tape to my card base and then added a few white and blue sequins. Last i rounded the corners.
Thanks for stopping by!!
Dana
Supplies
Stamps: Unity Stamp Co. - Ship Happens
Crafter's Companion AquaBlend Watercolor Pencils
Die: Spellbinders - Circle
Stencil: Simon Says Stamp - Rain Drops
April 1, 2016
Pinterest Inspired April Challenge
Hello!
It's the first of the month (can you believe it's April already!?!?!) and that means its time for anew challenge over at Pinterest Inspired Challenge!!
Here is this months inspiration photo.
I really liked the white outline of the flowers with the pretty colors inside each shape. I decided to give something a try, and i think it worked out great!! My background is white embossed, not with a stamp but from a stencil!! I placed a stencil over a panel of white card stock and then pressed my versamark ink pad into the open areas of the stencil. To get a good layer of the ink i really pressed and repressed the versamark through the open areas. Then i removed the stencil and added the white embossing powder and heated it.
Next i picked out some distress markers that were close to the photo colors (not quite the same) and then squiggled them on a clear block and with water added them to my embossed image. Since i didn;t use watercolor paper, the colors didn;t blend well, and that's what i was going for, bright color with minimal blending.
I set that aside to dry and then stamped the flower image on some white water color card stock. Then i used the same colors to color the image, adding in a green for the stems. Next i fussy cut it out and set it aside too.
Then i cut a strip black card stock and stamped the sentiment that came with the flowers. I heat embossed the sentiment then added it across my panel with foam tape. Next i added the flowers and last added a few black pearls.
Thanks so much for stopping by!! I hope you will play along with us at the Pinterset Inspired Challenge
Dana
Supplies
Stamps: Unity Stamp Co - As We Go Along
Stencil: Tim Holtz - Lace
Distress Markers: Pumice Stone, Abandoned Coral, Chipped Sapphire, Mowed Lawn, Peacock Feathers
It's the first of the month (can you believe it's April already!?!?!) and that means its time for anew challenge over at Pinterest Inspired Challenge!!
Here is this months inspiration photo.
 |
| Source |
Next i picked out some distress markers that were close to the photo colors (not quite the same) and then squiggled them on a clear block and with water added them to my embossed image. Since i didn;t use watercolor paper, the colors didn;t blend well, and that's what i was going for, bright color with minimal blending.
I set that aside to dry and then stamped the flower image on some white water color card stock. Then i used the same colors to color the image, adding in a green for the stems. Next i fussy cut it out and set it aside too.
Then i cut a strip black card stock and stamped the sentiment that came with the flowers. I heat embossed the sentiment then added it across my panel with foam tape. Next i added the flowers and last added a few black pearls.
Thanks so much for stopping by!! I hope you will play along with us at the Pinterset Inspired Challenge
Dana
Supplies
Stamps: Unity Stamp Co - As We Go Along
Stencil: Tim Holtz - Lace
Distress Markers: Pumice Stone, Abandoned Coral, Chipped Sapphire, Mowed Lawn, Peacock Feathers
March 29, 2016
Little Moments With You Matter
Hello!
My mojo has been zip, nada, just not around .... anywhere!!! Unfortunately stress from my class has just really affected my creativity, but this weekend i tried to just set it aside and do some crafting and i was able to do a few cards, some for fun and a few challenges and some others for my design teams. Today's card i made for Unity Stamp Co's Show & Tell Facebook group, the challenge this week is anything goes with any Unity girl.
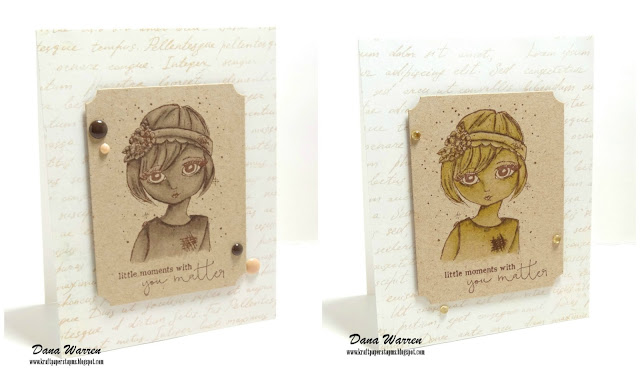
I've been seeing a lot of monochromatic coloring and finally got around to giving it a try! I started with some Kraft card stock and i stamped the girl from Unity's Only Imagine stamp set with some brown ink. Then i used my Spectrum Noir markers BG1, BG4, BG7 to color her up. I did leave her eyes uncolored.
Next i stamped the sentiment below her in brown ink and then cut her how with a fancy rectangle die. Then i found some pretty text pattern paper and i added it to a white card base. Then i added the stamped rectangle with foam tape and last i added a few matching enamel dots.
Now this was my second attempt at monochromatic coloring, i first stamped and colored with EB1, EB2, EB7 (on the left) but i wasn't sure i liked it, so i did it again with the BG colors. I decided i like the BG colors the best (on the right), but then figured i already had the other one colored i might as well make a card out of it too.
After editing the photo's, i'm not sure which one i like the best, on one hand i like them, but on another i think the colors are just a little too different! It's probably because i've never colored anything monochromatic before! Which one do you prefer?
Thanks so much for stopping by!!
Dana
Supplies
Stamps: Unity Stamp Co. - Only Imagine
Die: Spellbinders
Kraft Cardstock: Crafter's Companion
Pattern Paper: Photo Play Paper - Paper Dolls - Cuteness
Spectrum Noir Markers
Enamel Dots: My Minds Eye - Mistletoe Magic
February 9, 2016
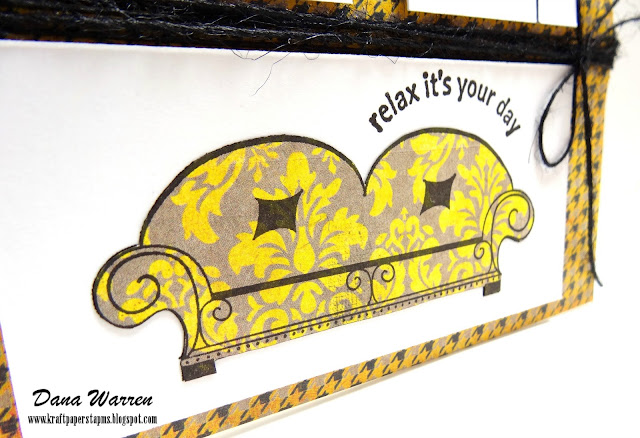
Relax It's Your Day
Hello!
I'm popping in with a card i made for Unity Stamp Co's Show & Tell Facebook Challenge. I needed to do something a little different and set aside my DT stamps for a few hours and this is one the cards i made!
The challenge is a sketch:
I started by cutting white card stock rectangles and then stamping the couch, chair and lamp from Unity's Comfy Cozy stamp set. Then i decided to do some paper peicing so i found some pattern paper that i liked.
Next i picked out one pattern paper and wrapped some black twine around the panel, tieing it in a bow. After adding the patterns to the furnature i stamped the sentiment Relax It's Your Day above the couch.
Last i added the rectangles to my panel with foam tape and then added the panel to a white card base.
Thanks so much for stopping by!!
Dana
November 17, 2015
Addicted to Stamps and More - Challenge #171
Hello!!
It's time for a new challenge over at Addicted to Stamps and More!! It's a great challenge too!! Anything Goes!!
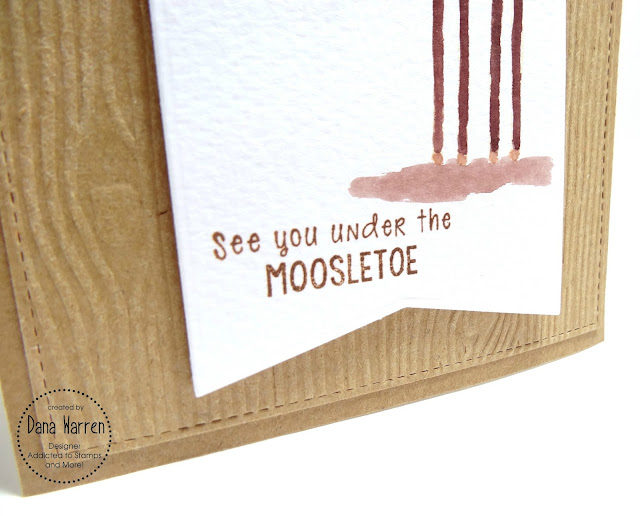
I decided to go with a Christmas card and use some stamps i got a while back that i hadn;t used yet, Very Merry Christmoose by Unity Stamp Company. Also, i tried my hand at no line coloring!!
I stamped the moose with some Antique Linen Distress Ink on some white watercolor paper. Next i used notched banner die to cut out the moose.
With my Spectrum Noir Markers i colored in the moose. It was a little challenging, but over all it wasn't bad! I think it turned out ok!! I added a little blue rhinestone to the snowflake and stamped the sentiment below the moose. Then i wrapped some twine around the banner and tied it into bow.
Next i used a woodgrain embossing folder to emboss a panel of Kraft card stock. I trimmed it down a little and added it to a Kraft card base. Last i added my stamped banner with foam tape.
Thanks so much for stopping by!!
Dana
Subscribe to:
Posts (Atom)


