Hello and Happy Friday!
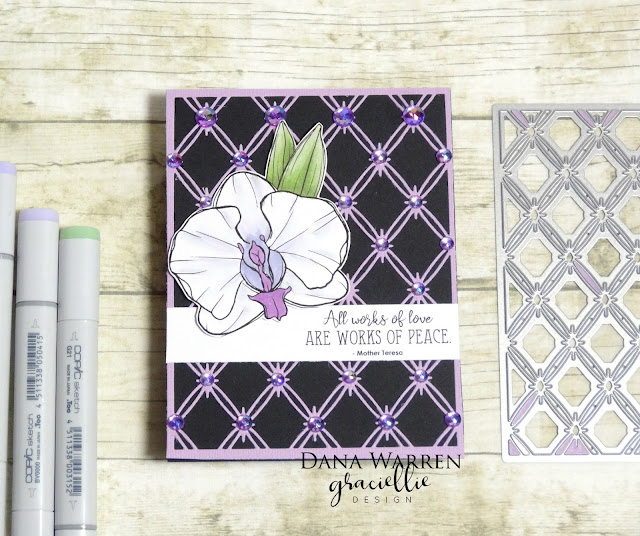
Today I have a card featuring Graciellie Designs new Words of Hope digital stamp set! Gracie has a new May/June Bundle 2020 Bundle and its on SALE!!! Yay!! I would snap this up now, its full of gorgeous images and fabulous sentiments! Please note my Graciellie Designs links are affiliate links.
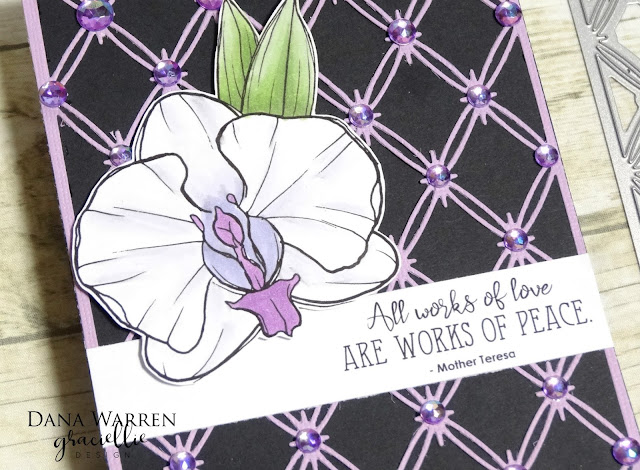
I added the lone orchid image to a word document, then made it bigger. I also added an leaf and a sentiment. Then I printed it out and used my Copic markers to color it the images. With sharp scissors I fussy cut the flowers and leaves out.
Next, I used a Crafter's Companion background die to cut some light purple card stock. I adhered this panel to a black card base.
I trimmed the sentiment and added it to my card, then I added the orchid and leaves to the card with foam tape. Then for some sparkle I added some purple rhinestones following the pattern of the purple background die cut.
Thanks so much for stopping by!!
Dana
Showing posts with label Crafter's Companion. Show all posts
Showing posts with label Crafter's Companion. Show all posts
June 26, 2020
March 31, 2020
Graciellie Designs - Angels in Disguise
Hello!!
Today I'm popping in with two cards I used with NEW Graciellie Designs digital stamps!! The set is called Angels in Disguise, perfect for the way the world is right now! I used the female image, but never fear there is a male version in the set too!!
I made two cards with this set because I wanted to show how diversified digi's and this set is!! My first card uses the image as it is in the set, I just added a sentiment below it and printed it out. If you or someone you know is not religious, like me, sending a secular card can still be done with set! I printed out the image and a sentiment, colored it and then fussy cut the nurses head without the hands and wings.
For my first card the image was printed with the sentiment, then colored with my Crafter's Companion Colour Blend pencils. I used a stitched rectangle to cut out the image and sentiment.
From my stash I found some gold vellum like paper that I added to a white card base and then added the stitched rectangle. Last, I added a three pearls at the bottom. I went a little more elegant and less is more with these cards!
With my second card I printed and colored with the same colored pencils mentioned above. I fussy cut the head of the nurse and trimmed the sentiment. From my stash I found a rectangle that I had used a stencil with transparent paste and glitter. I adhered it to a white card base.
Next, I cut a white stitched rectangle and adhered the colored image and sentiment with foam tape. Then I adhered the small panel to the glitter paste with foam tape. Again, I was going more elegant and thought the sparkly background was enough embellishment!
Thanks so much for stopping by! I hope every one stays healthy and safe, at home!!
Dana
July 26, 2019
Shaker Card with Crafter's Companion
Hello!!
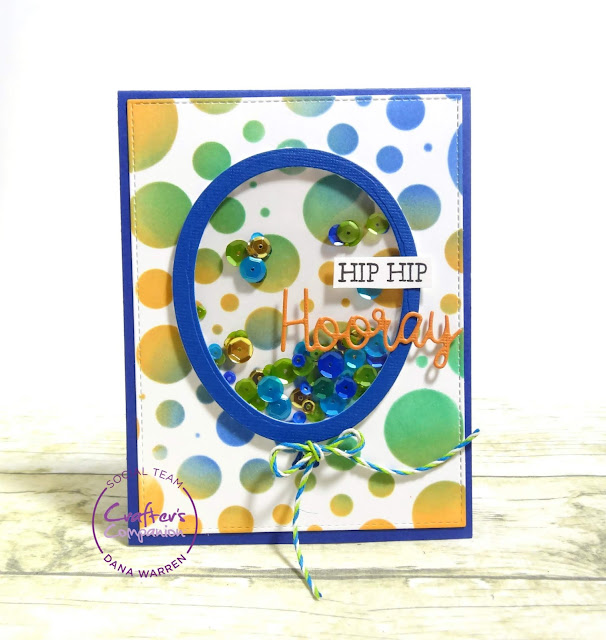
I hope everyone is having a great day!! Today I'm sharing an easy shaker card with you! And I made it masculine, which is really easy to do with a basic birthday stamp and die set!
I started with Crafter's Companion Hip Hip Hooray Shaker Card Stamp and Die Set! I made the shaker using the balloon die and cutting some CC Bright Textured Cardstock. I also cut the hooray from the pad using the orange.
Next, I used a circle stencil and Spectrum Noir Inkpads to ink the circles in. I used Midnight, Holly Leaf and Orange. Then I used a stitched rectangle die to cut a panel. I added the panel to a blue card base.
To create the shaker I adhered clear acetate to the back of the balloon, then added foam tape. I added some matching sequins and then adhered the balloon to the panel over the sequins with the foam tape.
I stamped and cut out the Hip Hip and adhered them and the Hooray to the balloon. I found some twine that happened to match and tied that around the bottom of the balloon.
Thanks so much for stopping by!!
Dana
Supplies
Stamps: Crafter's Companion : Hip Hip Hooray
Ink: Spectrum Noir Inkpads
Sequins: Neat & Tangled - Peacock Feather Mix
Circle Stencil
July 12, 2019
Card Making with a Paper Bag
Hello!!
So, today is Paper Bag Day!! They have a day for anything and everything!! I thought I would use a paper bag in my crafting to help celebrate!! Haha!!
Since a paper bag is made out of a thick Kraft card stock I decided it would be perfect to use with an embossing folder!!! I used Crafter's Companion Ocean Waves embossing folder. I used a little bit of brown Spectrum Noir Inkpad to darken a few areas here and there. This made seeing the embossing a little bit better. I also roughed up the edges a little.
Next, I stamped the lighthouse from Crafter's Companion Nautical Elements. I stamped it on CC's Kraft Card stock, which is a very close match to the grocery paper bag I used with the embossing folder. I got it from a major grocery chain.
I pulled out a random Spectrum Noir Brown marker to add a little shading to the image. Then I added a few details/highlights with opaque white pen. I also stamped two of the sea gulls, then fussy cut them and the lighthouse.
From CC's Pastel Textured Card stock pad I used a blue shade adding it to the bottom of the embossed panel. Then I stamped the Happy Birthday on the textured card stock. Last I added the lighthouse and sea gulls before adding the panel to a blue card base!
Thanks so much for stopping by!!
Dana
June 24, 2019
No Line Coloring with Crafter's Companion
Hello!!
I'm starting the week of with some No Line Coloring. I haven't done this in awhile but I saw someone doing it on Instagram and it inspired me to break out my gorgeous Crafter's Companion flower stamps!! My card today features the Beautiful Blooms set!
To make the image no line I used Spectrum Noir Inkpad Sandstorm, but I stamped it off first to make it a really light tan color. I stamped the image three times on a card stock panel.
Then I got to coloring! It does take longer because you have to be aware of the lines, doing a little at a time. I use the packaging as a guide to make sure I'm really coloring a petal the correct way. But, don't worry about being perfect! Only you know what the image should really look like and there were definitely places I color it a little different then the original stamp!!
To color the images I used my Spectrum Noir Tri-Blend Markers - Blends: Pale Pink, Light Yellow, Hydrangea, Dull Green.
When I was done coloring I stamped the Birthday Wishes with the SN Inkpad Noir Black. Last I added a few sequins for a little texture and sparkle!
Thanks so much for stopping by!!
Dana
Supplies
Stamps: Crafter's Companion - Beautiful Blooms
Spectrum Noir Tri Blend Markers
Sequins: Trinity Stamps
June 16, 2019
Clean and Simple with Crafter's Companion
Hello!
I'm stopping by with a card featuring some Crafter's Companion stamps and dies! I did a little coloring and went with a clean and simple card to feature the images!
I started with Jayne Nestorenko Die and Stamp Set - Follow Your Dreams! These are 50% so snap these up fast, I'm not sure how long the sale will last!!
After stamping the images I used the matching dies to cut them out. Then I used my Spectrum Noir Tri-Blend markers to color everything up. I used the following of blends: Orange, Earth Brown, Light Green, Ice Grey, Ice Blue, Tan, Fair Skin.
Next I used Crafter's Companion Stitched Edge Die to cut some white cardstock. Then I added some pattern paper to a white card base.
I stamped the Follow Your Dreams sentiment on the square, then I added the stamped and colored images with foam tape. Then I added a notebook edge sticker to the bottom of the square and then added the square to the card with foam tape.
Thanks so much for stopping by!
Dana
Supplies
Stamps: Jayne Nestorenko Die and Stamp Set - Follow Your Dreams
Die: Crafter's Companion Stitched Edge Die
Pattern Paper/Sticker: Photo Play Paper
Spectrum Noir Tri-Blend Markers
June 5, 2019
Foiling Thank You with Crafter's Companion
Hello!
Today I'm sharing a card that features hot foiling! Not too long ago I was able to get Crafter's Companion Foil Press machine and boy it's really fun to use!!
I started by foiling the Thank You Foil Stamp on blue card stock with a gold foil. I trimmed the sentiment and rounded the corners.
Next, I stamped and black heat embossed In Full Bloom on a dark blue card stock card base. I also rounded the corners of the card.
Then I added the foiled sentiment with foam tape and last added a few matching gems. The FoilPress is easy to use and I love the elegant look you get with foil!
Thanks for stopping by!!
Dana
Supplies
Stamps: Crafter's Companion - In Full Bloom
Foil Stamp: Thank You
Crafter's Companion FoilPress
Black embossing powder
In Full Bloom
February 13, 2019
Wishing You Love
Hello!!
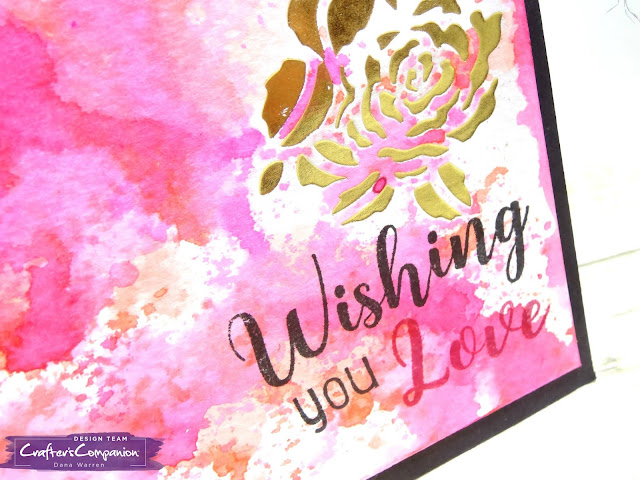
With tomorrow being Valentine's Day, I thought I'd share this fun love card!! Crafter's Companion's Foil Press is now available on their website and I grabbed one as soon as it appeared. I got a couple of the foil stamps and played around with them. This card features one of those experiments!
I started with some watercolor card stock, which is thicker then typical card stock, but the Foil Press had no problem foiling the rose metal stamp. I love how it turned out!!
Next, I did some watercolor smooshing with my Spectrum Noir Harmony Inkpads. I used Chinese Red, Fuchsia, Plum Jam. The watercoloring did not affect the foiling, though I didn't use a ton of water either!
After the watercoloring was dry I stamped Wishing You Love below the foiled rose. I added some black twine at the top of the panel and then added it to a black card base.
Thanks for stopping by!!
Dana
Supplies
Crafter's Companion: Gemini Foiling Press, Gold Foil, Rose Bloom Foil Stamp. Love, Laugh, Laughter Stamp Set.
Spectrum Noir Inkpads: Harmony - Chinese Red, Fuchsia, Plum Jam. Finesse - Noir Black
February 5, 2019
Graciellie Designs - More Than You Know
Hello!!
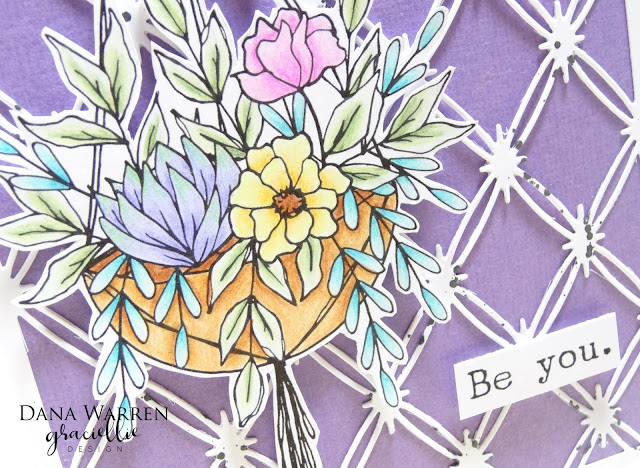
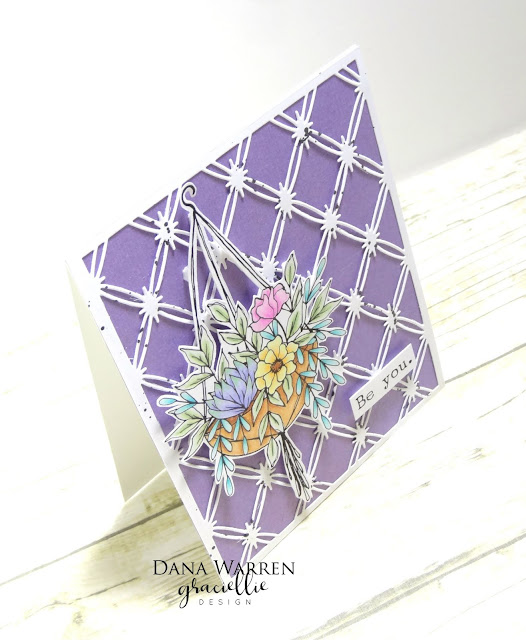
I'm popping in with a card featuring a new Digital stamp from Graciellie Designs! It's called More Than You Know, a really gorgeous flower image with some awesome sentiments!!
I stared by printing the flower basket, sizing it to fit an A2 card along with the Be You sentiment. Then I colored the image with my Spectrum Noir ColourBlend Pencils. Colors used are listed at the end of the post!
Next, I fussy cut out the image and sentiment. With Crafter's Companion Twinkling Trellis background I cut a panel from white card stock. Then I used some black spray ink to flick splatters all over the cut panel.
I found a nice light purple cardstock and adhered it to white card base. When the cut panel was dry I adhered it over the purple. Then I added the colored flower basket and sentiment with foam tape.
Thanks for stopping by!!
Dana
Supplies
Stamps: Graciellie Designs - More Than You Know
Spectrum Noir ColourBlend Pencils: Fern Green, Lunar Yellow, Pearl Blush,Cupid, Sorbet, Amethyst, Pistachio, Verdigris, Duck Egg, Vanilla, Sky Blue, shamrock, Ginger, Walnut, Periwinkle, Pumpkin, Wisteria, Saltwater, Copper
Die: Crafter's Companion - Twinkling Trellis
October 4, 2018
Coffee Loving Cardmakers
Hello!!
This is my second post today! You can click here for my Art Impressions post. I am also on the Coffee Loving Cardmakers blog today with some ideas for Quilt Inspired Cards!! I hope you'll stop by!! Here is a little sneak peek!!
Dana
This is my second post today! You can click here for my Art Impressions post. I am also on the Coffee Loving Cardmakers blog today with some ideas for Quilt Inspired Cards!! I hope you'll stop by!! Here is a little sneak peek!!
Dana
September 7, 2018
Watercolor Stamping with Crafter's Companion
Hello!!
I have to get in my last two 'summery' cards in before we get too far into fall!! I'll share the very last one in a couple days!! I am also entering this card into Simon Says Stamp Wednesday Challenge - Stamp It!
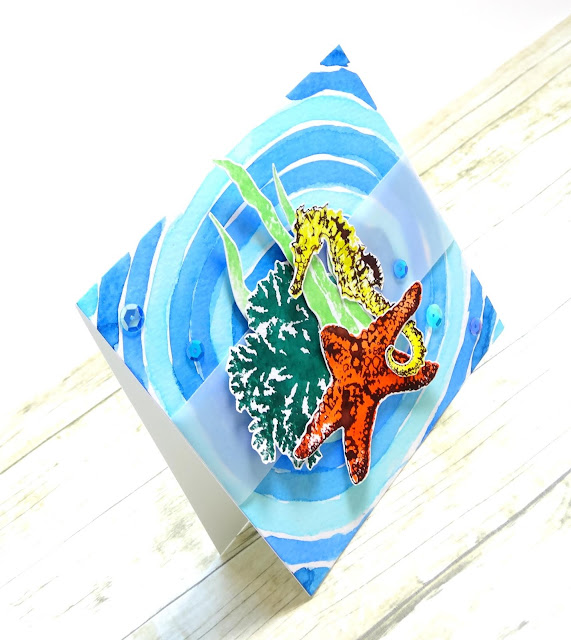
I started with a watercolor panel, square and my Spectrum Noir Aqua Markers. I used Navy, Marine, and Kingfisher. I added a little bit of water to the ink and free handed the circles alternating between light, medium and dark colors. I went round and round until the square panel was filled.
While that dried I used Sheena Douglass Hidden Stars stamp set to do some watercolor stamping. The starfish and seahorse has a solid image and then a detailed image. I used my Misti to get the stamping right. I inked the solid stamps with the markers, spritz with water and stamped. When they were almost dry I did the same thing with the details stamp, but used brown.
I repeated the above for the seaweed and coral. When everything was dried I fussy cut them out. I added a strip of vellum across the card and then arranged the sea life on top. Last I added a few matching sequins. I decided not to add a sentiment because I like how it looked without one!
Thanks for stopping by!!
Dana
Supplies
Stamps: Sheena Douglass - A Little Bit Scenic - Hidden Stars
Spectrum Noir Aqua Markers
Crafter's Companion Watercolor Cardstock
Vellum
Blue Sequins
August 15, 2018
Crafter's Companion on HSN Today!!
Hello!!
Crafter's Companion is on HSN today!! Tons of great new products, including a new Signature Collection: Winter Wonderland!!!
This collection has a ton new dies, embossing folders, pattern papers and stamps!! My card today features the Sparkling Snowflake. It's big!! I used Spectrum Noir Aqua Markers to do some watercolor smooshing!
To a panel of watercolor cardstock, I added a wash of light blue. When that was dried I added snowflake foil transfers and foil to make a panel nice and sparkling!! I added the panel to a blue card base.
Next, I cut a grey circle and added the Hello Winter foil transfer to the center. Then I added the snowflake and sentiment circle to the card.
Thanks for stopping by!!
Dana
Supplies
Crafter's Companion - Sara Davies Signature Collection: Winter Wonderland - Sparkling Snowflake Die, Foil Transfers and foil: Ice Blue, Sparkling Snowflake
Spectrum Noir Aqua Markers: Kingfisher, Teal, Navy, Black
Spectrum Noir Sparkle Pen: Moonstone
August 11, 2018
Crafter's Companion on HSN - Wednesday August 15th
Hello!!
I'm stopping by with a card I made with some new products coming to HSN this coming Wednesday! Crafter's Companion has a TON of great new products available that day!
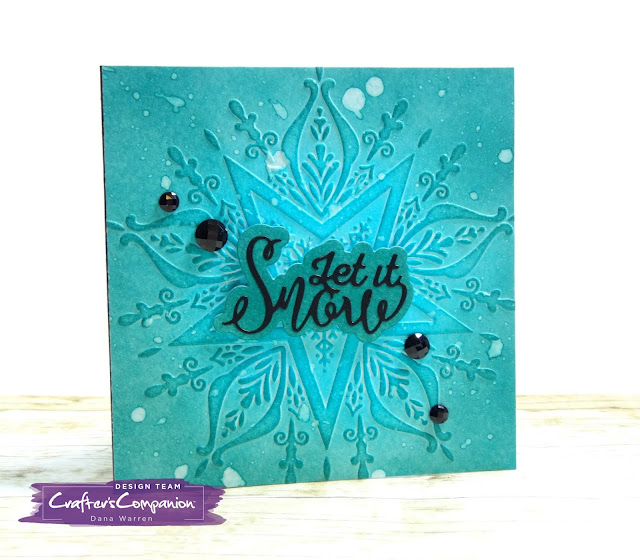
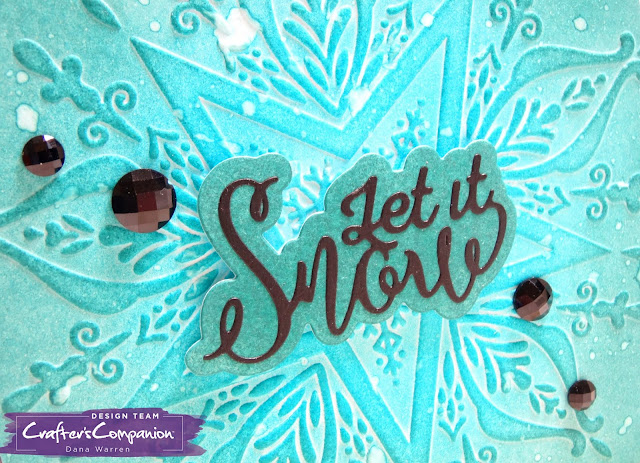
My card today features Christmas Sentimental 2, which are new word dies! I also used a snowflake embossing folder, a Sara Davies Signature Collection: Winter Wonderland - Snow Crystal. With CC's watercolor cardstock I ran the folder through my Gemini.
Then I used the new Spectrum Noir Inkpads to color the embossed panel, Lagoon, Parakeet, Oasis. I used the lightest color in the middle and darker at the end. Then I splattered some water over the panel. I let it sit for a while before blighting it away.
Next, I used the darkest color to ink up a scrap paper, then I used the Let It Snow outline die. From black cardstock, I cut the actual word die and added it to the outline.
I added the sentiment and black gems to the embossed panel, then I added the panel to a black card base.
Thanks for stopping by!!
Dana
July 9, 2018
Crafter's Companion on HSN Wednesday
Hello!!
I'm stopping by with a very cool card I made with NEW Crafter's Companion product coming to HSN this Wednesday!! CC has a few different die sets to make awesome 3D cards!! My card features the Enchanted Garden set.
You get lots of dies and instructions on how to make the card! It's really pretty easy, a few things I will do differently the next time! I'm not going to go into a lot of details but the card has accordion-like sides that you add each layer to.
I used my Spectrum Noir Aqua makers to color the layers. For the backdrop I used distress ink blended together to create the night sky. After making the card, I realized I should have used dark blue or black cardstock for the sides.
Thanks for stopping by!! I'll be back with some more new products available Wednesday on HSN!
Dana
June 13, 2018
Crafter's Companion on HSN Today!
Hello!
This is my second post today, click here for my Art Impressions post!
Crafter's Companion is on HSN today, with some great crafting goodies!! HSN is also having a weeklong craft sale, so make sure to tune and check out their website!!
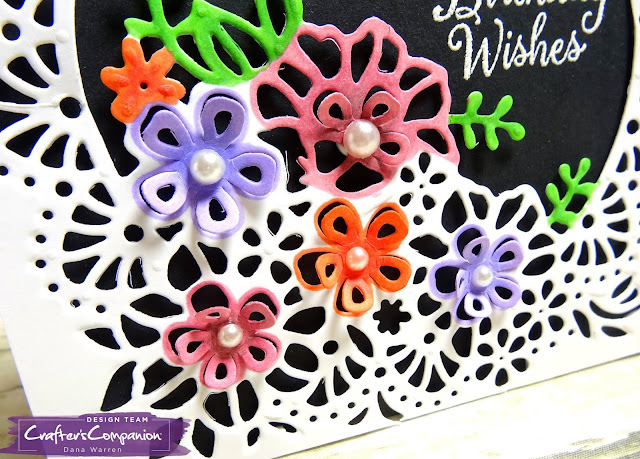
Today's card features another Create A Card die, Spring Garden. I started by die cutting some white cardstock and then I used my Spectrum Noir Markers to color the flowers and leaves. I used AP1, AP2, AP4, HB2, HB3, OR2, OR3.
Next, I made 5 x 5 card base from black cardstock. I placed the colored panel over the card base. With the Birthday Wishes stamp from CC's Beautiful Bloom set I marked with a pencil where I liked the sentiment.
Then I set aside the colored panel so I could stamp and white heat emboss the sentiment directly onto the black card base. With foam tape, I adhered the colored to the card base. Last I added some pearls to the flower centers.
Thanks for stopping by! Make sure to stop by HSN for some great crafty goodness!! I'll be back tomorrow with two posts, again!! Busy times!! :)
Dana
Supplies
Die: Crafter's Companion - Create A Card Die: Spring Garden
CC Premium White Cardstock
Spectrum Noir Markers
CC Stamp Set: Beautiful Bloom
CC White Embossing Powder
Subscribe to:
Posts (Atom)
