Hi!!
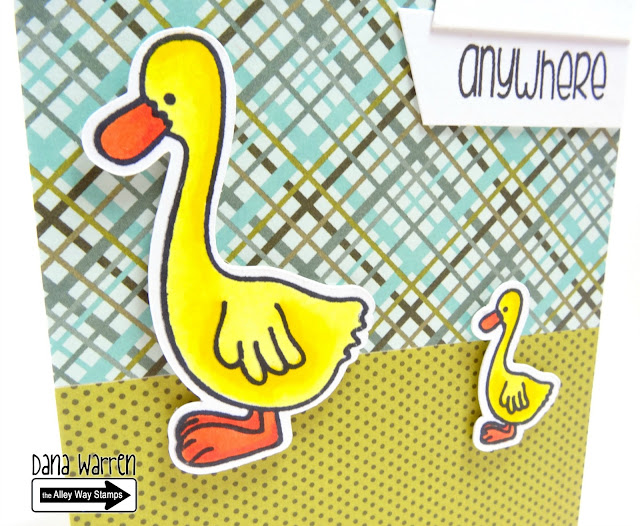
I'm on The Alley Way Stamps today featuring a card with the new Just Ducky set!! I also used some pattern paper that i hadn't used before, its always nice to use 'new' stuff!! Hehe!!
I went with two different blue and green pattern paper, the polka dot at the bottom and the plaid a the top of a white card base.
Next i stamped and colored the big and little ducks (i think these might really be geese, but i colored them like ducks!!) Then i fussy cut them out and added them to my card base with foam tape.
For an sentiment i stamped the I'll Follow You on a white card strip and Anywhere on another. I trimmed the ends at an angle and added them to the card.
Thanks so much for stopping by!! I'll be back later today, sharing a card featuring new products from Crafter's Companion!!
Dana
November 10, 2015
November 7, 2015
Crafter's Companion Sara Davies Signature Collection Sneek Peek
Hello!
I'm popping in on a Saturday to show a special Crafter's Companion Sneak Peek!! The owner of Crafter's Companion Sara Davies has created and designed some special collection of products. It's called the Sara Davies Signature Collection and the first range in the collection is called Festive Wonder! The collections includes stamps, dies, embossing folders, and much more!!
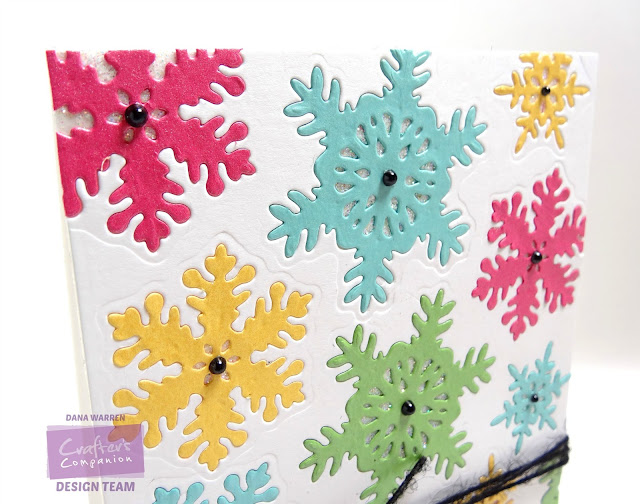
My card features just one of the die set in the collection along with a clear stamp set. This die set includes 3 different snowflakes and i used them to cut a panel of white card stock. I cut the whole panel with the snowflakes (this took just a little bit of time, lol!!)
Next i cut the three snowflakes from four different colors of CC's Shimmering Card Stock. I decided to use bright colors so i went with Green Envy, Sky Blue, Yellow Pearl and Rose Pearl.
Then i placed the white panel with the snowflakes cut out on a piece of double sided adhesive sheet. The sticky sheet makes placing the snowflakes in much easier then having to add glue to each snowflake! I started adding the color snowflakes into the cut out snowflakes on the panel. As i went along i cut the specific snowflake i needed, in the color i needed.
There is some great detail in the snowflakes, some tiny detail! I didn;t add the little white or colored pieces that would fit in the snowflakes. Instead i added some fine glitter, so when you move the card you get a little sparkle! And it helps that nothing will get stuck in the adhesive!! :)
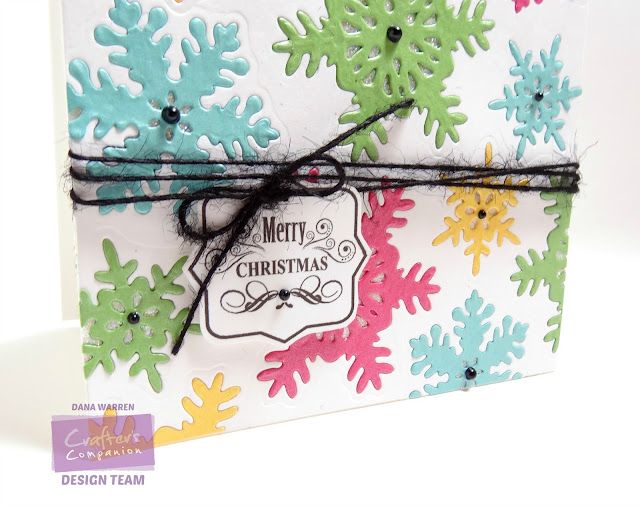
Next i stamped the Merry Christmas stamp one white card stock and then fussy cut around it. I punched a tiny hole at the top and threaded the sentiment on some black twine. Then i wrapped the twine around my panel a few times and tied it in a bow.
From my stash i found some tiny black pearls and added them to the center of each of the snowflakes. Last i peeled the backing from the adhesive sheet and added the panel to a white card base.
Thanks so much for stopping by!!! I'll be back next week when this new collection is available showing off some more the wonderful products! Also i have to mention that next week is Crafter's Companion UK Birthday and they are celebrating here in the US too!! So stay tuned next week for some great sales and well who know what might come about in the celebration!!
Dana
November 5, 2015
Fly Away With Me
Hello!
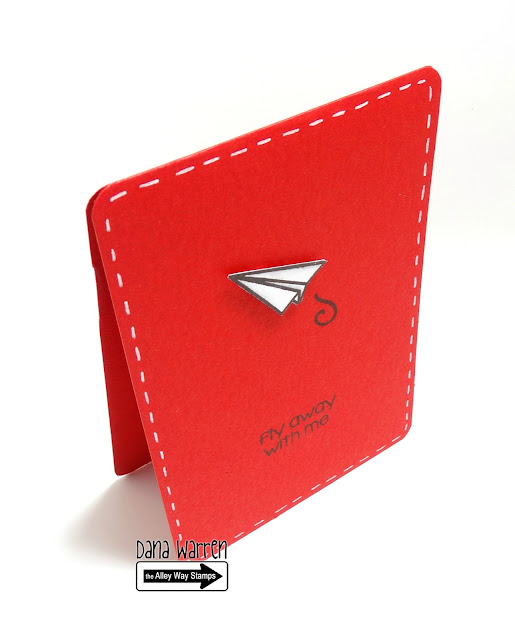
I'm on The Alley Way Stamps blog today sharing a super easy card i made with the new Rain or Shine stamp set!
I stamped the cute little paper airplane on white card stock and fussy cut it out. With a light grey Spectrum Noir marker i added a little shading to it. I added the plane to a red card base with foam tape.
Next i stamped the little swirl below the plane and then stamped the sentiment. With a white gel pen i added faux stitched around the card edge. Last i just round the corners with a corner punch.
See super easy!! Make sure you stop by the blog and The Alley Way Stamp store, unfortunately Alison is closing the store so if there is any particular stamps you have to get them before hey are gone, check out the store for details!!
Thanks for stopping by!!
Dana
November 4, 2015
Star of Wonder
Hello!
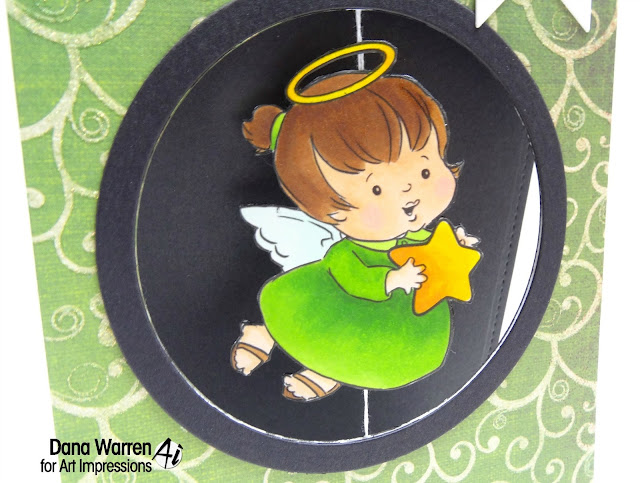
I'm on the Art Impressions blog today sharing a Christmas card featuring the new Angel Spinner! Such a cute little angel!!
I stamped both the front and back of the angel and colored her with my Spectrum Noir Markers. Then i fussy cut her out, but there is a matching die if you don;t want to fussy cut!! Next i run my spinners through a sticker maker, add some white thread on one side and add the other side, easy and not mess!!
Next i used a circle die to cut the circle from a white card base and some green scroll pattern paper. I added my Angel Spinner to the white card base (make sure she spins!!) then i covered the white card base with my pattern paper.
Then i cut a circle frame from black card stock and added it to my card. I stamped the sentiment on a piece of white card stock and cut a notch below it and added it to my card. To make my angel stand out better i added black card stock to the inside of the card.
Thanks so much for stopping by!! Happy Stamping!!
Dana
November 3, 2015
Addicted to Stamps and More Challenge #169
Hello!
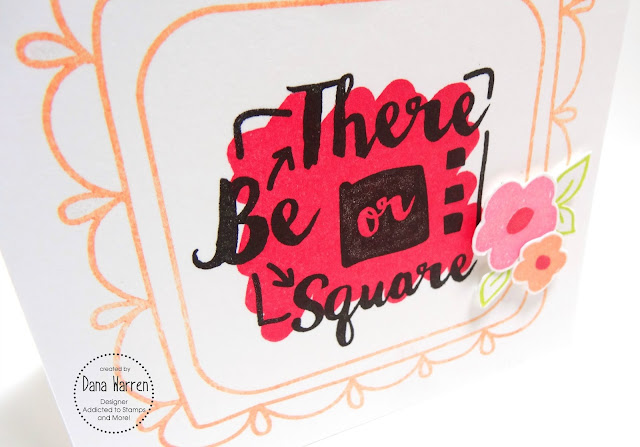
It's time for a new challenge over at Addicted to Stamps and More!! The challenge this week is CAS!! I made this card months and months ago, but hadn;t gotten around to sharing it yet, i guess it was waiting for this challenge!!
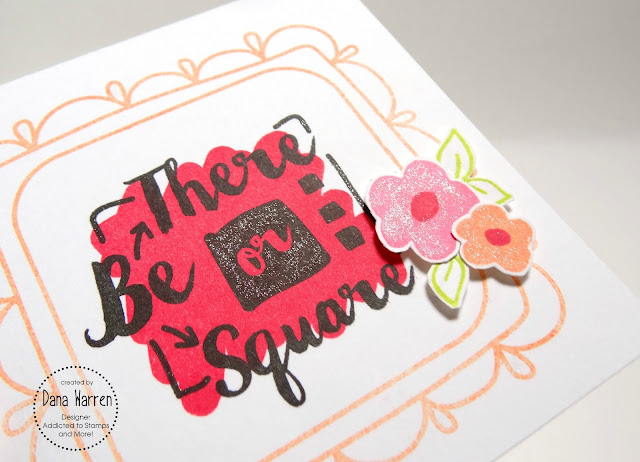
This was a really easy card to make, just a little stamping and cutting! I used some stamps from Waffle Flower the Doily Square Stamp. The doily frame was stamped in orange, the sentiment in black and the squiggly behind the sentiment in red. The ink is from Waffle Flowers Spring Blend Chalk Ink.
For the flowers i stamped them the DT Mix set in pink and orange. I also stamped the leaves from that set and fussy cut them all out.
I added the flowers and leaves with foam tape and last added some Wink of Stella to the flowers, and sentiment.
Thanks for stopping by! I hope you will play along with us at Addicted to Stamps and More!!
Dana
We're Here For You
Hello!
Today i'm sharing a card with the new The Alley Way Stamps November release. The Wispy Wishes stamp set has some flowers that you can do some two step stamping with them.
I started by stamping just the stem from one of the flowers, the long stem makes it easy to add a slight curve to the clear block. I added multiple stems along the top of a horizontal folded card. Then i stamp the flowers using a lighter and darker color for the flowers. Next i added leaves to the stems with the leaf stamp in the set.
Then i used the We're Here For You sentiment from the From Us stamp set. I inked the Here in the same dark pink i used on some of the flowers. Last i added some sequins to add a little texture to my CAS card.
Thanks so much for stopping by!!
Dana
November 1, 2015
Pinterest Inspired November Challenge
Hello!!
It's time for a new challenge at Pinterest Inspired Challenge!! Here is the inspiration:
Now when you see my card you might wonder how was it inspired by the above picture? Well, let me tell you! I really like how the flower petals were different colors and especially where they overlapped with other petals. So i went through my whole stamp collection and do you think i had a nice big open outline petal flower??!?!! That would be a no!!! In fact i really didn;t have anything big enough with open spaces, so instead i went with the small starfish from Lawn Fawn! It;s a little hard to see the overlap, i did a lot of experiments to make sure i like it, and overlap at the stars tips looked the best!
Anyway, on how i made the card! I started with vellum and stamped the starfish over the vellum panel. When i started i thought i would fill the whole panel, but as i went along i decided i didn;t need to fill the panel! Then i added some white embossing powder and heat embossed it. I also stamped and heat embossed the I'm So Jelly sentiment.
Then i flipped it over and used my Spectrum Noir markers to color in the starfish. I used these colors: BP2, JG2, CT4, OR2, DR3, BT5, PL4, True Black. So i wouldn;t have any glue spots, i ran my colored vellum panel through my sticker maker and then adhered the panel to a white card base.
Next i trimmed some black card stock and stamped and heat embossed the You're a Star sentiment, then added it across the card with foam tape. Last i stamped and heat embossed the little Jelly Fish on some vellum. Turned him over and colored him with the PL4 marker and fuss cut him out and added him to my card.
Thanks so much for stopping by! I hope you will play along with us at Pinterest Inspired Challenge, i can;t wait to see your take on the photo!!
Dana

It's time for a new challenge at Pinterest Inspired Challenge!! Here is the inspiration:
 |
| Source |
Now when you see my card you might wonder how was it inspired by the above picture? Well, let me tell you! I really like how the flower petals were different colors and especially where they overlapped with other petals. So i went through my whole stamp collection and do you think i had a nice big open outline petal flower??!?!! That would be a no!!! In fact i really didn;t have anything big enough with open spaces, so instead i went with the small starfish from Lawn Fawn! It;s a little hard to see the overlap, i did a lot of experiments to make sure i like it, and overlap at the stars tips looked the best!
Anyway, on how i made the card! I started with vellum and stamped the starfish over the vellum panel. When i started i thought i would fill the whole panel, but as i went along i decided i didn;t need to fill the panel! Then i added some white embossing powder and heat embossed it. I also stamped and heat embossed the I'm So Jelly sentiment.
Then i flipped it over and used my Spectrum Noir markers to color in the starfish. I used these colors: BP2, JG2, CT4, OR2, DR3, BT5, PL4, True Black. So i wouldn;t have any glue spots, i ran my colored vellum panel through my sticker maker and then adhered the panel to a white card base.
Next i trimmed some black card stock and stamped and heat embossed the You're a Star sentiment, then added it across the card with foam tape. Last i stamped and heat embossed the little Jelly Fish on some vellum. Turned him over and colored him with the PL4 marker and fuss cut him out and added him to my card.
Thanks so much for stopping by! I hope you will play along with us at Pinterest Inspired Challenge, i can;t wait to see your take on the photo!!
Dana
Subscribe to:
Posts (Atom)

