Hello!
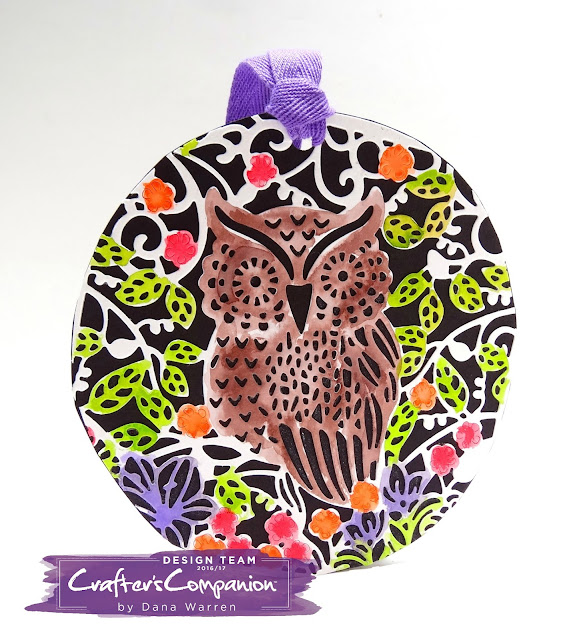
Crafter's Companion will be on HSN, this coming Tuesday! A lot of great new products will be available!! Today, I have a tag I made with one of the new Create A Card dies!! Even though you can create a card with the dies you don't always have to make a card, they work great for tags too!!
I started by die cutting the owl from Crafter's Companion Watercolor cardstock. Then I used my Spectrum Noir Markers to color it. I used Amber, Heather, Begonia, Chocolate, Bud Green.
When the watercolor was done I made a circle from a small dish from the kitchen to trace around, then I cut along my trace. All my circle dies were too small, I could barely get the owl in, so I made my own circle from the dish. Then I adhered the circle to a piece of black cardstock, trimming off the extra black cardstock. Next, I punched a hole at the top and then threaded some purple ribbon through.
Thanks so much for stopping by!! Make sure you mark your calendar for Tuesday!! Lots of great stuff on HSN!!
Dana
Supplies
Create A Card Owl Die
Spectrum Noir Aqua Markers
Purple Ribbon
Black Cardstock
January 8, 2017
January 5, 2017
Art Impressions Challenge #199 - Card Resolutions
Hello!!
I hope everyone had a great holiday season! It's been a little quiet around here and that's due to a few different things! Crafter's Companion will be on HSN in a few days and Art Impressions will be at CHA later this month, so I have been super busy working on cards and projects!! So stay tuned for some great new products from both of these great companions!!
The other reason is that among all this creating I had to get ready to go Ferris State University! It's almost 3 hours away from my mom's house so that means I am living on campus!! Of course, I had to bring some of my crafty stuff!! Luckily there is just enough space in my room for a small craft desk! I am sharing a suite with two other women, we each get our own room and share a living room/kitchen/bathrooms! It's an exciting time and am looking forward to the semester starting next week!!
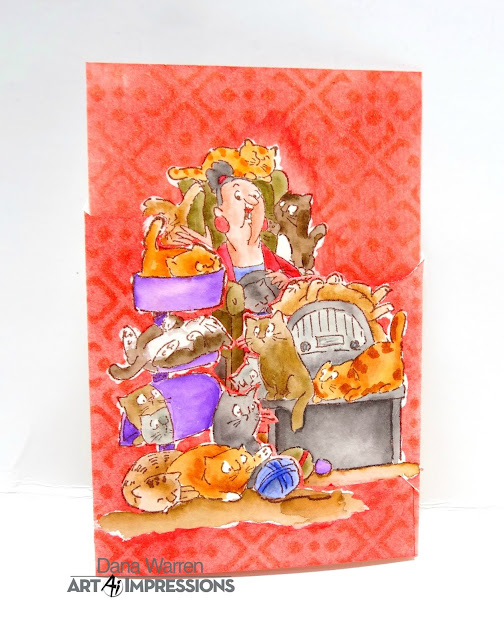
Ok, on to my card!! Today, I'm on the Art Impressions blog with a tutorial!! It's also time for a new challenge and with the New Year, the challenge is to try a new technique!! I went with Masking with Rubber Cement!! I've been wanting to do this for awhile know!! Make sure you stop by the blog to see how I made this card!!
Thanks for stopping by!!
Dana
December 25, 2016
Happy Holiday!
Happy Holiday!
I hope everyone has a joy filled Holiday!!! I have one last Christmas card to share! I mixed a little Art Impressions and Essentials by Ellen together for an easy card!
I started with some watercolor card stock trimmed to fit a white card base. Then I stamped the cute chickens from Art Impressions Dairy Christmas set in brown ink. Then I used the following Distress Markers to color it: Weathered Wood, Spiced Marmalade, Fired Brick, Forest Moss, Barn Door, Ground Espresso, Hickory Smoke, Rusty Hinge, Wild Honey, Vintage Photo, Blue Print Sketch, Seedless Preserves, Carved Pumpkin.
Below the image I stamped the sentiment from Essentials by Ellen Cozy Christmas stamp set, also in brown ink. Then I tied a tiny bow from twine and added it to the card.
I used the Weathered Wood marker and lots of water to color around the birds and the sentiment. This helped to ground the image and sentiment.
Thanks so much for stopping by! And Happy Holidays!!
Dana
Supplies
Stamps: Art Impressions - Dairy Christmas. Essentials by Ellen - Cozy Christmas
Distress Markers
December 24, 2016
Mixing Pattern Papers
Hello!!
Happy Christmas Eve!! I'm sharing two cards today that I made a few weeks ago for a challenge, but got behind and didn;t get the photo edited in time! And since tomorrow is Christmas I need to share pronto!!!
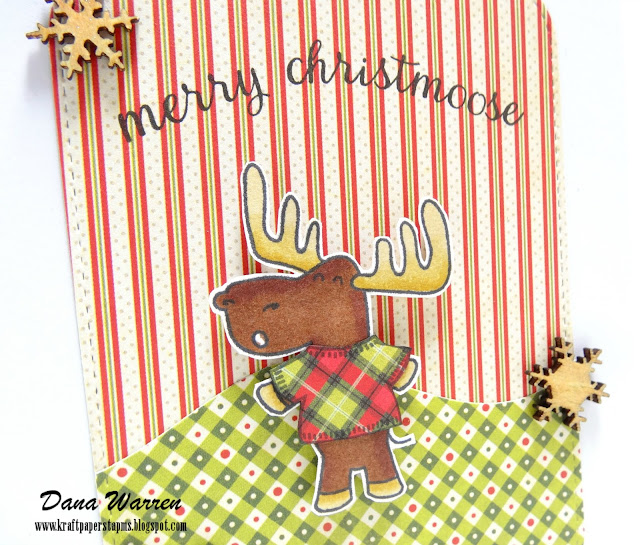
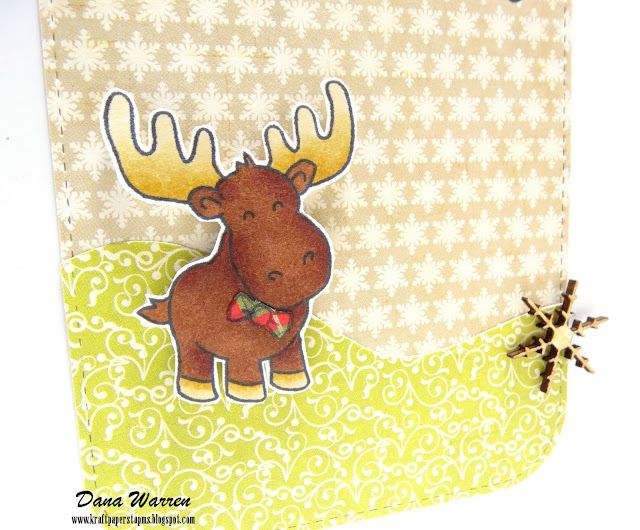
I started by stamping 3 little moose from Poppy Stamps Moose Crossing, yes I said 3! I was first going to use all three on one card but later change my mind and instead just made two cards. The third is sitting on my desk still! Probably going to be hanging out until next Christmas.
I used my Spectrum Noir markers to color the moose (CG2, DG2, DG3, IG1, IG2, IG4). I stamped and paper pieced a shirt and tie.
Then I started mixing pattern papers. I decided to use a stitched rectangle die and cut one pattern for the background and another for the ground. For the ground, I cut a wave in each and discarded the top portions. I adhered the ground patterns on rectangle patterns.
Next, I stamped the sentiment after bending it slightly. I added the moose to each panel with foam tape and then added panels to white card bases. Then I added wood snowflakes!
Thanks so much for stopping by!!
Dana
Supplies
Stamps: Poppy Stamps - Moose Crossing
Pattern papers: Echo Park Paper - Season's Greetings
Spectrum Noir Markers
Dies: Gina Marie Designs - Rounded Stitched Rectangle
December 22, 2016
Holiday Stencil & Embossing Paste
Hello!!
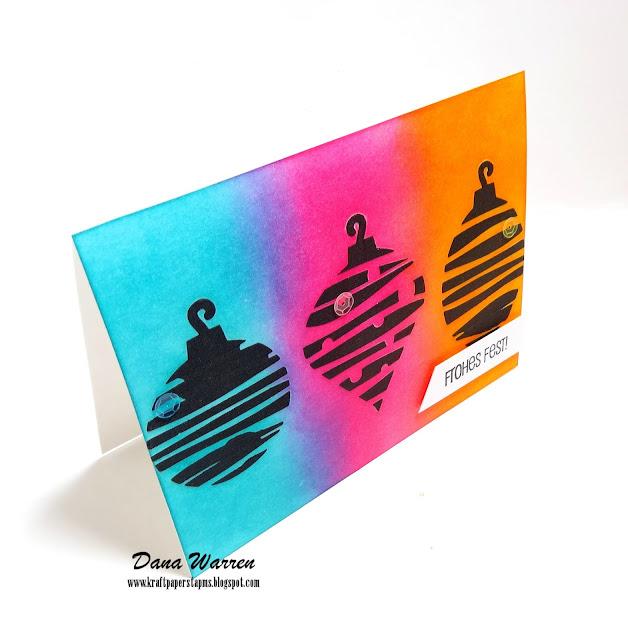
It's almost Christmas so I need to share the last of my Christmas cards! This first one I made a few months ago. My mom is into Genealogy and found some relations in Germany. They exchange Christmas cards and she was needing some ideas for this years Christmas card, this was one of the ideas I came up with!
Last Christmas I think it was I gave her a German Christmas stamp set from Create A Smile. I also got for myself a few other items including the Ornaments stencil. I am entering this into Create A Smile Challenge of the Month - Christmas/Winter.
I started with a white card base and placed the stencil over it. Then I added some black embossing, scraped off the excess and removed the stencil. I let it dry nice and good (probably overnight to be safe!).
Then I applied three colors of Distress Ink, each color highlighting an ornament. Next, I stamped the German Merry Christmas sentiment on a strip of card stock. I cut one end at an angle and added it to the card with foam tape. Last I found some blue, pink and yellow neon sequins that I added to each ornament.
Thanks so much for stopping by!!
Dana
Supplies
Stamps: Create A Smile - Schone Bescherung
Stencil: Create A Smile - Ornaments
Distress Ink
Seqins
December 21, 2016
Art Impressions Top 10 of 2016
Hello!
This past week the Design Team at Art Impressions are featuring their top ten projects of the year! It was really hard to just pick 10!!! I hope you'll stop by to check out all 10 cards!! Here's one to wet your appetite! And well it's been really, really cold here in Michigan!! :)
This past week the Design Team at Art Impressions are featuring their top ten projects of the year! It was really hard to just pick 10!!! I hope you'll stop by to check out all 10 cards!! Here's one to wet your appetite! And well it's been really, really cold here in Michigan!! :)
Dana
December 20, 2016
Festive Fun with Spectrum Noir ColourBlend Pencils
Hello!
Today I'm sharing a card I made that features Spectrum Noir New ColourBlend Pencils! These are so nice!! They blend beautifully and are so creamy!!
I started by die cutting a circle from Crafter's Companion's Watercolor card stock. I stamped the image from The Makey Bakey Mice, Festive Fun & Frolics set. Then I used the ColourBlend pencils to color the image. Because I used watercolor card stock I got a nice texture look to the image! I used the following colors: Lemon Grass, Maize, Smoke, Pebble, Yellow Ochre, Spice Brown, Espresso, Bark, Pink Blush, Cranberry, Poppy, Carmine.
Next, I trimmed a snowflake pattern paper from Sara Davies Signature Collection - Festive Wonder. With Antique Linen Distress Ink I inked around the end of the panel. I also lightly inked around the colored circle.
I added the colored circle to the panel with foam tape. From my stash, I found a rusty snowflake, removed the twine that came with it and added it to my card. Then I stamped the sentiment, trimming it to a square and rounding the edges. I added it to the card over the snowflake. Last I adhered the panel to a white card base.
Thanks for stopping by!!
Dana
Supplies
Stamps: The Makey Bakey Mice - Festive Fun & Frolics
Pattern Paper: Sara Davies Signature Collection - Festive Wonder
Distress Ink - Antique Linen
Diesire: Essential Circles
Spectrum Noir ColourBlend Pencils
Subscribe to:
Posts (Atom)
