Hello
It's the second week of Art Impressions Challenge #171, the challenge is to use Water-based inks! The design team is also show casing new fabulous Easel dies!! These dies make sending a card that can be displayed so easy!!
AI did a fabulous video showing how to create your easel card, you can see it here! Much better then me trying to explain it!! :) I used some pattern paper that looks like white wood with arrows on the other side. You don;t have to use double sided pattern paper but it does look good if you do!!
The die set also comes with a couple basic shapes, that you can layer. I used the bigger rectangle to cut some white water color paper. For my main focal point i used the new Watercolor Mini Clay Pot stamp set. The water-based inks i used were Marvy's Le Plume II markers and i used them for the first time! They work great with water, definitely going to be doing some more coloring with these!!
I used the markers to color the stamps, then pressed the stamp to my rectangle. With water i pulled the ink from the stamped image to fill in the image. To add more color or make some areas darker, i would add more ink with my marker and use water to spread it around. I did the same thing with the leaves and flowers.
For the sentiment i cut the oval die that comes with the easel die and stamped the sentiment from the Bench set. I wrapped some twine around the colored image and added it and the sentiment oval to my easel card with foam tape.
I hope you will play along with us, there is still time to!! Thanks so much for stopping by!!
Dana
October 29, 2015
October 28, 2015
Witch Wanda
Hi!!
I'm on the Art Impressions blog today with my last Halloween card of the year :( I think i have more Halloween paper pads then i do Christmas, but i make way more Christmas cards!! How does that happen?!?!
Anyway today's card features Witch Wanda!! I just love her attitude and the sentiment in this set (i stamped the sentiment on the inside of the card, see last picture below)
I stamped Wanda and the kitty on some white card stock, then cut Wanda out with a stitched oval and fussy cut the kitty. Next i used my Spectrum Noir markers to color both!
Then i found some cobweb and bat pattern paper that i liked and added it to a white card base. I added the Wanda oval to the card base directly with double sided tape! No foam tape for her (gasp!!). Hehe!
Now i could have a card with noooo foam tape (If you haven;t noticed i use a LOT of foam tape!!!) So i added the fussy cut kitten and pumpkin to my card, next to Wanda.
Last i added a few black enamel dots around the oval and on the pattern paper. And below you can see the sentiment stamped on the inside of the card.
Thanks for stopping by!!
Dana
October 27, 2015
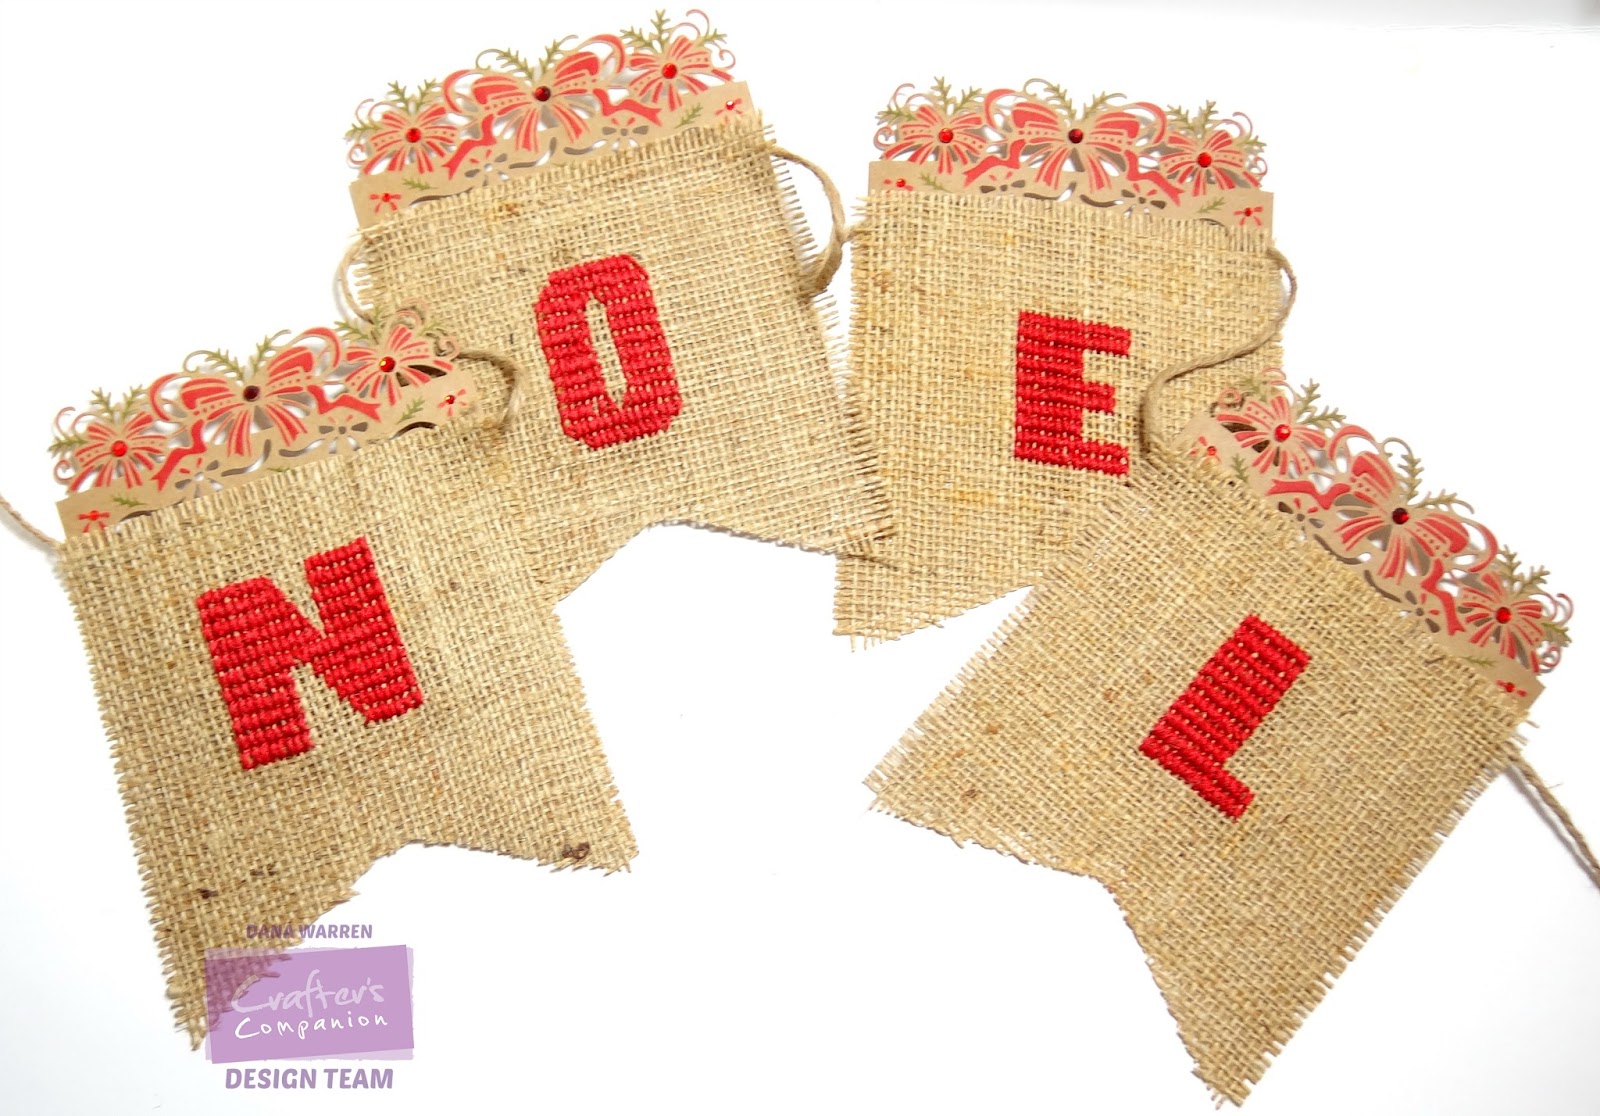
Noel
Hello
I'm back sharing a project i made for Crafter's Companion, they were on HSN recently and my banner was on TV!! It's so cool to see your project on TV!! Ok anyway on to the project!
To start i first make a banner from white card stock or i should say two! It was my pattern as i tried things out, i have the measurements on my craft desk somewhere if anyone is interested! I cut four long rectangles and cut CC's Edge'able Christmas Fancy Border - Christmas Bow at the top of each one. Then i cut the remaining card stock to make the notched banners.
Before i removed the dies on each one i added red and green ink to the card stock as these dies act as stencils too! It involved a lot of post it notes to get the leaves green and everything else red!
I punched holes on each side of the banners and threaded some thick twine through it. Next i cut some burlap to match the banners, cutting them a little bit bigger all the way around except at the top. With some red thread i cross stitched the letters to spell Noel. I used my Silhouette to cut out some paper letters, then stitched an outline around the letters in white thread. Then in two evenings i stitched the letters removing the white thread when i was done. Last i added some rhinestones to the bows and adhered the burlap to each flag.
Below is a picture of it hanging on an antique cabinet. Can you tell what season it is in my house?? :)
Thanks so much for stopping by!!
Dana
I'm back sharing a project i made for Crafter's Companion, they were on HSN recently and my banner was on TV!! It's so cool to see your project on TV!! Ok anyway on to the project!
To start i first make a banner from white card stock or i should say two! It was my pattern as i tried things out, i have the measurements on my craft desk somewhere if anyone is interested! I cut four long rectangles and cut CC's Edge'able Christmas Fancy Border - Christmas Bow at the top of each one. Then i cut the remaining card stock to make the notched banners.
Before i removed the dies on each one i added red and green ink to the card stock as these dies act as stencils too! It involved a lot of post it notes to get the leaves green and everything else red!
I punched holes on each side of the banners and threaded some thick twine through it. Next i cut some burlap to match the banners, cutting them a little bit bigger all the way around except at the top. With some red thread i cross stitched the letters to spell Noel. I used my Silhouette to cut out some paper letters, then stitched an outline around the letters in white thread. Then in two evenings i stitched the letters removing the white thread when i was done. Last i added some rhinestones to the bows and adhered the burlap to each flag.
Below is a picture of it hanging on an antique cabinet. Can you tell what season it is in my house?? :)
Thanks so much for stopping by!!
Dana
Make A Wish
Hello!
I'm on The Alley Way Stamps blog today sharing a simple birthday card. I kept it clean and simple, when i made i a few weeks ago i was strapped for time!
I started by die cutting the matching SVG's for Sweet Thing. I stamped the Wish sentiment on the smaller one in red ink. Then i colored the mat for the sentiment black with a pen and adhered the two layers together.
Next i stamped the balloons, masking some of them to get them to look grouped together. I stamped one on some scrap paper and colored it red with my Spectrum Noir markers and fussy cut it out.
With a fine black marker i drew the tether lines from the balloons to were i was going to add the Wish. I added the colored balloon with foam tape and adhered the Wish directly to the card. Last i just stamped the rest of the sentiment.
Thanks for stopping by! I'll be back later today to share a Christmas project.
Dana
I'm on The Alley Way Stamps blog today sharing a simple birthday card. I kept it clean and simple, when i made i a few weeks ago i was strapped for time!
I started by die cutting the matching SVG's for Sweet Thing. I stamped the Wish sentiment on the smaller one in red ink. Then i colored the mat for the sentiment black with a pen and adhered the two layers together.
Next i stamped the balloons, masking some of them to get them to look grouped together. I stamped one on some scrap paper and colored it red with my Spectrum Noir markers and fussy cut it out.
With a fine black marker i drew the tether lines from the balloons to were i was going to add the Wish. I added the colored balloon with foam tape and adhered the Wish directly to the card. Last i just stamped the rest of the sentiment.
Thanks for stopping by! I'll be back later today to share a Christmas project.
Dana
October 22, 2015
Brrr
Hello!!
I'm on The Alley Way Stamps blog today sharing a card that features the new Waddle Pals stamp set, along with this months Free stamp set with a $40 purchase, Chilly.
I started by stamping the big ice berg and adding a little shadow with my Spectrum Noir markers. Next i stamped the skating penguin, colored him with Spectrum Noir markers then fussy cut him and the ice out.
From my stash i found some snowflake embellishments and added them to a Kraft card base. On top of them i added the ice berg and penguin. For a sentiment i added Brr to the ice berg. Last i added a few matching enamel dots.
Thanks so much for stopping by!!
Dana
I'm on The Alley Way Stamps blog today sharing a card that features the new Waddle Pals stamp set, along with this months Free stamp set with a $40 purchase, Chilly.
I started by stamping the big ice berg and adding a little shadow with my Spectrum Noir markers. Next i stamped the skating penguin, colored him with Spectrum Noir markers then fussy cut him and the ice out.
From my stash i found some snowflake embellishments and added them to a Kraft card base. On top of them i added the ice berg and penguin. For a sentiment i added Brr to the ice berg. Last i added a few matching enamel dots.
Thanks so much for stopping by!!
Dana
October 21, 2015
Standard Broom Equipped
Hello
I'm on the Art Impressions blog with a Halloween card! I love Halloween, orange is my favorite color, i just love all the orange products that are available!! :)
I made a fairly easy card today using the Air Hag Set, i just love the sentiment in this set!! To start i stamped the witch and bats on some white card stock and used my Spectrum Noir markers to color them up. Then i fussy cut them all out, using a black marker to color the edges.
Next i cut a circle from black card stock and added it to a white card base with foam tape. Then i added the Witch to the circle with foam tape (lots of dimension that you can see better in person!). And of course added the bats with foam tape too!
I stamped the sentiment below the circle and then wanted to add a little something more. I played around with enamel dots and then sequins, but in the end decided that it didn;t really add anything! Sometimes less is more!!
Thanks for stopping by!!
Dana
October 20, 2015
Happy Halloween
Hello!
It's time for a new challenge over at Addicted to Stamps and More!! The challenge this week is Make Your Mark!! I decided to go with markers and make a Halloween card!
This image has been colored for ever!! I colored this image with Copics as i had printed this out and colored it before i got my Spectrum Noir markers. I cut the image out with a stitched oval die.
Next i used a Simon Says Stamp Halloween die to cut the work from black card stock. I added the oval to an orange card base with foam tape and added the die cut word to the oval. Then i stamped the tiny happy above the Halloween.
I wrapped some black and white twine around the panel and tied it in a bow.Then last just added the panel to a white card base.
Thanks so much for stopping by!!
Dana
It's time for a new challenge over at Addicted to Stamps and More!! The challenge this week is Make Your Mark!! I decided to go with markers and make a Halloween card!
This image has been colored for ever!! I colored this image with Copics as i had printed this out and colored it before i got my Spectrum Noir markers. I cut the image out with a stitched oval die.
Next i used a Simon Says Stamp Halloween die to cut the work from black card stock. I added the oval to an orange card base with foam tape and added the die cut word to the oval. Then i stamped the tiny happy above the Halloween.
I wrapped some black and white twine around the panel and tied it in a bow.Then last just added the panel to a white card base.
Thanks so much for stopping by!!
Dana
Subscribe to:
Posts (Atom)