Achievements

November 23, 2016

Art Impressions Collage Card

Hello 

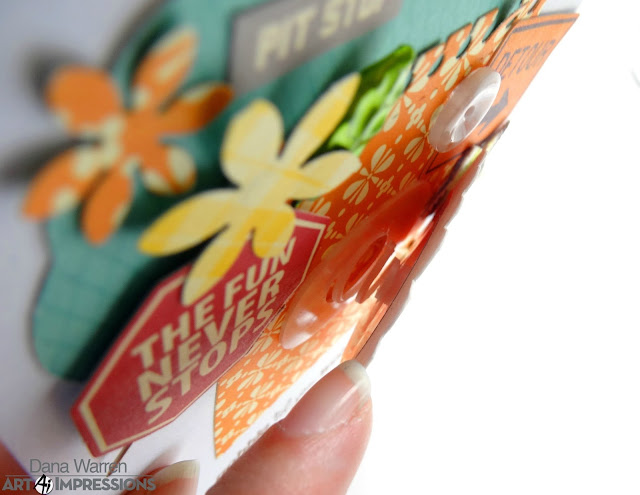
Happy Thanksgiving Eve!! I'm on the Art Impressions blog today with a card that is a little tongue in cheek, I paired the Gobble Set with some elements from Jillibean Soup Happy Camper Stew Collection. I think the Detour, Pit Stop, and The Fun Never Stops make for a cute and funny Thanksgiving card!! 

This card is my take on the collage style cards! I'm not really good at it (I'm a bit of a perfectionist!) but I tried really hard to just let it come together without a lot of changes!

Dana Warren - Kraft Paper Stamps - Art Impressions
I started by stamping the turkey behind (haha!!) on watercolor cardstock and then used my Distress Markers to color it. I used Vintage Photo, Rusty Hinge, Tea Dye, Gathered Twigs, Mustard Seed, Seedless Preserves, Candied Apple, Spiced Marmalade. Then I fussy cut it out with sharp scissors.

Dana Warren - Kraft Paper Stamps - Art Impressions

Next, it was just a matter of adhering all the elements. I have the collection together, including some extra pieces I die cut but didn;t use. I used a notebook page and the turkey as the center and added the flowers, buttons, and sentiments.

Dana Warren - Kraft Paper Stamps - Art Impressions

The turkey behind was added with a wobble, making the card a little interactive. Last I stamped the Gobble 'Til You Wobble sentiment at the bottom. 

Dana Warren - Kraft Paper Stamps - Art Impressions

Thanks so much for stopping by! Happy Thanksgiving!!

Dana

Supplies
Stamps: Art Impressions - Gobble Set 
Pattern Paper Collection: Jillibean Soup Happy Camper Stew
Action Wobble

November 22, 2016

Spectrum Noir ColourBlend Pencils

Hello!

Crafter's Companion is having a Week of Giving Thanks from Nov 21st to Nov 28th! Make any purchase and receive a great Giving Thanks stamp set (card below features this set!) or make purchase of a Colorista product and you get a Colorista Natural Beauty Paper Pad! Also, make sure you stop by their Facebook page there will be great giveaway's all week long!!
Dana Warren - Kraft Paper Stamps - Crafter's Companion
I started by stamping the flower wreath on Crafter's Companion Ultra Smooth Card Stock. Then I used my Spectrum Noir ColourBlend Pencils to color the flowers. I used Fern Green, Sage, Cranberry, Boysenberry, Passion Fruit, Raspberry, Grape, Fireweed, Carnation, Peony. With sharp scissors, I fussy cut the flower wreath out.

Dana Warren - Kraft Paper Stamps - Crafter's Companion

Next, I trimmed some CC's Water Color cardstock to fit an A2 card base. I used my Wild Flower, Orchid, and Scarlet Aqua Markers to do a smooshing technique. For the sentiment, I stamped the Thank You and then trimmed the cardstock into a strip. I adhered the strip to the back of the flower wreath, trimming off the extra on each side.

Dana Warren - Kraft Paper Stamps - Crafter's Companion
When the watercolor panel was dry I wrapped some black twine a few times around it and then added it to a white card base. I also wrapped some twine around the wreath and tied it in a bow, then I just added the wreath to the card base with foam tape.

Thanks so much for stopping by!!

Dana

Supplies
Stamps: Crafter's Companion - Giving Things
Paper: Crafter's Companion - Ultra Smooth Card Stock, Watercolor Card Stock
Spectrum Noir ColourBlend Pencils - Fern Green, Sage, Cranberry, Passion Fruit, Raspberry, Grape, Fireweed, Carnation, Peony
Spectrum Noir Aqua Markers - Wildflowers, Orchid, Scarlet
May Arts - Black Twine

November 17, 2016

Crafter's Companion Sheena Douglass Groovin' 60s

Hello!

This is my second post today, click here for my Art Impressions post.

Crafter's Companion has a great new release of Stamps and STENCILS!!! There are 4 stamps and 7 stencils and wow, these are awesome stamps and stencils!!

Dana Warren - Kraft Paper Stamps - Crafter's Companion
My card today features the Geometric Groove stencil and RPM stamp set!! I started with the stencil and placed it over a panel of Crafter's Companion watercolor card stock. Then I used a few Spectrum Noir Aqua markers to color the stencil. If you use too much water the ink will leak under the stencil, which in some cases is ok! But I wanted it to look a bit cleaner, so I didn;t add a lot of water, just enough to paint each area of the stencil.

Dana Warren - Kraft Paper Stamps - Crafter's Companion

Next, I stamped the main image and a couple extra records, all on watercolor cardstock. I used the same Aqua markers above, plus a few extras: Yellow, Marine, Slate, Aquamarine, Kingfisher. Then I fussy cut everything out.

Dana Warren - Kraft Paper Stamps - Crafter's Companion
I stamped the Fab sentiment in the upper left corner and then added all the images with foam tape. Perfect card for a teenager!

Thanks for stopping by!!

Dana

Supplies
Crafter's Companion - Stencil: Geometric Groove. Stamp: RPM. Watercolor Cardstock
Spectrum Noir Aqua Markers: Yellow, Marine, Slate, Aquamarine, Kingfisher
Foam Tape
Versafine Ink - Smokey Grey

Art Impressions Challenge #197 - Slide on By

Hello!

It's the second week of Art Impressions Slide on By Challenge!! AI also has some great new stamps to go with the Slider die!! There are 3 Slider stamp sets and 2 Holiday Stackers! The challenge is to make a card with some kind of slider element.
Dana Warren - Kraft Paper Stamps - Art Impressions
My card today features the Penguin Stacker and Slider die. I started by stamping the Penguin image and using my Spectrum Noir markers to color it. BG1, BG3, BG6, BG7, BG9, BT6, BT8, CG2, CR7, CR11, DG2, DG3, OR2, OR3, Blender. I used the Moonlight Sparkle Pen to color the star at the top of the Penguin stacker.

Dana Warren - Kraft Paper Stamps - Art Impressions

Next, I picked out some pattern paper, one pattern for my card base and the other I used with the Slider die. I stamped the sentiment on a piece of red pattern paper from the same pad, trimmed it and added it to the card base.

Dana Warren - Kraft Paper Stamps - Art Impressions

Then I was all set to add the slider I cut but I added my adhesive to the wrong area, so to still salvage the slider I trimmed off the flaps and used it as a frame and added it on top of my colored image. I added the whole thing to my card with foam tape!

Dana Warren - Kraft Paper Stamps - Art Impressions
Thanks for stopping by! I hope you will play along with us at the Slide on By Challenge!!

Dana

Supplies
Stamps: Art Impressions - Penguin Stacker
Die: Art Impressions - Slider Die
Spectrum Noir Markers & Sparkle Pen
Pattern Paper: Echo Park Paper - Season's Greetings


November 16, 2016

Art Impressions - Monochromatic Coloring with Distress Marker

Hello AI fans!!

I'm on the Art Impressions blog today with a card featuring one of the new Clear Christmas Stamps, Merriest Christmas! I did some monochromatic coloring and used some gorgeous gold washi tape for the background.
Dana Warren - Kraft Paper Stamps - Art Impressions
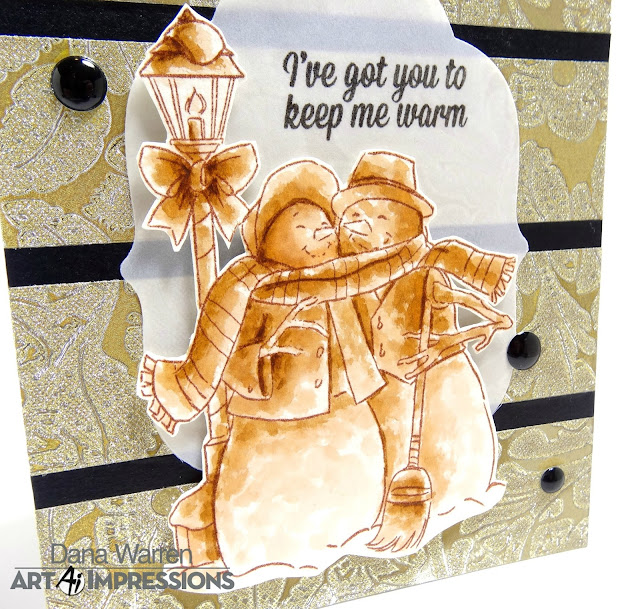
The washi tape so gorgeous, it looks like a rich gold tapestry! I added four strips of the washi tape, leaving space between each one, allowing the black card base to show through. Next, I stamped the snowman couple on some water color card stock. 

Dana Warren - Kraft Paper Stamps - Art Impressions

To color the image I went with a monochromatic look and used the Vintage Photo Distress  Marker. I didn't color it with typical strokes, instead patting the paint brush on the image. Squiggle the marker on a palette, add a little water to lighten the color. As I colored the image I used less and less water to get darker tones.

Dana Warren - Kraft Paper Stamps - Art Impressions

When my coloring was done I used sharp scissors to fussy cut the image out. For the vellum piece behind the image, I found it in my leftovers stash. I stamped the sentiment on the vellum and then adhered it to the card. Then I added the image with foam tape and last adhered a few black enamel dots. 

Dana Warren - Kraft Paper Stamps - Art Impressions
Thanks so much for stopping by!! 

Dana

Supplies
Stamps: Art Impressions - Merriest Christmas 
Washi Tape: Recollections
Die: Papertrey Ink - Mat Stack #5
Enamel Dots: Doodlebug Design Sprinkles - Beetle Black
Distress Marker: Vintage Photo

November 14, 2016

Crafter's Companion Contemporary Christmas

Hello!

Crafter's Companion has two new Sara Davies Collections, both are Christmas themed! Today, my card features products from the Contemporary Christmas Collection.
Dana Warren - Kraft Paper Stamps - Crafter's Companion
First, I cut a sheet of the A4 Luxury Snowfall Acetate to fit a 4.25 x 5.5 white card base. I also cut some gray cardstock to the same size.

Dana Warren - Kraft Paper Stamps - Crafter's Companion

Next, I cut a strip vellum and white embossed Christmas Wishes from the Festive Sentiments stamp set. I placed the acetate over the gray cardstock and then wrapped the vellum around both, adhering the vellum to the back side of the gray card stock.

Dana Warren - Kraft Paper Stamps - Crafter's Companion

I cut the deer from At Christmas Time die set from brown card stock. Then I added some brown ink to the edges of the deer.

Dana Warren - Kraft Paper Stamps - Crafter's Companion
To adhere to acetate to the gray cardstock I placed the deer over the vellum then added a little liquid glue between the acetate and the gray cardstock, then a little more glue between the acetate and the deer.

Thanks so much for stopping by!!

Dana

Supplies
Stamps, dies, and acetate are from Crafter's Companion Sara Davies Contemporary Christmas Collection.
Hero Arts White Embossing Powder


November 9, 2016

Art Impressions & Therm O Web Product Swap

Hello!

I'm on the Art Impressions blog today with a card featuring one of the NEW Holiday Shaker stamps: Reindeer Mini Shaker!! I paired the stamp with some great Therm O Web products!!

Dana Warren - Kraft Paper Stamps - Art Impressions Therm O Web
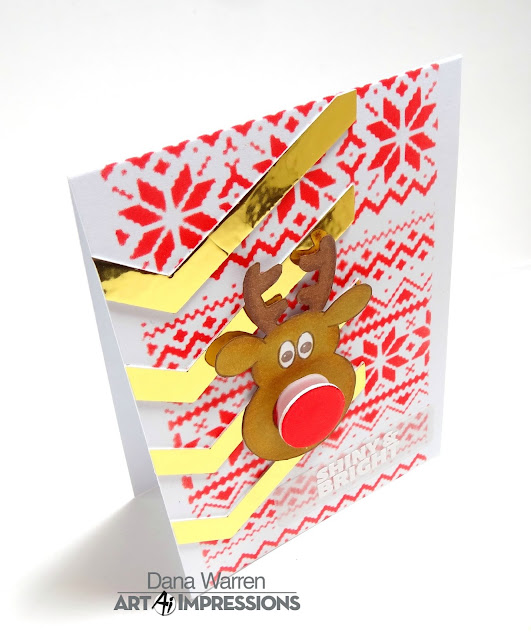
I started with a white card base and placed a stencil over the card base. With Distress Ink Barn Door I added red ink along the stencil to cover most of the card base. 

Next, I pulled out the extra Gold Foiled Chevron pieces that came from this card. I added them to the card, just off center and trimmed off the overhang.

Dana Warren - Kraft Paper Stamps - Art Impressions Therm O Web

Then I stamped the Reindeer on some white card stock and used my Spectrum Noir Markers to color it up. I used: DR3, EB5, EB6, GB9, GB9. I fussy cut him out with some sharp scissors.

Dana Warren - Kraft Paper Stamps - Art Impressions Therm O Web
A small circle dies comes with the stamp set and I die cut a circle from white cardstock. Then I cut it again from Therm O Web's Deco Foam Adhesive. I removed the release paper on one side and added the Red Deco Foil sheet over it, silver side down. Then I removed the other sides release paper and adhered it to the cardstock circle. I added it the foam adhesive to the cardstock circle because next I added it to a mini wobble and I thought it helped stabilize the foam adhesive!

Dana Warren - Kraft Paper Stamps - Art Impressions Therm O Web
With some liquid adhesive, I added the Reindeer to my card on top of the Gold Chevrons. Next, I stamped the Shiny & Bright sentiment on vellum cardstock and then ran it through my sticker machine and added it to my card.

Thanks so much for stopping by!!

Dana


November 3, 2016

Art Impressions Challenge #196 - Prep for Christams

Hello!

It's the second week of Art Impressions Challenge #196 - Prep for Christmas! There is still plenty of time to play along!! This challenge is extra special Art Impressions is partnering with Therm O Web, featuring product from both companies!! There is even an awesome prize giveaway, so make sure you stop by the Art Impressions blog!

Art Impression has also released 5 NEW Clear Christmas Stamp Sets!!  My card today features the Christmas Wreath stamp set and matching die! I also used some great Therm O Web products!!
Dana Warren - Kraft Paper Stamps - Art Impressions Therm O Web
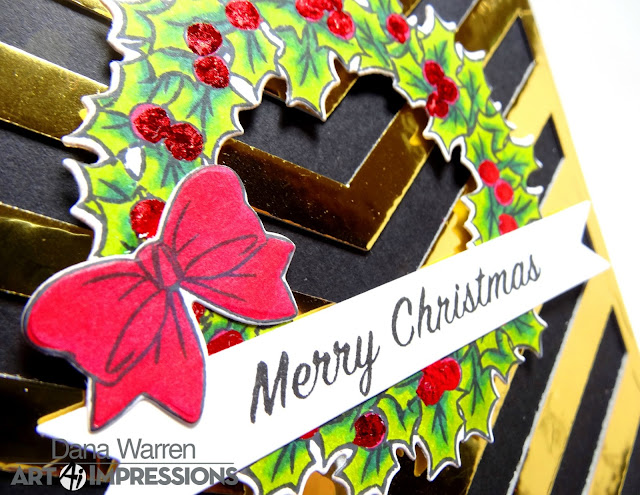
I started with my background and pulled out Deco Foil Foam Adhesive and the Gold Foil. The plan is to cut the foam adhesive with Papertrey Ink's Chevron background die, so with scissors, I trimmed the foam adhesive sheet so it was just a little bit bigger then the die. I peeled one side of the release paper and added the gold foil to it (gold side up). After trimming the foil I ran the foam and die through my Big Shot. The result is the perfect foil background, I saved the gold chevron pieces for another card I'll be sharing next week!

Dana Warren - Kraft Paper Stamps - Art Impressions Therm O Web

Then I just peeled off the release paper and adhered the foil background to a black card base! Super easy!!!

Dana Warren - Kraft Paper Stamps - Art Impressions Therm O Web

Next, I stamped the wreath and bow image on some Crafter's Companion Ultra Smooth cardstock. I used the matching dies to cut out the wreath and bow. Then I used my Spectrum Noir Markers to color them both, I used CG2,  DR3, DR6, JG1, JG6. The only thing I didn't color was the red berries in the wreath.

Dana Warren - Kraft Paper Stamps - Art Impressions Therm O Web

Once my coloring was done, I used the Deco Foil Adhesive Pen to add the adhesive to the berries. Then I placed the Red Deco Foil sheet over the berries, silver side down. Peeling the sheet back leaves the red foil where the adhesive was.
Dana Warren - Kraft Paper Stamps - Art Impressions Therm O Web
I added the wreath with foam tape to the card over the gold chevron. Then I die cut a Papertrey Ink Banner and stamped the Merry Christmas sentiment from the Wreath set. With a little adhesive, I added the banner and bow to the wreath.

Thanks for stopping by!! Make sure you stop by the Art Impressions blog to see the other great projects by the AI Design Team!

Dana

Supplies
Stamps: Art Impressions - Christmas Wreath Stamp Set and Die
Therm O Web - Gold, Red Deco Foil. Deco Foil Foam Adhesive Sheet. Deco Foil Adhesive Pen.
Spectrum Noir Markers

November 2, 2016

Art Impressions & Therm O Web Product Swap

Hello, AI Fans!! 

I'm on the Art Impressions blog today with one of the new Clear Christmas stamps! I used the Southwest Christmas Stamp set, the perfect for your friends out west!!  It's one of the newest Christmas stamps now available at artimpressions.comhttps://www.artimpressions.com/!!


My card also features some great products from Therm O Web!! I used a couple different adhesives and Deco Foil!!

I started by die cutting a stitched oval from white cardstock and then stamped the cute cactus. I used the Deco Foil Adhesive Pen to add the adhesive to the cactus hat, lights, and scarf. Once the adhesive was dry I added the Red Deco Foil (silver side down!). And wa-la a little red foil on my stamped image!!
Dana Warren - Kraft Paper Stamps - Art Impressions
Next, I used my Spectrum Noir markers to color the rest of the image. I used: BG1, BG4, BG5, CG2, DG2, DG3, DR3, IG2, JG7, TB4, TB8. 

Dana Warren - Kraft Paper Stamps - Art Impressions

For the background I applied stripes of Super Tape, using my craft mat to make sure the strips of adhesive were straight. Then I removed the release paper and pressed Emerald Watercolor Deco Foil, silver side down. I used an embossing tool to press the foil down, especially at the edges of each strip. 

Dana Warren - Kraft Paper Stamps - Art Impressions

I added the stamped oval to my card base with 3D White Foam Squares. Next, I stamped the sentiment Warmest Holiday Wishes on a strip of white card stock and then notched each end. I added the sentiment to the card just below the oval.

Dana Warren - Kraft Paper Stamps - Art Impressions

I love the look of the watercolor AND shiny background!!! It is a bit hard to photograph, though!! :)

Dana Warren - Kraft Paper Stamps - Art Impressions

Thanks so much for stopping by!! 

Dana

November 1, 2016

Ugly Sweaters with Spectrum Noir Markers

Hello!!

Well, it's the day after Halloween and that means cue the Christmas cards!!! LOL!! Today I'm playing along with Simon Says Stamp Flickr Challenge - Anything Goes and Simon Says Stamp Wednesday Challenge - Anything Goes!

Dana Warren - Kraft Paper Stamps - Simon Says Stamp
I pulled out Simon Says Stamp Ugly Sweater stamp sets and dies, first cutting three of the sweaters with the sweater die, then stamping them with the matching stamp.

Dana Warren - Kraft Paper Stamps - Simon Says Stamp

Then I used the little elements from the Ugly Sweater set and the Sweater Words and Appliques set to stamp different patterns and images on each sweater. To keep the images on the inside of the sweater I used a Post-It Note to mask along the edges.

Dana Warren - Kraft Paper Stamps - Simon Says Stamp

Next, I used my Spectrum Noir Markers to color each sweater. I kept the shading to a minimum since the areas were small. I used: BT7, CG2, CT4, DG2, DR2, DR3, DR5, EB5, EB6, FS2, FS3, GB8, IB3, IG1, JG3.

Dana Warren - Kraft Paper Stamps - Simon Says Stamp
I picked out a stripe pattern paper from Fancy Pants Wish Season pad for the background and added it to a white card base. Then I added the three sweaters, two of them with foam tape. Below them, I stamped the May All Your Sweaters Be Ugly & Bright. Last I added a few sequins around the card along with two red sequins for the reindeer's nose and the holly on Santa's hat.

Thanks so much for stopping by!!

Dana

Supplies
Stamps: Simon Says Stamp - Ugly Sweater, Sweater Words & Appliques
Dies: Simon Says Stamp - Ugly Sweater
Spectrum Noir Markers
Fancy Pants - Wish Season Pattern Paper Pad
Sequins: Neat & Tangled - Winder Wonderland Mix, Classic Christmas Mix