Hello!!
It's time for The Alley Way Stamps December blog hop, the design team is showcasing the new December stamps. Unfortunately TAWS is closing their doors, so you have to get these stamps while they are available because once they are sold out they are not coming back!
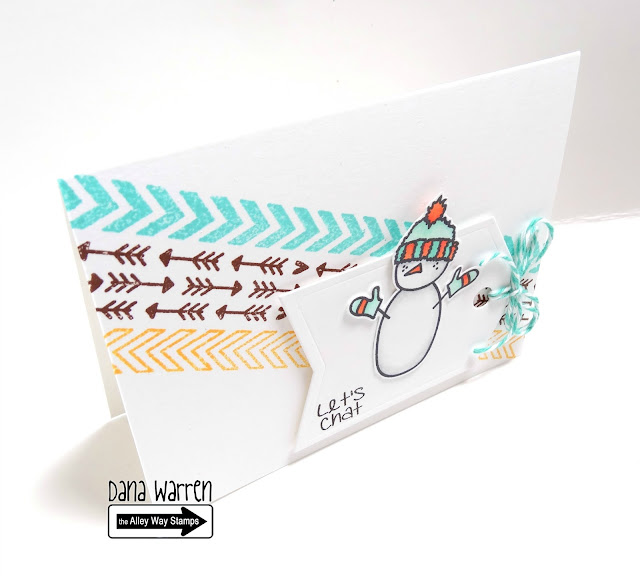
My card features the Point of View stamps set. This set is perfect for making backgrounds!! I used three of the stamps and three different inks to stamp the background across a white card base.
Next i stamped one of the snowmen from Chill Out stamp set. I used my Spectrum Noir markers to color him. I used aqua and orange markers to match the ink colors i used on the background. Then i fussy cut him out.
Then i die cut a small tag from white card stock, turned it on its side and stamped the Let's Chat sentiment. I found some aqua bakers twine from my stash and tied it in a bow on the tag. I added the snowman to the tag, and then adhered the tag to the card base.
Thanks so much for stopping by!!
Dana
November 30, 2015
November 29, 2015
You're My Cup of Tea
Hello!
It's time for new stamps at The Alley Way Stamps, unfortunately its the last release as TAWS is closing the doors! Today i have a sneak peek of Swee-Tea!
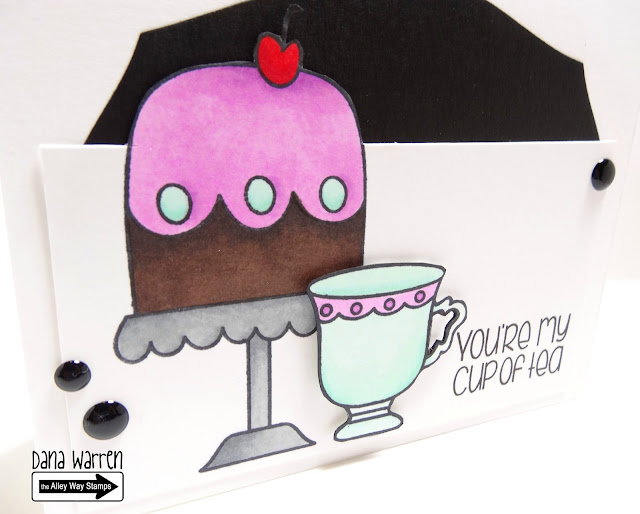
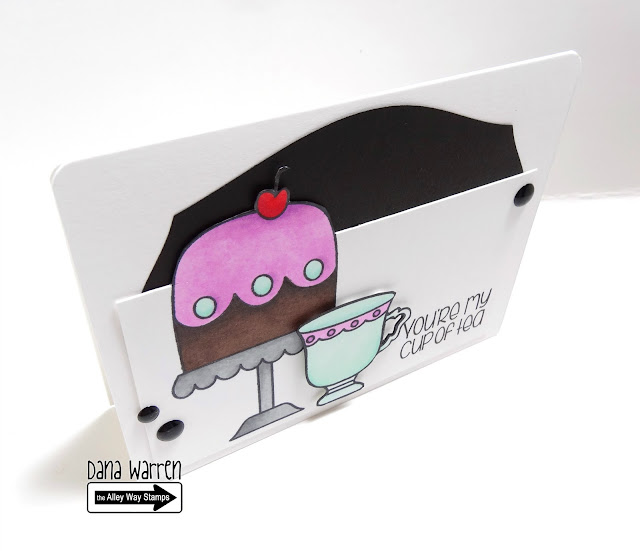
I started by stamping the cake on a piece of white card stock, then i stamped the tea cup on scrap piece of card stock. Then i used my Spectrum Noir markers to color them up. I trimmed the card stock piece with the cake, trimming off the top part around the cake.
Next i stamped the sentiment on the bottom right corner of the cake panel. Then i fussy cut the tea cut out and added it to the cake panel with foam tape.
I found a black die cut shape and adhered it to a white card base, then added the cake panel over it. Last i added a couple black enamel dots!
Thanks for stopping by!!
Dana
November 28, 2015
Thank You
Hello!!
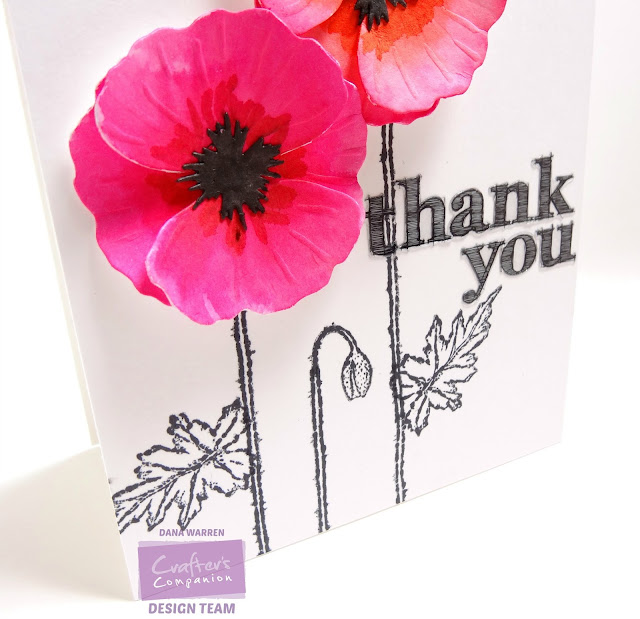
I'm stopping by with a Thank You card. I played a little bit with my Spectrum Noir Aqua markers along with some other Crafter's Companion products!! I am also entering this into Simon Says Stamp Wednesday Challenge - Anythings Goes.
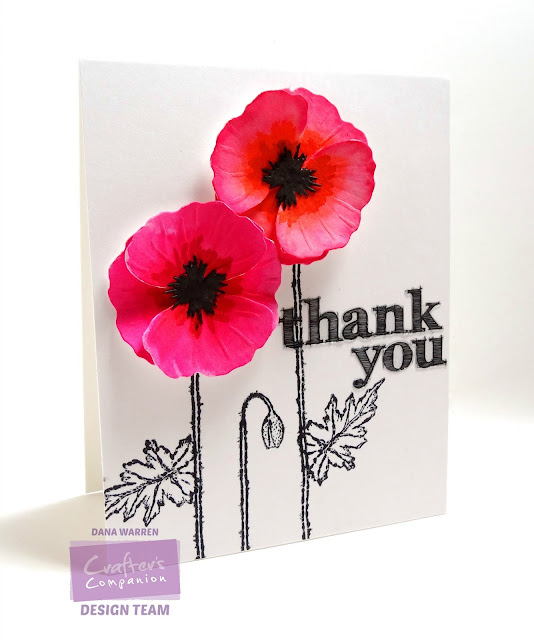
I started by die cutting the poppy flowers from Crafter's Companion Issue 7 Summer Edition. I used CC's watercolor paper and then used my Spectrum Noir Aqua markers to color them. After die cutting the poppy centers, i used the black Aqua marker to color them.
Next i adhered the poppy petals and centers together. I cut a card base from white card stock and stamped the leaves and flowers from the Poppy stamp set that also came with the Summer Edition.
Then i found some cool sketchy alphabet stickers in my stash to spell out Thank You on the card. Last i just adhered the Poppy flowers to the card above the stems.
Thanks so much for stopping by!!
Dana
November 25, 2015
Reindeer Games
Hello!
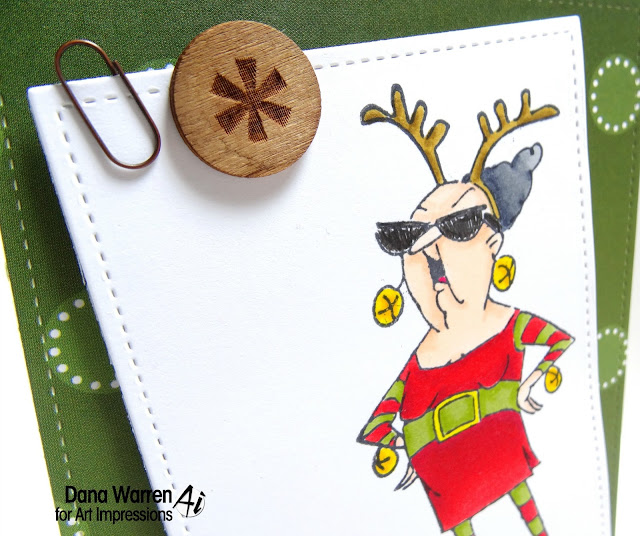
I'm on the Art Impressions blog today. Have you stopped by Michaels and picked up the new Christmas stamp?? Well, if you haven't you better get on it!! These are seriously cute and funny stamps!
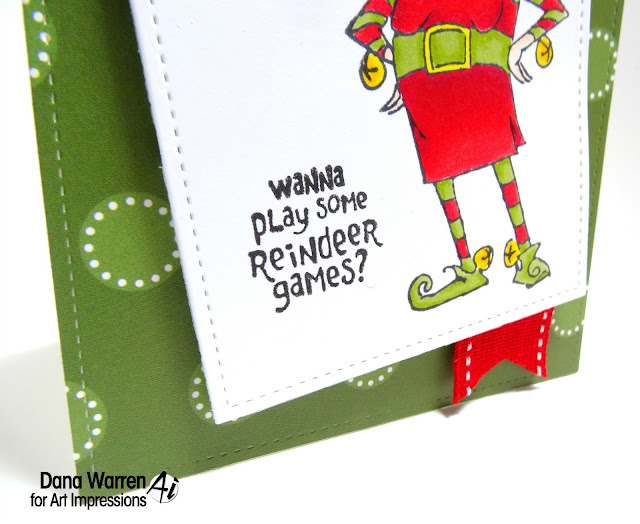
Today's card features the Reindeer set, i stamped the fun reindeer lady on some white card stock. I colored her up with my Spectrum Noir markers, then used a stitched rectangle to cut around her.
Next i stamped the reindeer games sentiment beside her. To dress up the rectangle i added a small brown paper clip and a cool wood chip.
I found some green pattern paper and added it to a white card base. To add a little more red, i added some red ribbon to the bottom of the rectangle and notched the end. The colored panel was added to the card with foam tape.
Make sure you check out our challenge, it ends later today!! Click here to check it out and see more inspiration using these new stamps only available at Michaels!!
Thanks so much for stopping by!!
Dana
November 24, 2015
We're So Proud
Hello!
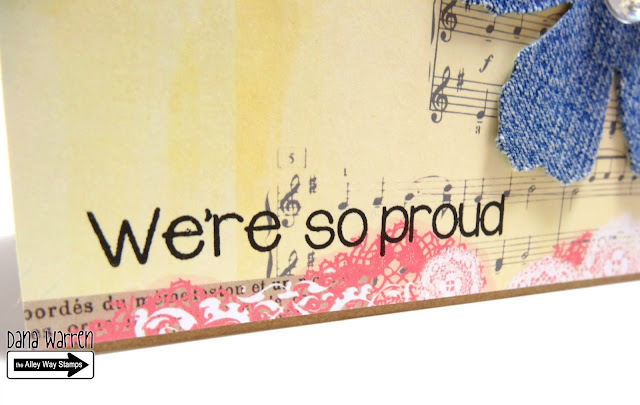
I'm on The Alley Way Stamps blog sharing a card that features the From Us stamp set. I did some more digging in my embellishments and stickers.
I found a denim flower i had die cut way back when and some large journal card tag thingy's. The are perfect together, i trimmed the journal card to fit a Kraft card base and then added the denim flower.
Looking through my embellishments i found a cool music pebble that is perfect as a flower center! Then i stamped the We're So Proud sentiment.
Super quick and easy AND i used up some embellishments!! Thanks so much for stopping by!!
Dana
November 23, 2015
Seasons Greetings
Hello!!
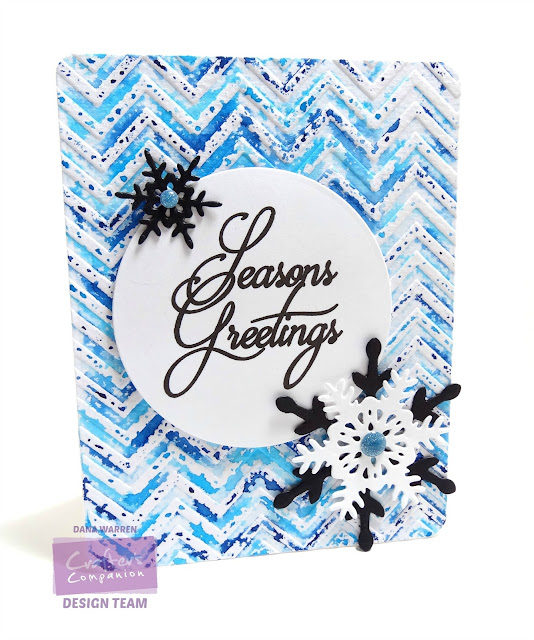
Today i'm sharing a snowy card and it's perfect timing as we got about 12 inches or so Saturday! Driving was lots of fun!!!! Not!! :) And in case you are wondering, i'm still in Organic Chemistry land!!! No classes this week, but i still have another test and the final the second week of December, so i'm still studying for both (and of course the final is cumulative!!)
But anyway, on to the card!! I started with some Crafter's Companion water color card stock and a CC embossing folder. Before i embossed the paper, i colored the embossing folder with Teal and Navy Spectrum Aqua markers, then spritzed a little water. The result is a cool water color looking and embossed panel!!
Next i die cut a circle from white card stock and stamped Seasons Greetings from Sara Davies Signature Collection Festive Wonders stamp set.
Then i used the Snowflake Trio die from Festive Wonders and cut a couple snowflakes from black and white card stock. I added my circle to my embossed panel with foam tape.
I layered the bigger snowflakes together, then added them and the smallest to my card. I added some blue glitter enamel dots to the snowflake centers. Last i added the panel to a white card base and rounded the corners!
Thanks so much for stopping by!!
Dana
November 19, 2015
We Wish You a Happy Birthday
Hello!!
This is my second post today, click here if you are looking for my Art Impressions post!
I'm on The Alley Way Stamps blog with a card featuring the From Us stamps set. I pulled out some old rub on's and chipboard with a Robot theme.
First i added the chipboard flags to the left side of a white card base. Next i rubbed on the cute little robot, stars and arrows.
Last i stamped the We Wish You a Happy Birthday sentiment below the robot. I kept it simple since this would make the perfect card for a little boy!
Thanks for stopping by!!
Dana
Art Impressions Challenge #172 - Rudolph Red & Evergreen
Hello!!
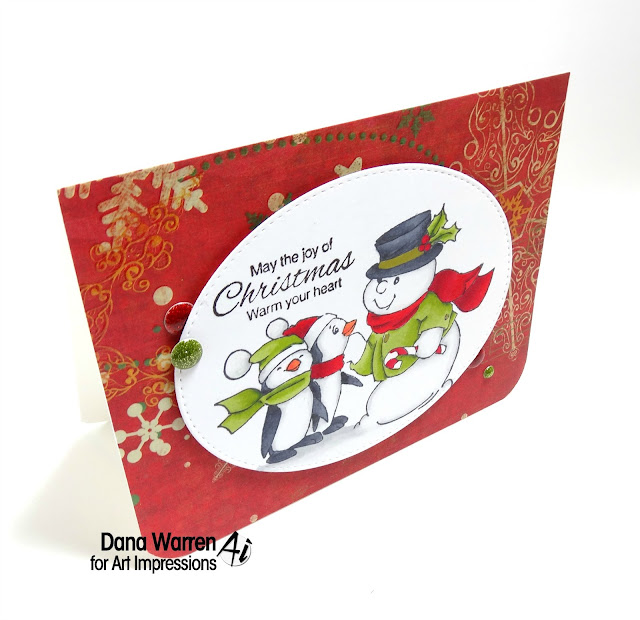
It's time for a new Challenge over at Art Impressions! The challenge this week is Rudolph Red & Evergreen, basically use red and green!! We are also celebrating some new Christmas stamps that are now available at your local Micheal's!! I'm also entering this card into Simon Says Stamp Wednesday Challenge - Christmas!
For my card i used the Penguin stamp set, i stamped the snowman and penguins on a stitched oval. I used the following Spectrum Noir Markers to color the image: DG2, CG2, DG3, DR3, DR5, CR8, IG1, IG2, IG6, IG8, IG10, OR2, OR3, and Blender. Next i stamped one of the images above the penguins.
Next i found some red Christmas pattern paper and added it to a white card base. Then i added the oval to the card with foam tape. I added some red and green glitter enamel dots and last rounded the bottom two corners.
Thanks so much for stopping by! So head to Michael's, get your AI stamps and play along with us!!
Dana
November 18, 2015
Merry & Bright
Hello,
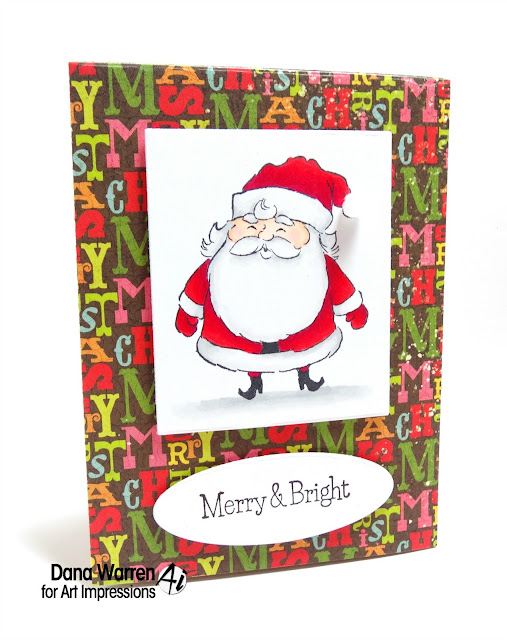
I'm on the Art Impressions blog today showcasing the new Christmas release!! I paired the super cute Santa from Holly Jolly with the Square Easel Die and some festive Christmas paper.
First i found some double side Christmas paper and used the Square Easel Die to cut out the pattern paper. With a little folding and glue i made the easel card.
Next i cut the smaller window square from white card stock and stamped the Santa from Holly Jolly. Then i colored him with my Spectrum Noir markers.
Then i cut the oval from white card stock and then stamped the Merry & Bright from the stamp set. All that was left to do was add the Santa and Sentiment to the easel card with foam tape.
Thanks for stopping by!!
Dana
November 17, 2015
Addicted to Stamps and More - Challenge #171
Hello!!
It's time for a new challenge over at Addicted to Stamps and More!! It's a great challenge too!! Anything Goes!!
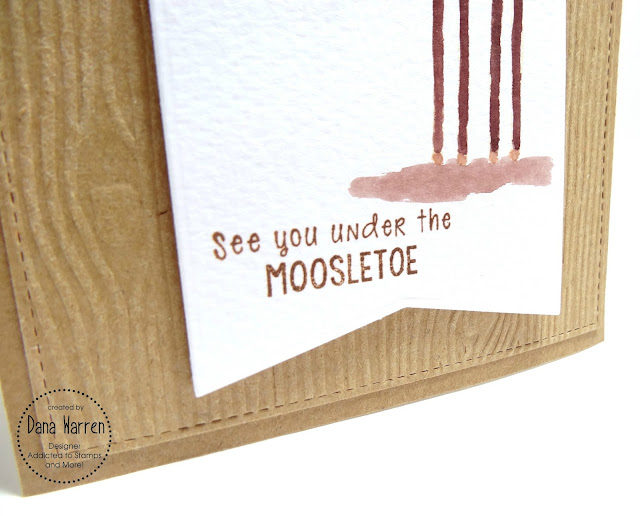
I decided to go with a Christmas card and use some stamps i got a while back that i hadn;t used yet, Very Merry Christmoose by Unity Stamp Company. Also, i tried my hand at no line coloring!!
I stamped the moose with some Antique Linen Distress Ink on some white watercolor paper. Next i used notched banner die to cut out the moose.
With my Spectrum Noir Markers i colored in the moose. It was a little challenging, but over all it wasn't bad! I think it turned out ok!! I added a little blue rhinestone to the snowflake and stamped the sentiment below the moose. Then i wrapped some twine around the banner and tied it into bow.
Next i used a woodgrain embossing folder to emboss a panel of Kraft card stock. I trimmed it down a little and added it to a Kraft card base. Last i added my stamped banner with foam tape.
Thanks so much for stopping by!!
Dana
Subscribe to:
Comments (Atom)


