Hello!
It's time for the Spring/ Summer Coffee Loving Cardmakers Blog Hop!!! There are tons of inspiration to be had over the coming week!! I'll be sharing several cards, not sure yet how many as I'm still creating!! You can start and get all the details over at the Coffee Loving Cardmakers blog!
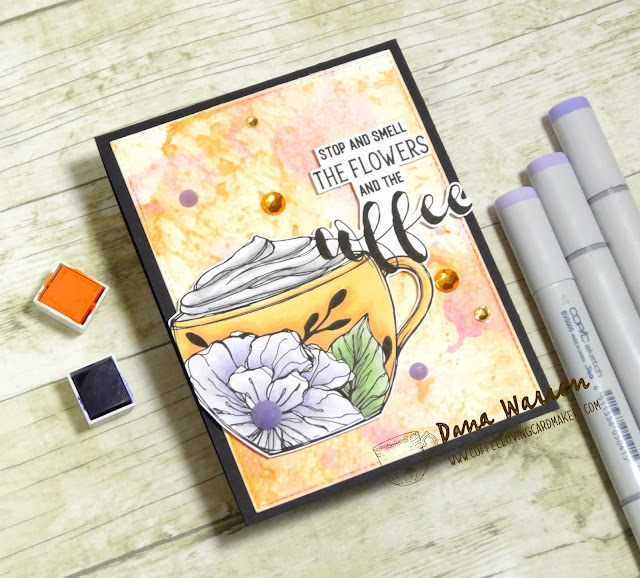
There are lots and lots of wonderful sponsors, so make sure to get your coffee/tea/hot cocoa projects linked up!! One of the returning Super Sponsors the fabulous Graciellie Designs!! Today my card features the newest coffee digital stamp set: Coffee Queen. Please note the Graciellie Designs links are affiliate links at no extra cost to you!!!
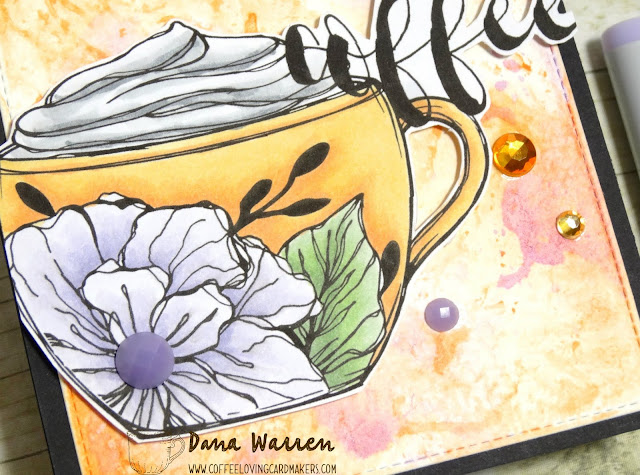
This is my first card made with this set, later in the week I'll be sharing two more!! First I added one of the coffee images to a Word document. I resized it, making it a little one big side, then I added an sentiment.
After printing the image I used my Copic markers to color the image. When I printed the image I had an idea of what I was going to do with it, but as I started to create the card, I went in a totally different direction!! Instead of leaving most of the white around the image, I fussy cut out all out instead.
Then I made the background by doing some watercolor smooching with Altenew watercolors. I used a heat gun in between the orange and light purple, both colors to match my coffee cup. Then I cut the panel out with a stitched rectangle and adhered it to a black card base.
Next, I added the image with foam tape and then added a few rhinestones for some sparkle! Since the image fell over the edge, I did trim a little off.
Thanks so much for stopping by!! Have fun over the next week with tons of coffee inspiration!!
Dana
May 22, 2020
May 13, 2020
Graciellie Designs - Hope & Strength
Hello!!
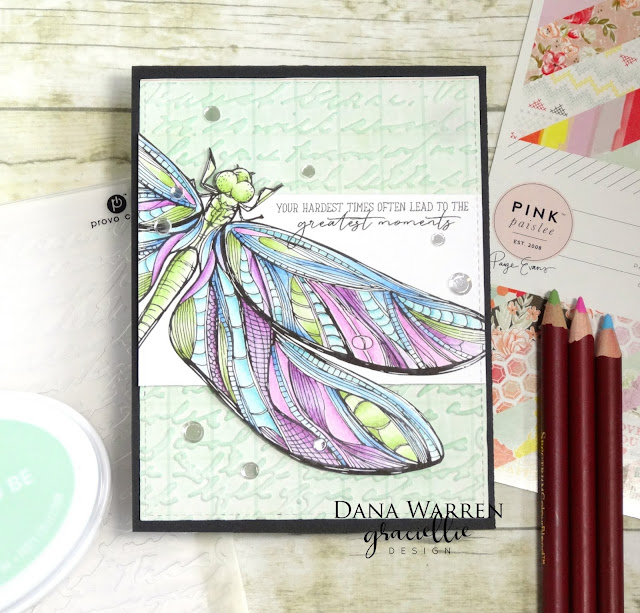
I'm stopping in today with a card I made with a new Graciellie Designs digital stamp set - Hope & Strength! If you are a fan of dragonfly's this set is for you!! Gorgeous images and like always, fabulous sentiments! Please note links are affiliate links, at no cost to you!
I started by opening one of the dragonfly images in a Word document. Then I resized it really big. Next, I added a sentiment, resizing it to fit. After printing the image, I used my Spectrum Noir Colorblend Pencils to color it up!
Next, I fussy cut a little above and below the image. From a Pink Paislee pattern paper pack I pulled out a pattern that I though matched my coloring. Then I used an embossing folder with the pattern paper.
After running the folder through my die cutting machine I used some Catherine Pooler Mint To Be ink to add a little color to the embossed panel.
I added the panel to a black card stock base and then added my dragon fly with foam tape. Last I added a few sequins scattered around the card.
Thank so much for stopping by!!
Dana
May 5, 2020
DoodleBug Designs - Stellar Birthday
Hello!!
Today I have a card I made for a Doodlebug Designs sketch challenge. The challenge was for National Scrapbooking day this past weekend. When I saw they had a card specific collection, I new I had to play along with my Doodlebug stamps!! Here is the sketch:
I started by making a galaxy background. The make the background I used my Altenew watercolors. First, I taped a watercolor panel down, added water to it and then started to randomly add a few colors, pink, yellow and a blue. Then I added a bunch of black and water as necessary. As it dried I added a little more black here and there, until I was happy with the look.
While the background dried I pulled out Doodlebug's Far Out stamp set and stamped all the images. I decided to do them all as I wasn't sure which one I wanted to actually use on my card. Next, I used my Copic markers to color them up. Then I fuss cut out each one.
When my background was dry I did add black, white and silver splatters. I used a heat gun to make sure they were dry. Then I cut strips of cardstock, including a couple black strips. I stamped and white heat embossed the Have a Stellar Birthday on one of the black stripes.
I adhered the strips together and trimmed it to fit my galaxy background. The background went on a blue card base and then adhered the strips.
Next, I played an images and then added them with liquid adhesive and foam tape. I did add a little clear sparkle to the stars and spaceship lights.
Thanks so much for stopping by!! I'll be back later in the week with a card I made with the images I didn't use today!!
Dana
May 4, 2020
Watercolor Sunflower
Hello!!
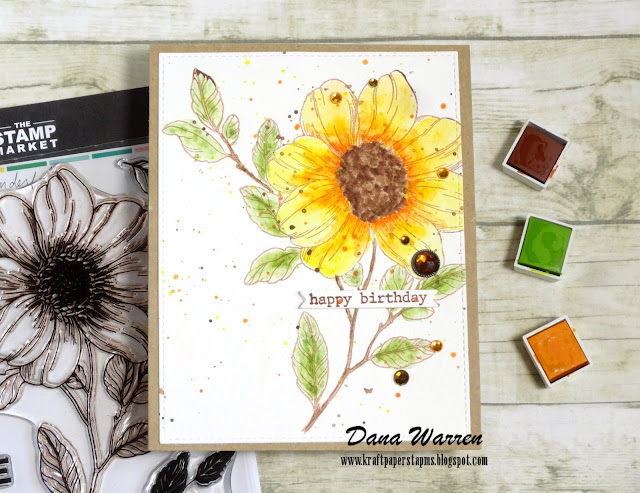
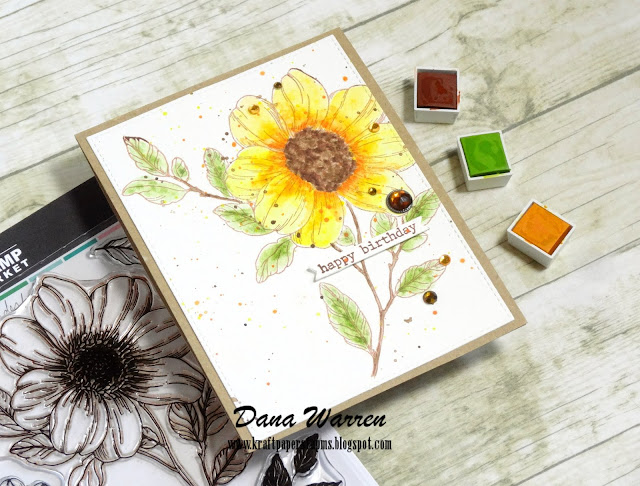
I'm popping in with a card I made just for fun! I've been doing a little organization so seeing lots of great stamps that I haven't played with yet!! I played with The Stamp Markets - Some Kind of Wonderful stamp set and Altenew's watercolor set.
This was my first time using Altenew watercolors, and I have to say I like them!! I stamped the flower with brown in on watercolor paper. I hit it with my heat gun just to make sure the ink dried.
Then I went to coloring! I need more practicing, but they were fun to use!! After everything was dry, I used some of the same colors to add splatter to the flower. Then I used a stitch rectangle to cut out the flower.
Next, I used The Ton Vintage Type to stamp the Happy Birthday on watercolor cards stock. I used The Greetry Sentiment Suite Basics die to cut out the sentiment.
Last, I added the sentiment to the panel with foam tape and then adhered it to a Kraft cardbase. From my stash I added a few brown rhinestones.
Thanks so much for stopping by!!
Dana
May 2, 2020
Graciellie Designs - April 2020 Digital Bundle
Hello!!
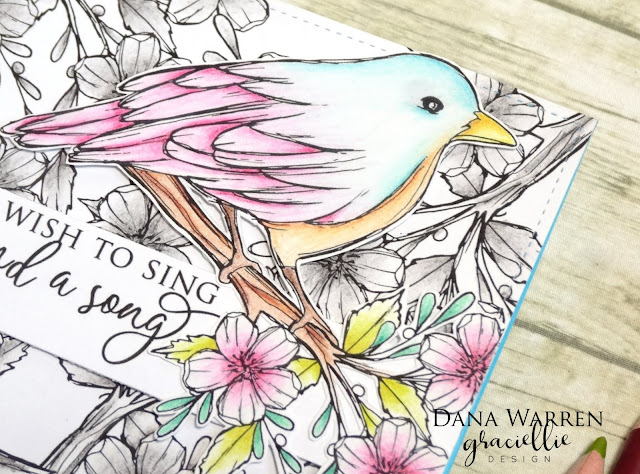
Today I'm popping in with a card I made with a Graciellie Designs digital stamp, called Do Not Worry. It's also in the April 2020 Digital Stamp Bundle and it's on sale!! The bundle includes 4 digital stamp sets with lots of images and sentiments!! Please note links are affiliate links, at no cost to you!
To create my card I first added the branch with flowers to a Word document. I resized it, then copy and pasted a few more. I arranged the different images enough to fill a card base panel. Then I added the bird on the branch, resizing it till it was the right size.
Next, I printed out the images. With my Spectrum Noir Colored pencils I colored just the bird and branch image, then fussy cut it out.
With a stitched rectangle I cut out the background branches that I printed. I also resized and printed the sentiment Those Who Wish to Sing Always Find a Song.
I cut the sentiment to a strip and added it to the background panel with foam tape. Then I added the colored image with foam tape too.
Thanks so much for stopping by!!
Dana
April 27, 2020
Graciellie Designs - Happy Mother's Day
Hello!!
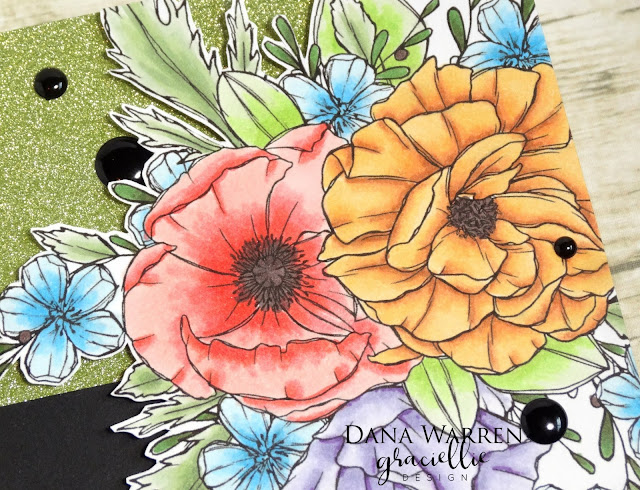
I'm popping by with a new card made with a NEW Graciellie Designs digital stamps set: Happy Mother's Day! Now is a great time to get your card done and this is the perfect set to do it with! Not only is there Mother's Day sentiment, but one for sister, aunt and grandma.
I started with the flower cluster and added it and a sentiment to a Word document. I resized them and then printed them out. Then I colored them with my Copic markers.
My plan was different then what I had planned, I dropped a marker close to the image, so I had to fussy cut the sentiment and image out.
Then I found some green glitter cardstock and trimmed it to fit a card base. I adhered a strip of black card stock, then added the colored image with foam tape. Last, I added black enamel dots scattered around the card.
Thanks so much for stopping by!!
Dana
April 23, 2020
Graciellie Designs - Hang In There #2
Hello!!!
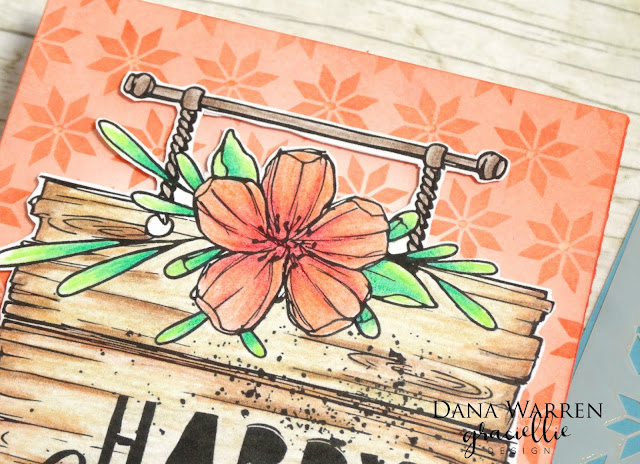
Today I'm back with my second card featuring Graciellie Designs new Hang in There digital stamp set. Such a fun set with lots of different possibilities!!
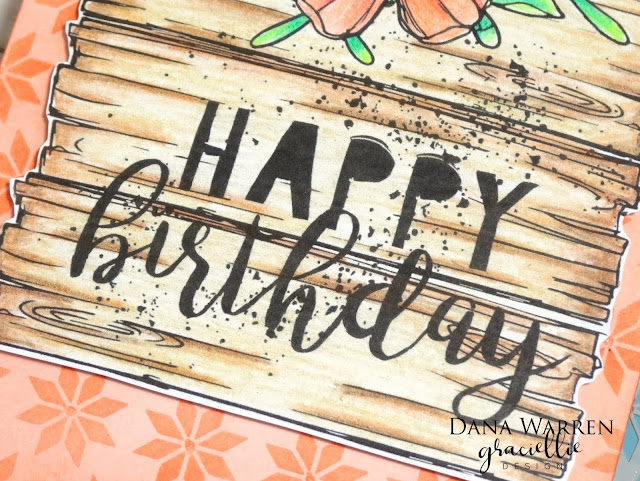
In Word I added the hanging wood sign with the flower, then I added the Happy Birthday sentiment and the splatters. I printed it out and used my Spectrum Noir Colored Pencils to color the image. Then I fussy cut it out.
Next, I trimmed a piece of Bristol paper to fit a card base and used Papertrey Ink's Terracotta Tile ink pad along with Funky Fossil Nordic Star stencil. First I inked on the Terracotta, darker at the edges and lighter in the center. Then I placed the stencil on top and inked it up.
Then I added the colored image with foam tape. I added a little sparkle to the center of each star, but I forgot to get a photo of it!
Thanks so much for stopping by!!
Dana
Subscribe to:
Posts (Atom)


