Achievements

November 8, 2020

Coffee Loving Cardmakers Fall/Winter Blog Hop- Card 2

 Hello!!

The Coffee Loving Cardmakers Fall/Winter Blog Hop is in full swing and I hope everyone is laying along and checking out all the coffee inspiration!! I've spent the weekend in the craft room and will have several cards to share over the next week!

Today I have a gift card holder to share featuring Sponsor Catherine Pooler products. I recently picked up the Gift Card To Go die along with some fall stamp sets. I decided to make a fall cocoa gift card holder, with winter pattern paper! I used Feeling Chilling pattern paper and matching CP inks! 

I started by using the die to cut a pattern and then again from some white card stock. I used grey copic markers to shade the top lid part of the cup. Then I trimmed the cardstock so all I had was the white lip. I adhered this lid to the pattern paper cup.

Then I cut the cup wrap from white card stock and then used one of the CP inks and an ink blending tool to ink up the wrap.

Next, I used the Pumpkin Season stamp set and various CP inks. I stamped and fussy cut a pumpkin, a few leaves and acorns and one of the coffee cups from the set. I arranged them on the wrap and stamped the sentiment bring on the cocoa.

You can see in the picture below that I used a Michael's gift card in the gift card slots and the wrap fits nicely over it. I can see making a few of these for Christmas gift cards!!

Thanks so much for stopping by! Make sure to stop by the CLC blog for tons of coffee inspiration and to link up your coffee themed projects!

Dana

November 6, 2020

Coffee Loving Cardmakers Fall/Winter Blog Hop

 Hello!

Welcome to the Coffee Loving Cardmakers Fall/Winter Blog Hop!!! The most exciting time of the year, right??!! Haha!! Make sure to check out the CLC blog for all the details, you can link up your Fall/Winter for your chance to win one of the many giveaways from our fabulous sponsors!! Make sure stop by our sponsors, many will be sharing a project, too! And of course hop along over the next week and see all the projects everyone is linking up!! Lots of inspiration to be had!!


My first card for the hop features new Sponsor Journals for Life!! They have a few coffee themed products so make sure to check them out!! I recently picked up the Fall Friends bundle and made my card with the stamps and pattern paper. The bundle also has stickers and ephemera, so lots to play with!!

I started by stamping the bunny images, all of them and then using Copic colors that matched the pattern papers. I also stamped the coffee cup from the the stamp set and colored it and fussy cut them out with sharp scissors. Then I adhered the coffee cup to one of the bunnies. The rest I will use later on other cards.


Next, I picked out a few pattern papers and cut some strips. I adhered them to the card, some a little crooked on purpose. From my card stock stash found a green that matched and cut it into a thick strip.

I stamped the Hello Fall sentiment on side and then adhered the strip to the card with foam tape. Then I adhered the bunny. I though the card still needed something, so I picked a few Catherine Pooler inks that matched the card stock and stamped the solid leaf stamps. Fussy cut those out and adhered scattered them around my card.

Thanks so much for stopping by!! Make sure to stop by the CLC blog and link up your fall or winter project for your chance to win a prize from Journals for Life and many more sponsors!! 

Dana

November 3, 2020

Graciellie Designs - Live for Today

 Hello!

I'm popping in today to share a card I made with Graciellie Designs new digital stamp set, Live for Today! A beautiful winter bird with great sentiments!! 

I started by opening the bird in Word. I resized it and added the Live for Today sentiment. Then I printed it out and used my Copic markers to color it up. Instead of really blending the coloring, I did a more stippling like technique to dot the color and blend it. Then I fussy cut most of the image out, using my paper trimmer to cut the sentiment. 

For the background I decided to pick out a dark red card base and use my Wow Embossing Fab Foil. I started with Funky Fossil Designs Snow Flurry stencil and watermark ink. I only inked up the top half of the card base.

Then I added Wow Embossing Bonding Powder to the watermark ink and heated it. With Wow Fab Foil, I added the white foil, shiny side up onto the melted powder. 


Next, I heated up my regular cloths iron and placed my card base face down, opened the card and ironed the back of the front card base. Trim off any access foil as you don't what it to melt to your iron. I did this a few times, letting the card stock cool in between. The hardest part is the edges and the top, I think I get it all but there's usually a few spots I miss!! lol!!

After the card has cooled I pulled the foil and and wa-la I have my foiled white snowflakes! I always keep what I pulled up, down the road I'll use it on a card!!

Last I added the bird and sentiment to the card with foam tape! 

Thanks for stopping by!

Dana

October 31, 2020

Catherine Pooler - Happy Halloween

 Hello and Happy Halloween!!!

My last Halloween features a Catherine Pooler stamp set and inks. I picked these up not too long ago and I was determined to make a card with it! I had made a fall card with these same colors and decided to use them with this stamp set before putting the supplies away. (I'll be sharing that card late next week!).

I started by stamping the pumpkins from the Hey Pumpkin stamp set. The colors were picked out to match Journals for Life Fall Friends pattern paper. I cut a strip from the leaf pattern to use on my card. After stamping I fussy cut the pumpkins out. 


I used the Aquatini ink pad and an ink blender brush to add color to the white card base. Then adhered the leaf strip and finally the pumpkins with foam tape. 

Below the pumpkins I stamped the Halloween sentiment in black ink. I tried adding sequins, but in the end I preferred it without the sequins!! Some times less is more!!!

Thanks so much for stopping by!! I'll be back in a couple days with new Graciellie Designs cards and next week is the beginning of the Coffee Loving Cardmakers Fall/Winter Blog Hop!!

Dana

October 29, 2020

Hello Bluebird - Halloween

 Hello!!

I'm stopping by with another Halloween card!! I used a couple Hello Bluebird Halloween stamp sets, Frightful Little Bits & Spooky Script.

I stamped a whole bunch of the these images, colored them with my Copics and fussy cut them out several weeks ago. Last week I finally made at least one card with some of the images!

I started by die cutting different sized circles and then used Distress Oxides to ink up the circles. Then I pulled out some Halloween pattern paper and cut some circles from it. 

Then I started playing with placement of the circles and images. When I was happy with it I added the circles with foam tape. Then I adhered the images. Last I decided to stamp the Boo and Eek sentiments!

Thanks for stopping by!

Dana


October 27, 2020

Journals for Life - Boo Crew

 Hello!

Today I stopping by with some Halloween cards! I have a few to share and I hope I can share them all before Halloween!! First, up are two cards I made with Journals for Life Boo Crew bundle. Check the bundle out, its on sale!! Lots of goodies in this kit, its going to last me a few years!! 


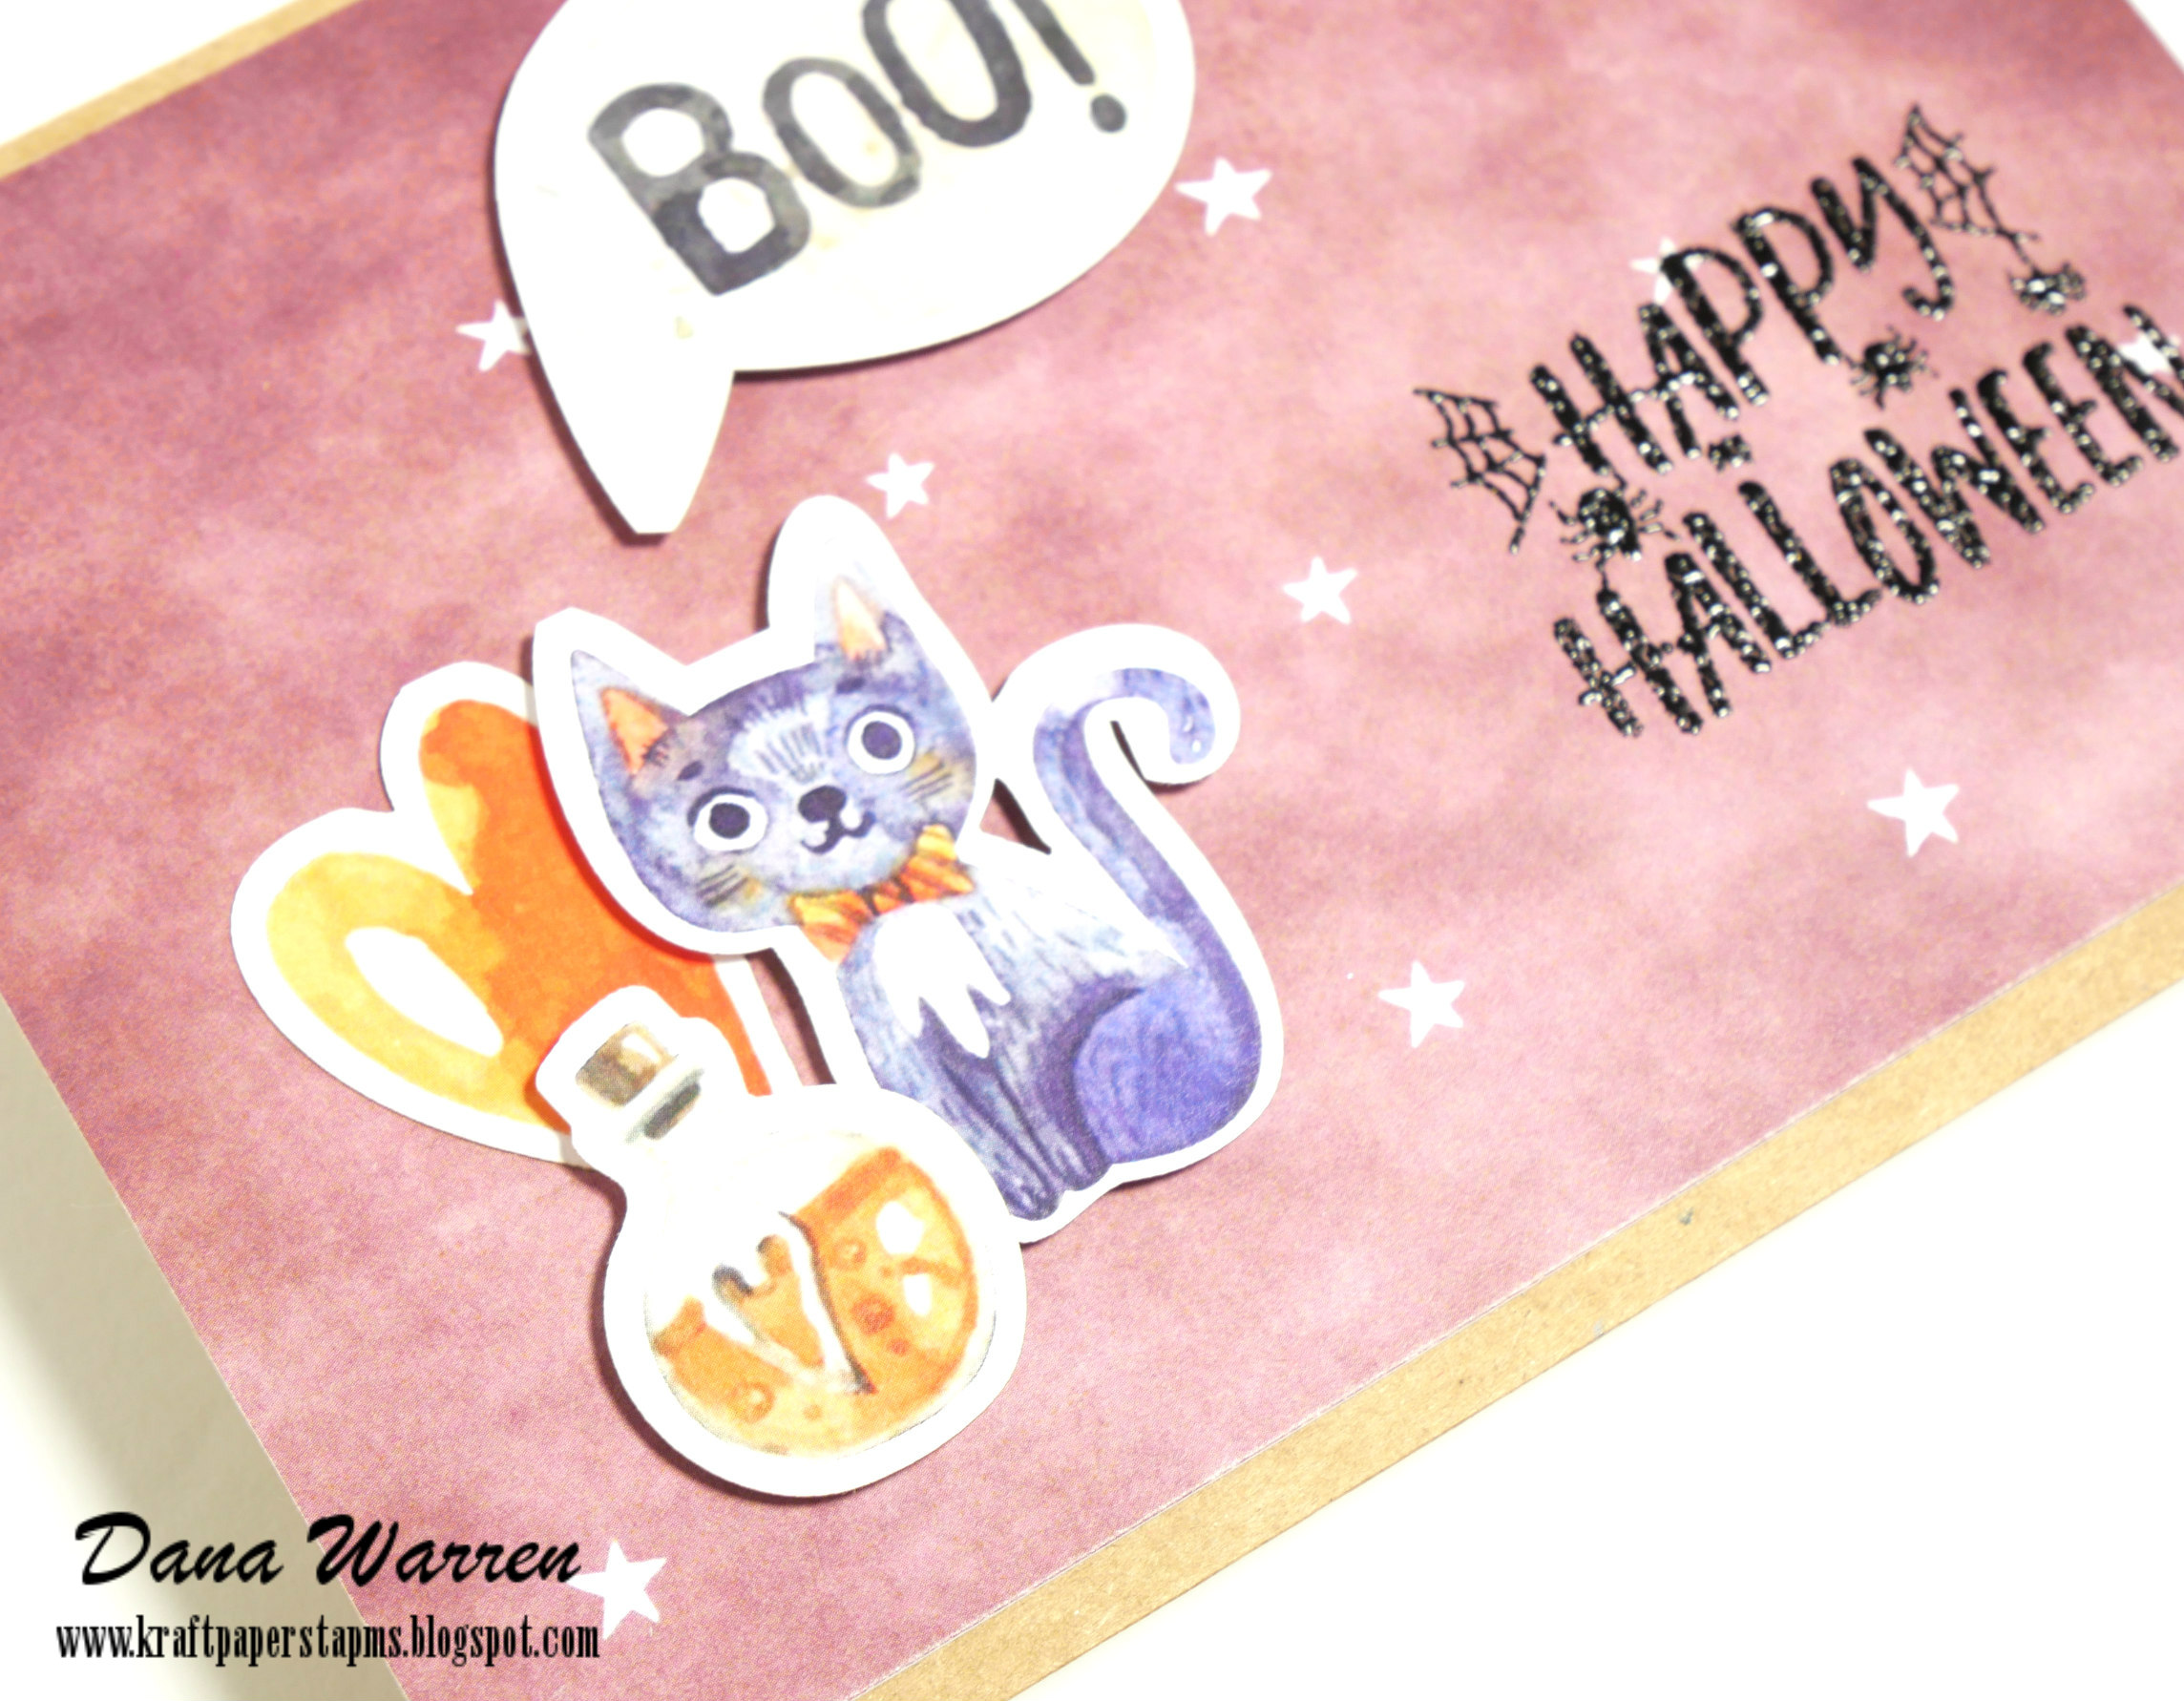
My first card features some of the Ephemera, a cat, heart, potion bottle, and a boo speech bubble. The kit has pattern papers, for a journal, so they are not quite as wide as a card. But, that is okay, it works just fine with a border at the top and bottom! 

I used the stamp set from the kit to black heat emboss one of the Halloween sentiments. After adhering the pattern paper to the kraft card base, I played around the ephemera. When I was happy with the placement I added them to the card with foam tape. 

For my second card, I started by going threw my extra backgrounds. I found one that had dots and I used some kind of thick black paste. I trimmed it down so it would show the card base. 

From the kit I picked out a super cute ghost sticker, along with some colorful stars. I added baby powder to the back of the stickers, that way I can play around with the placement with out them sticking to anything.


I trimmed a strip of black card stock and added it to the dotted panel. Then I wrapped black twine around the panel and tied it in a bow. From the kit I used the alphabet stickers and spelled out Boo.


When I was happy with the placement of ghost and stars I added them to the card with foam tape. 

Thanks so much for stopping by!! 

Dana


October 19, 2020

Graciellie Designs - Start Anew Magnolias

 Hello!!

I'm stopping with a second card I made with Graciellie Designs new Start Anew Magnolias digital stamp set. The set has two floral clusters and like always amazing sentiments!!

I started by pasting one of the floral clusters in Word and resizing it. I added a sentiment and printed both out. Then I used my Copic markers to color the image. 

From my stash I found some silver glitter card stock. I adhered it to the front of a white card base. 

Next, I cut my image into three equal parts. I used some washi tape and adhered my cardbase to my glass mat, using the lines to keep the card straight. Then I went about added the three image stripes with foam tape, using the lines on my mat to keep each section equal and have equal spaces between them. I trimmed off the over hang.

Last, I trimmed the sentiment down and adhered it to the front of my card. Thanks so much for stopping by!!


Dana